

Set up a cloaking domain with Cloudflare
Configure a custom cloaking subdomain in Cloudflare, add the CNAME record required by Skro, and verify the connection.
A cloaking domain controls the referrer information passed to an affiliate network or offer page. This guide uses go.example.com and points it to skrocloak.com.
Before you begin
You need access to your domain’s DNS settings and the Settings → Domains section in Skro. Use a subdomain, such as go.example.com, for this setup.
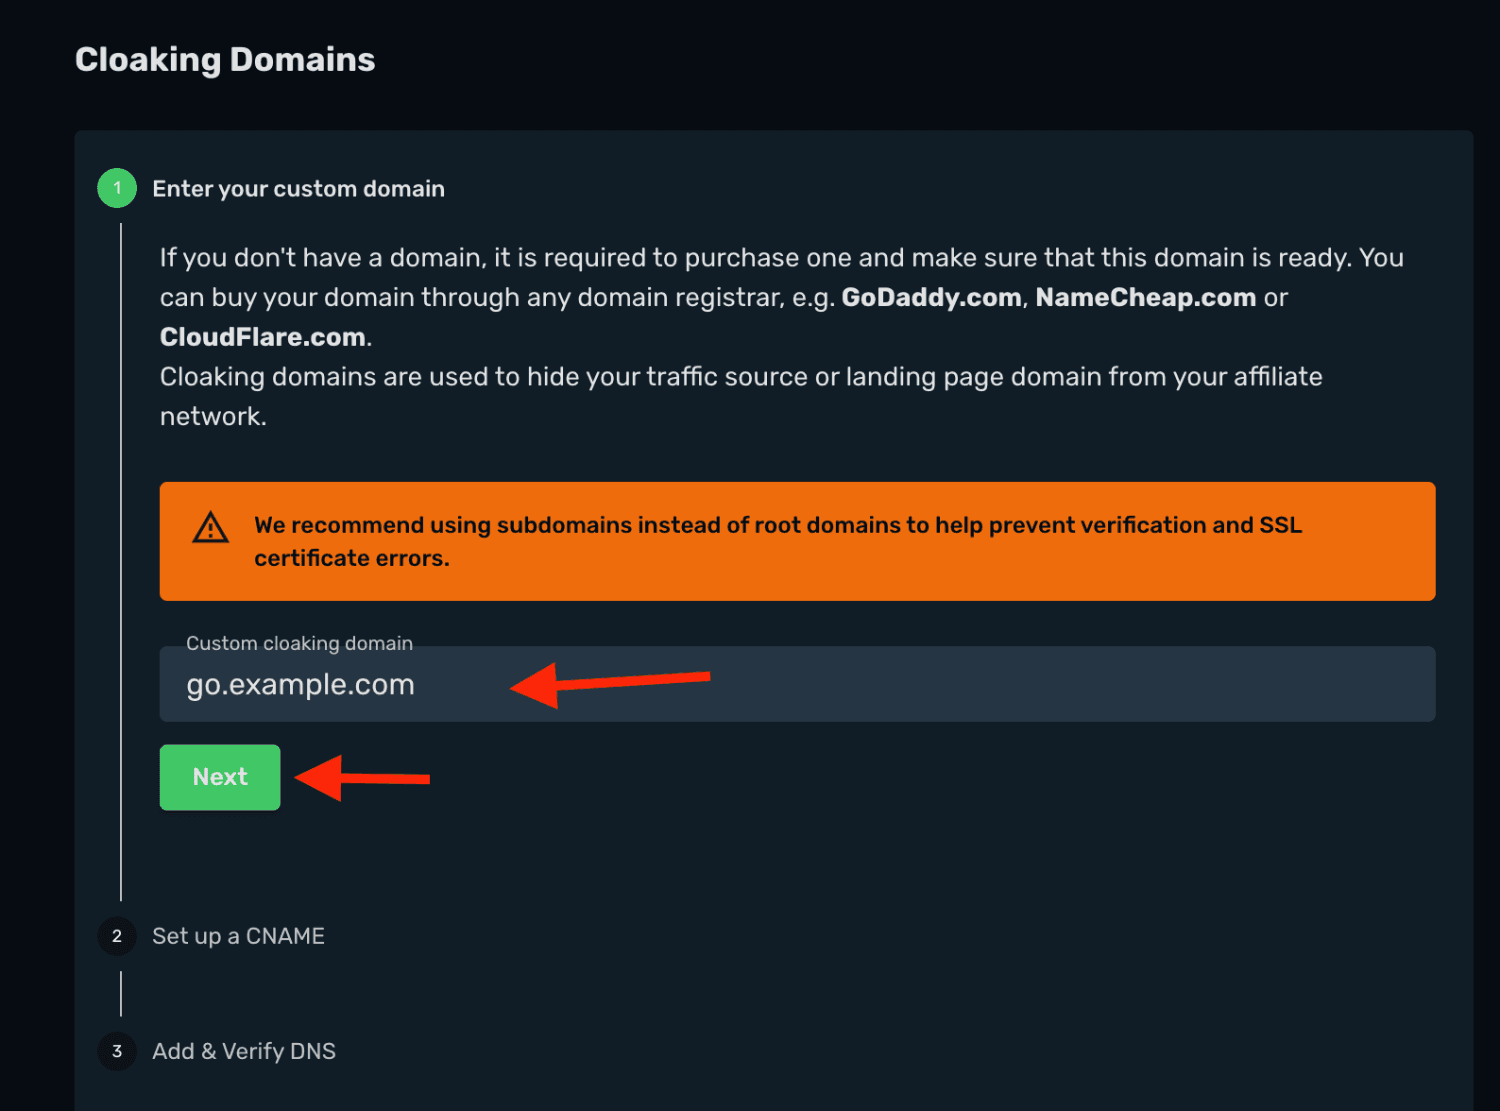
Step 1. Add the domain in Skro
- In Skro, open Settings → Domains.
- Find Cloaking Domains and add
go.example.com. - Review the CNAME configuration shown for your domain.
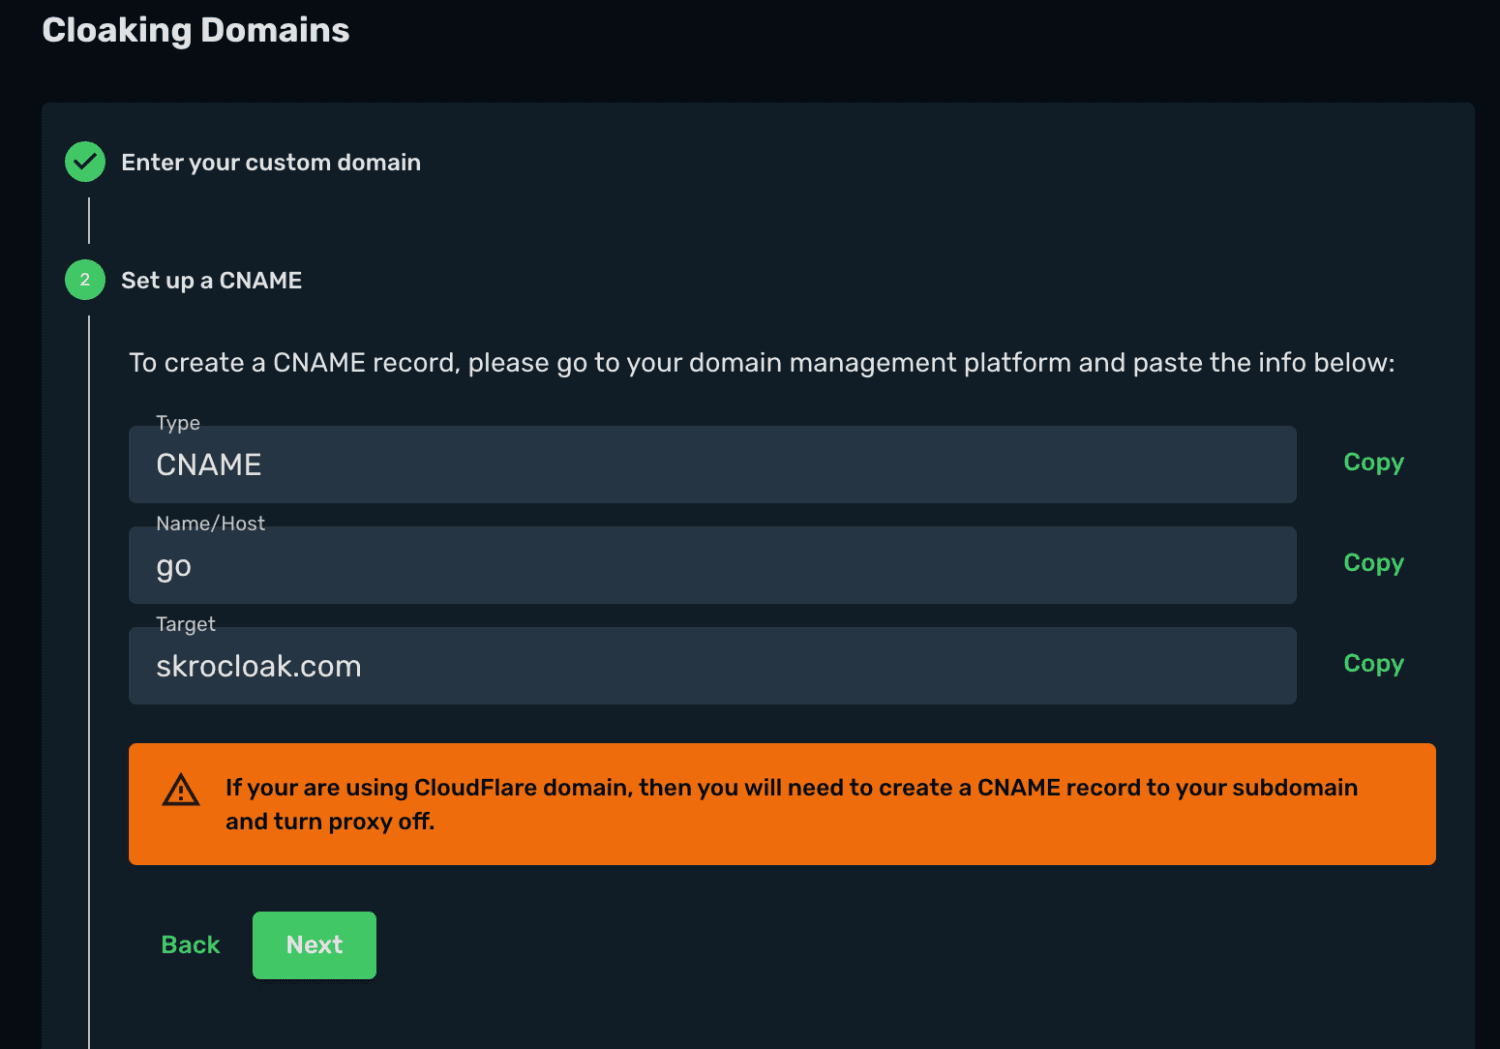
Step 2. Create the CNAME record in Cloudflare
- Sign in to Cloudflare and select the domain.
- Open DNS → Records → Add Record.
- Enter these values:
| Field | Value |
|---|---|
| Type | CNAME |
| Name | go |
| Target | skrocloak.com |
| Proxy status | Off / DNS only |
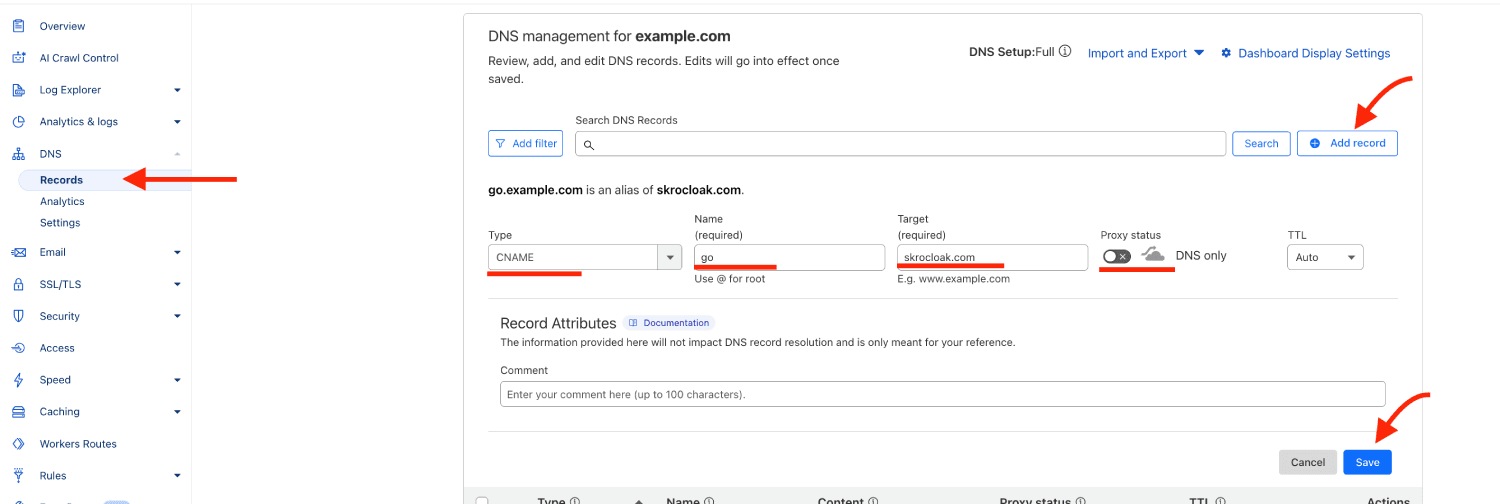
- Save the DNS record.
Step 3. Verify the domain
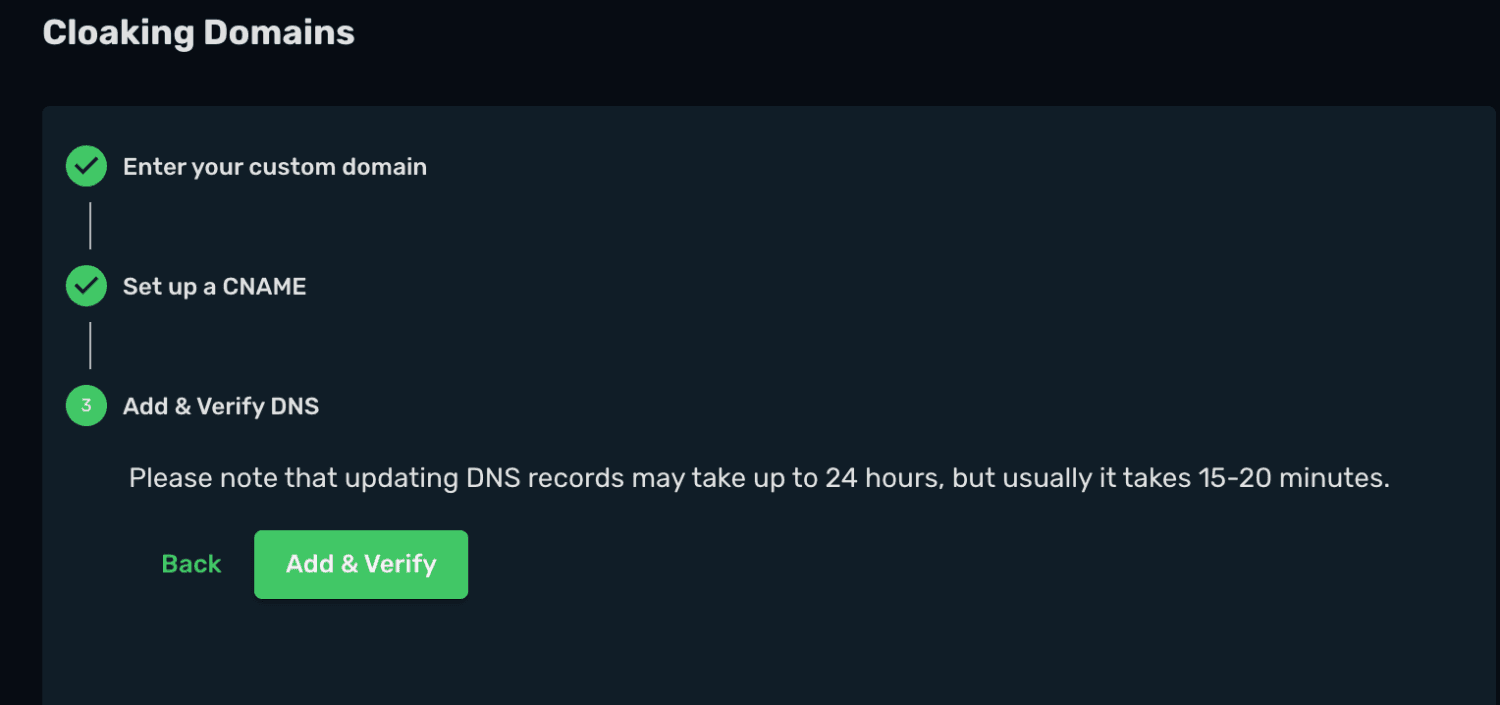
Allow time for the DNS change to propagate, then return to Cloaking Domains in Skro and verify the domain.
Troubleshooting
Check that the record uses the correct subdomain and CNAME target. Keep the Cloudflare proxy disabled for this record. If verification fails immediately after saving, wait for DNS propagation and try again.
Related guides
Need help with this guide? Contact Skro support.