

Configure a domain and SSL certificate
Add a website domain in Skro, configure DNS records, and verify the domain for an SSL certificate.
Step 1. Add your domain
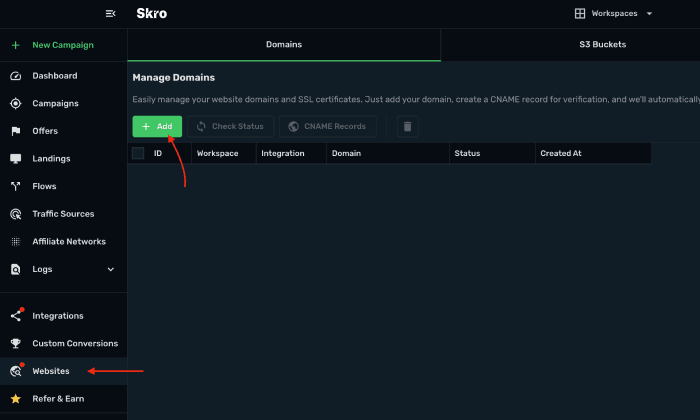
- Go to the Websites and click Add.
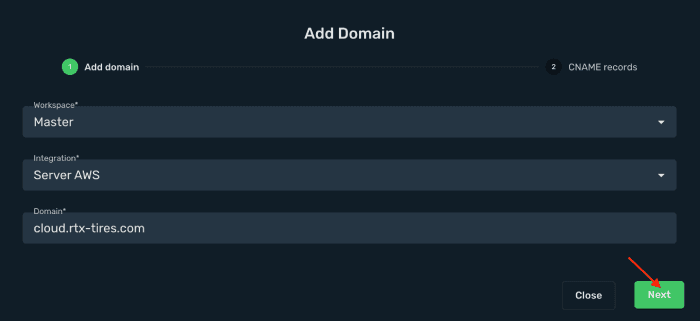
- Select your workspace and AWS integration, and type your domain name what you want to use your website deployment. Click Next. (Loading might take up to 10 sec). In my example I'm using subdomain.
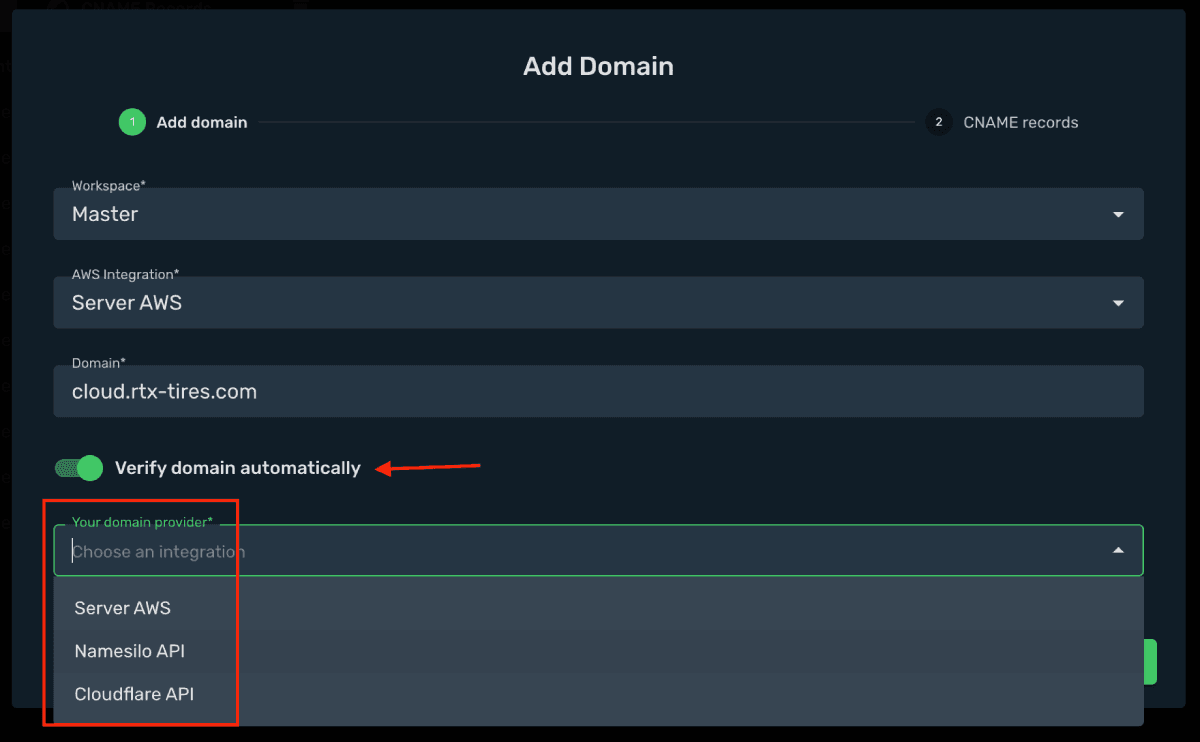
2.1.To automatically verify your domain ownership, add your domain provider integration. This will allow Skro to generate a CNAME record for seamless domain verification.
Automated verification are supported with AWS (Route53), Cloudflare and Namesilo.
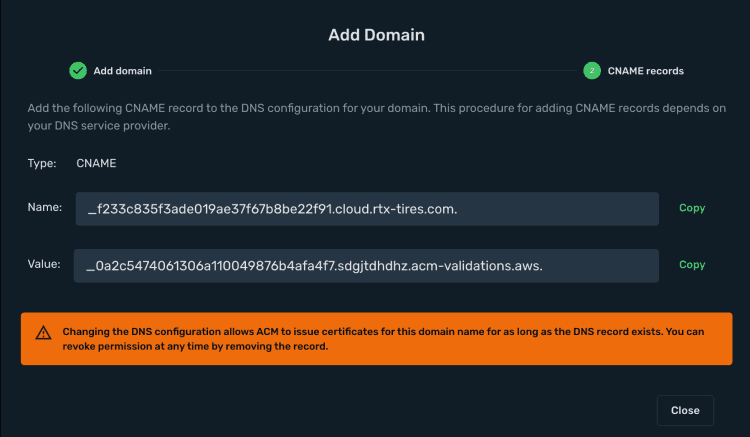
- On the next step you will get CNAME record Name and Value to verify your domain ownership.
Step 2. Add CNAME record.
-
In our example we use Namecheap. Log in to Namecheap account.
-
Select your domain and click Manage DNS and click Add new record.
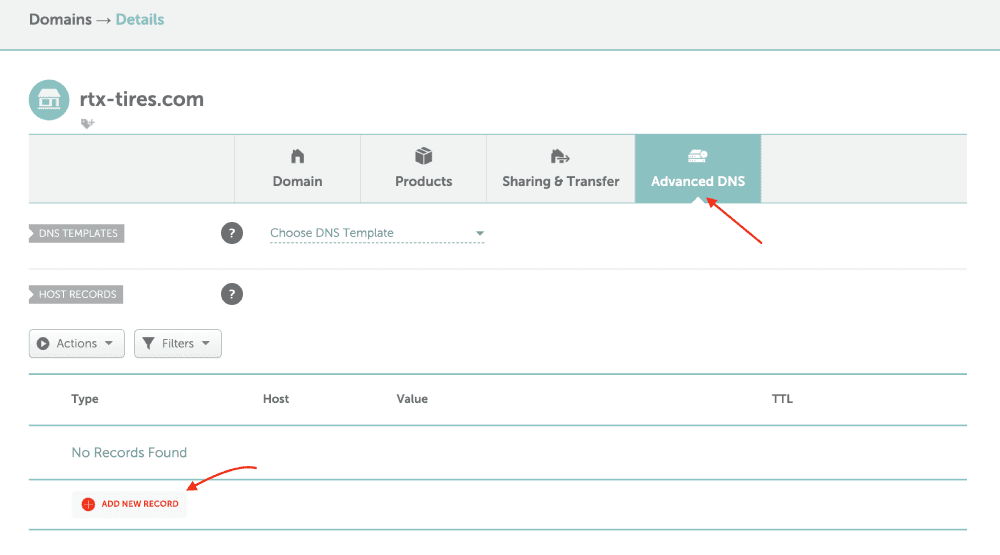
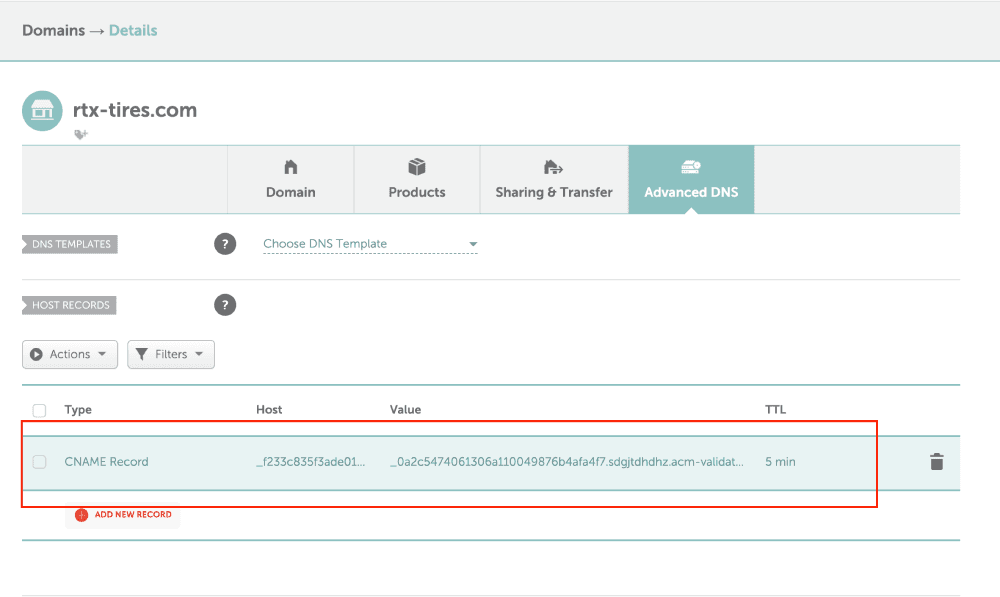
Host: is _f233c835f3ade019ae37fs7b8be22f91.cloud. As you see I do not add .rtx-tires.com at the end because Namecheap will add that automatically.
Value: is _0a2c5474061306a110049876b4afa4f7.sdzjtdhdhz.acm-validations.aws.
Step 3. Verify domain ownership and generate free SSL cert.
-
Go back to Skro and click Close.
-
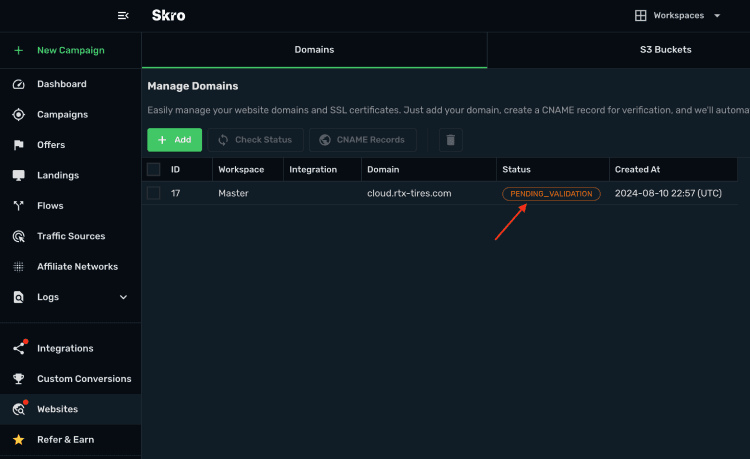
As you see your domain is in PENDING_VALIDATION status. DNS changes will take some time to update and generate SSL for your domain. Usually it will take up to 5-15 minutes, but it can take up to 48 hours.
- After 5 minutes, you can select your domain and click Check Status to see if your domain is verified and SSL cert issued.
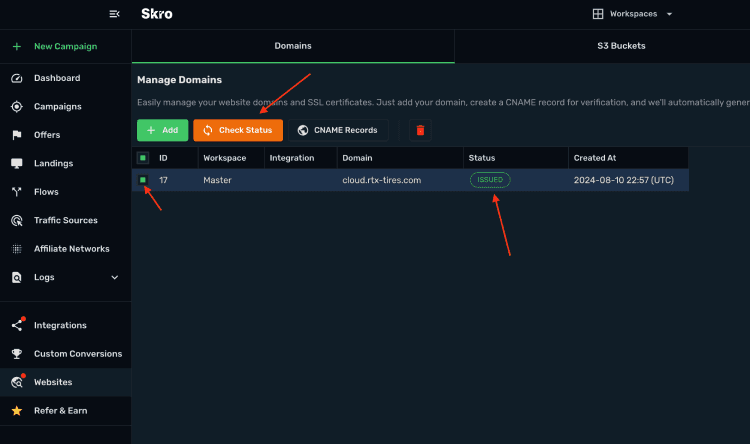
Domain is ready for deployment.
Get started with website deployment setup
Related guides
Need help with this guide? Contact Skro support.