

Ads.com RSOC integration
Set up Ads.com RSOC in Skro and map offer identifiers for Related Search on Content revenue reporting.
Integration benefits
Integration enables seamless revenue data synchronization across channels, ensuring accurate tracking even after adjustments from various traffic sources. It also consolidates your ads, conversions, and revenue, giving you a clear and comprehensive view of your ad performance.
- Revenue updates every hour.
- Revenue updates for the last 3 days.
Step 1. Add integration
-
Log in to your Skro account.
-
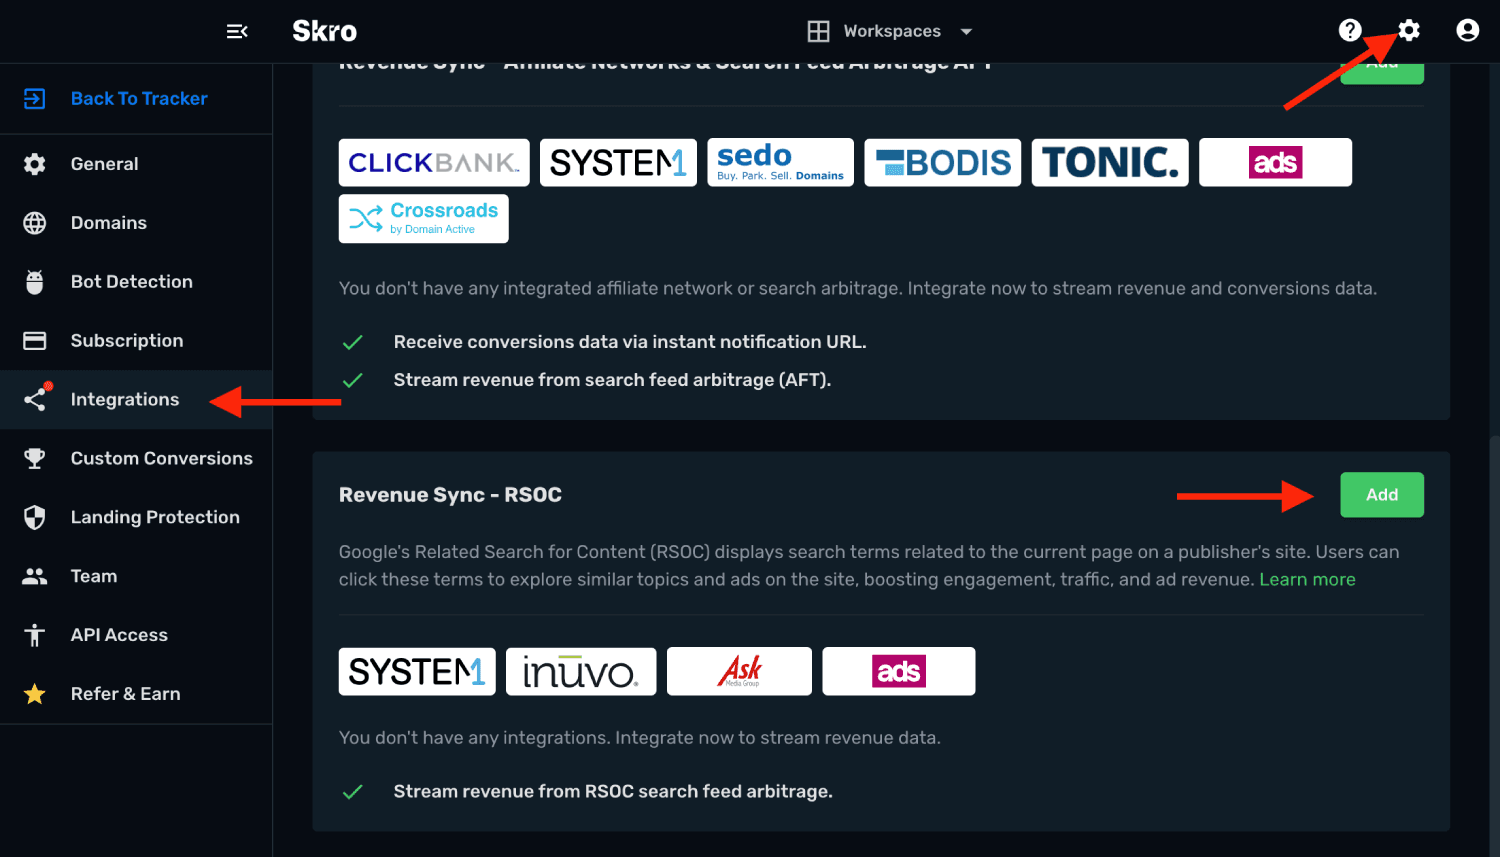
Navigate to Settings → Integrations.
-
Scroll down and click Add in Revenue Sync - RSOC section.
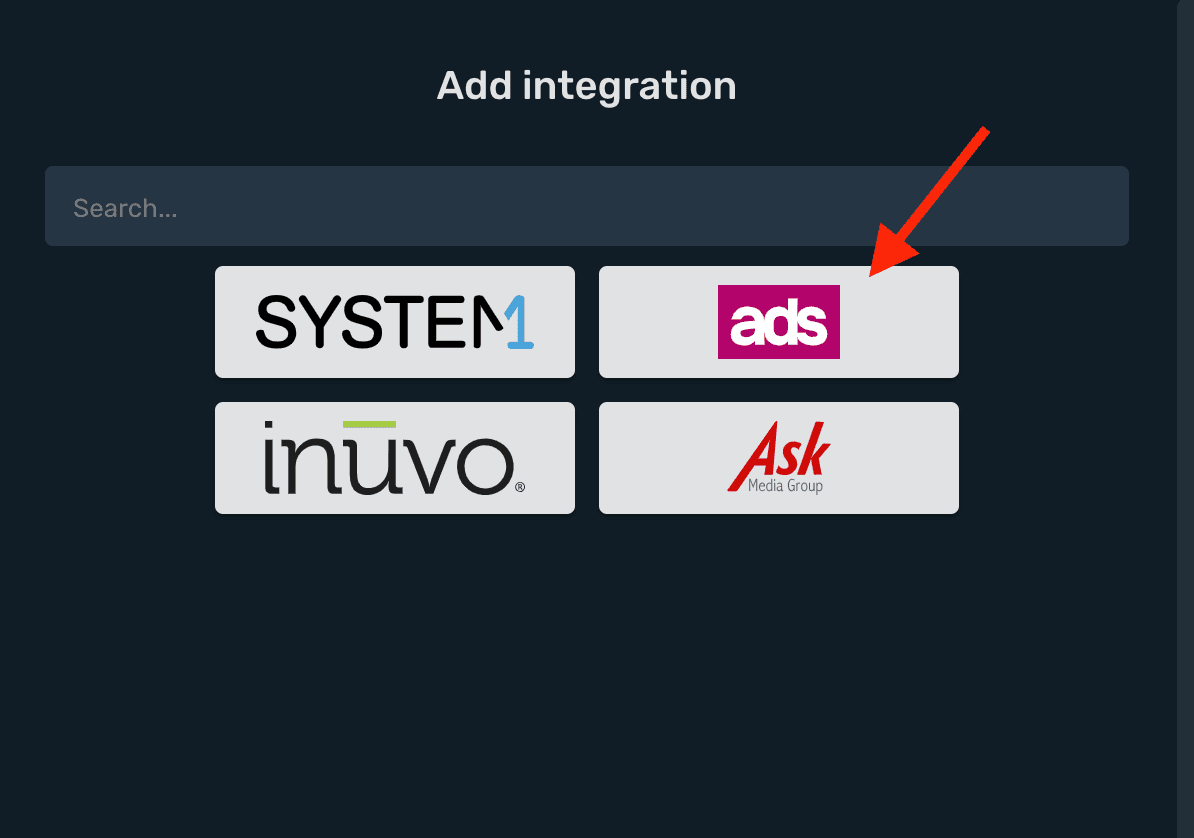
- Click Ads.com logo.
- Integration Name name of your integration.
- Domain Name is your offer domain name provided by Ads.com.
- Username is your Ads.com account username.
- Password is your Ads.com account password.
- API Secret is your API secret key. You will find it on Ads.com if you go to Profile → Access Token → Your Secret Key. Navigate to this link if you do not find it: API KEY
- Account Currency is the currency of the earnings.
- Custom Conversion Event is optional. If you are using Custom Conversion on your postback URL, then you will need to select your event here, otherwise your revenue isn't synced correctly.
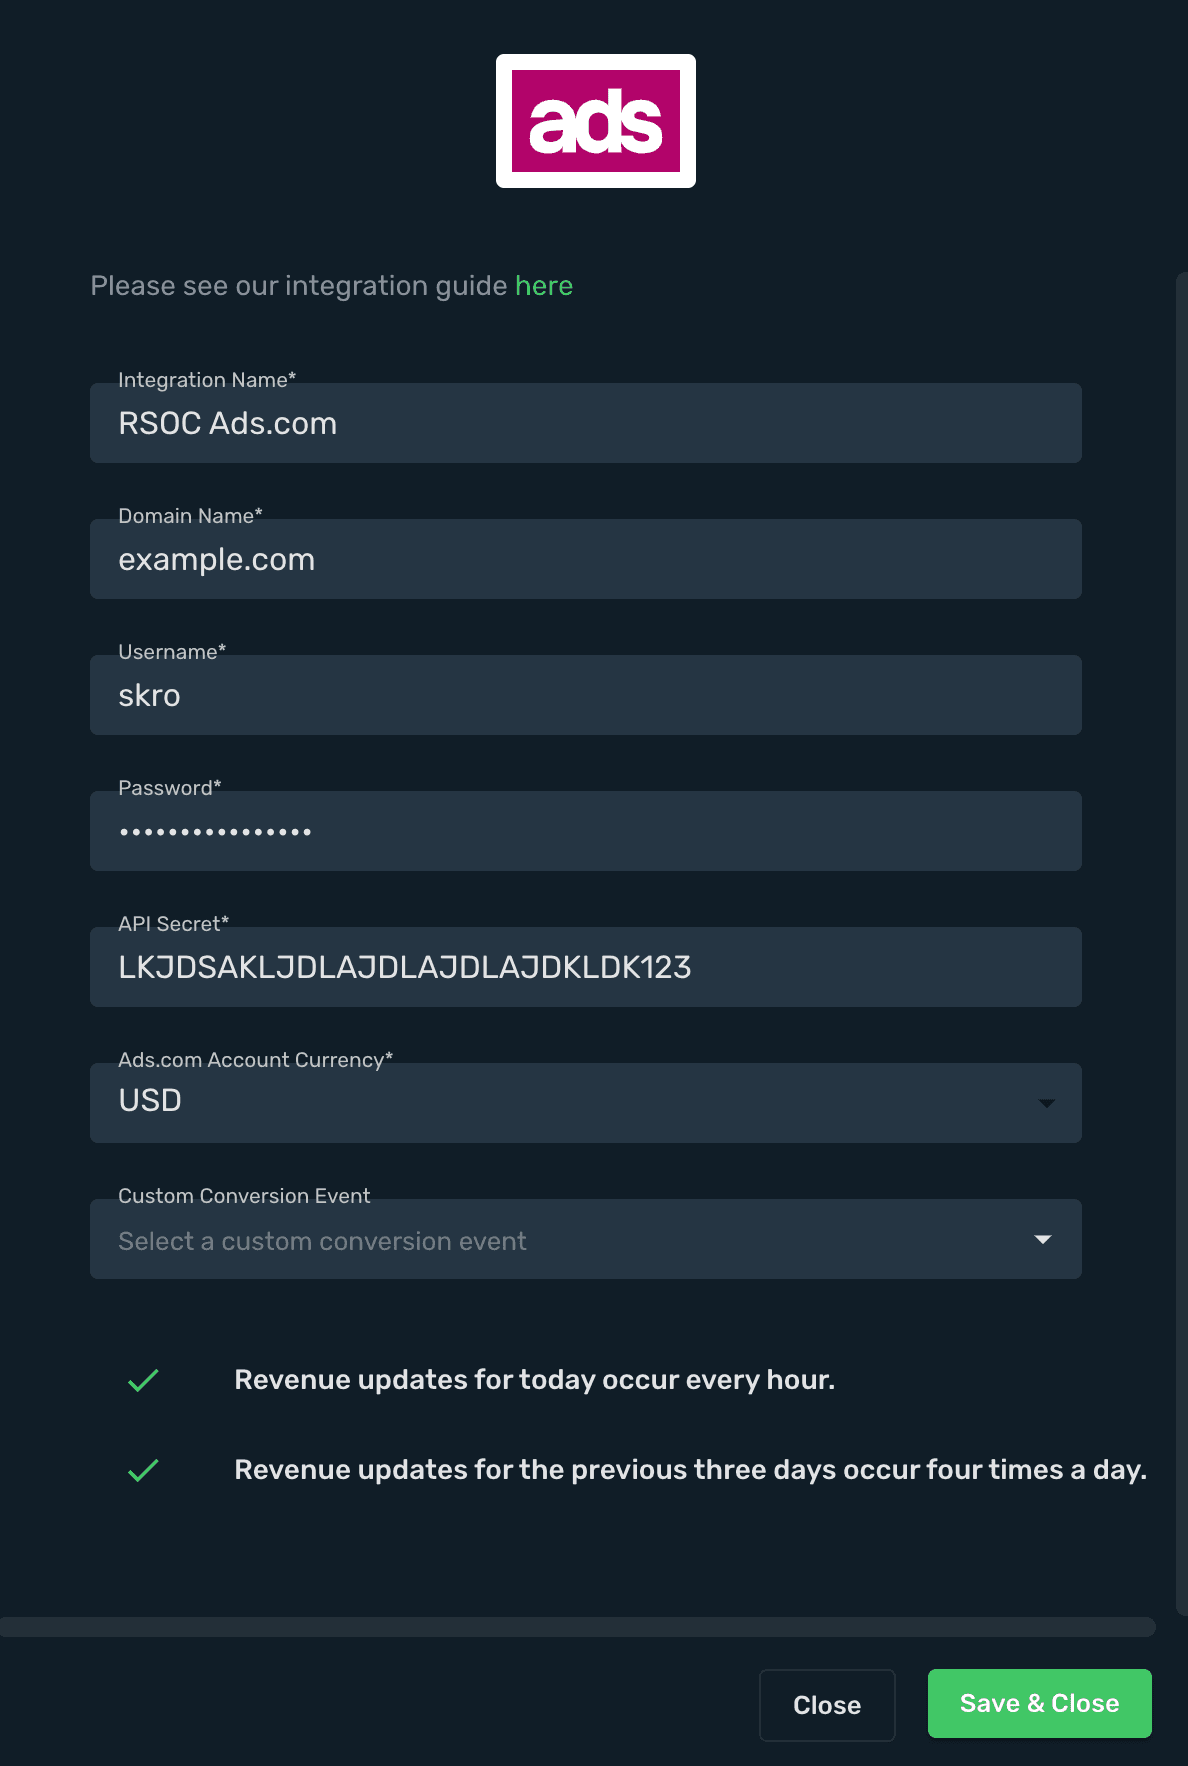
- Complete the form and click Save & Close
Step 2. Add Ads.com RSOC offer in Skro
-
Go to Offers.
-
Click Create and complete the required fields.
-
Map your RSOC Channel/Campaign ID on special field to track revenue correctly.
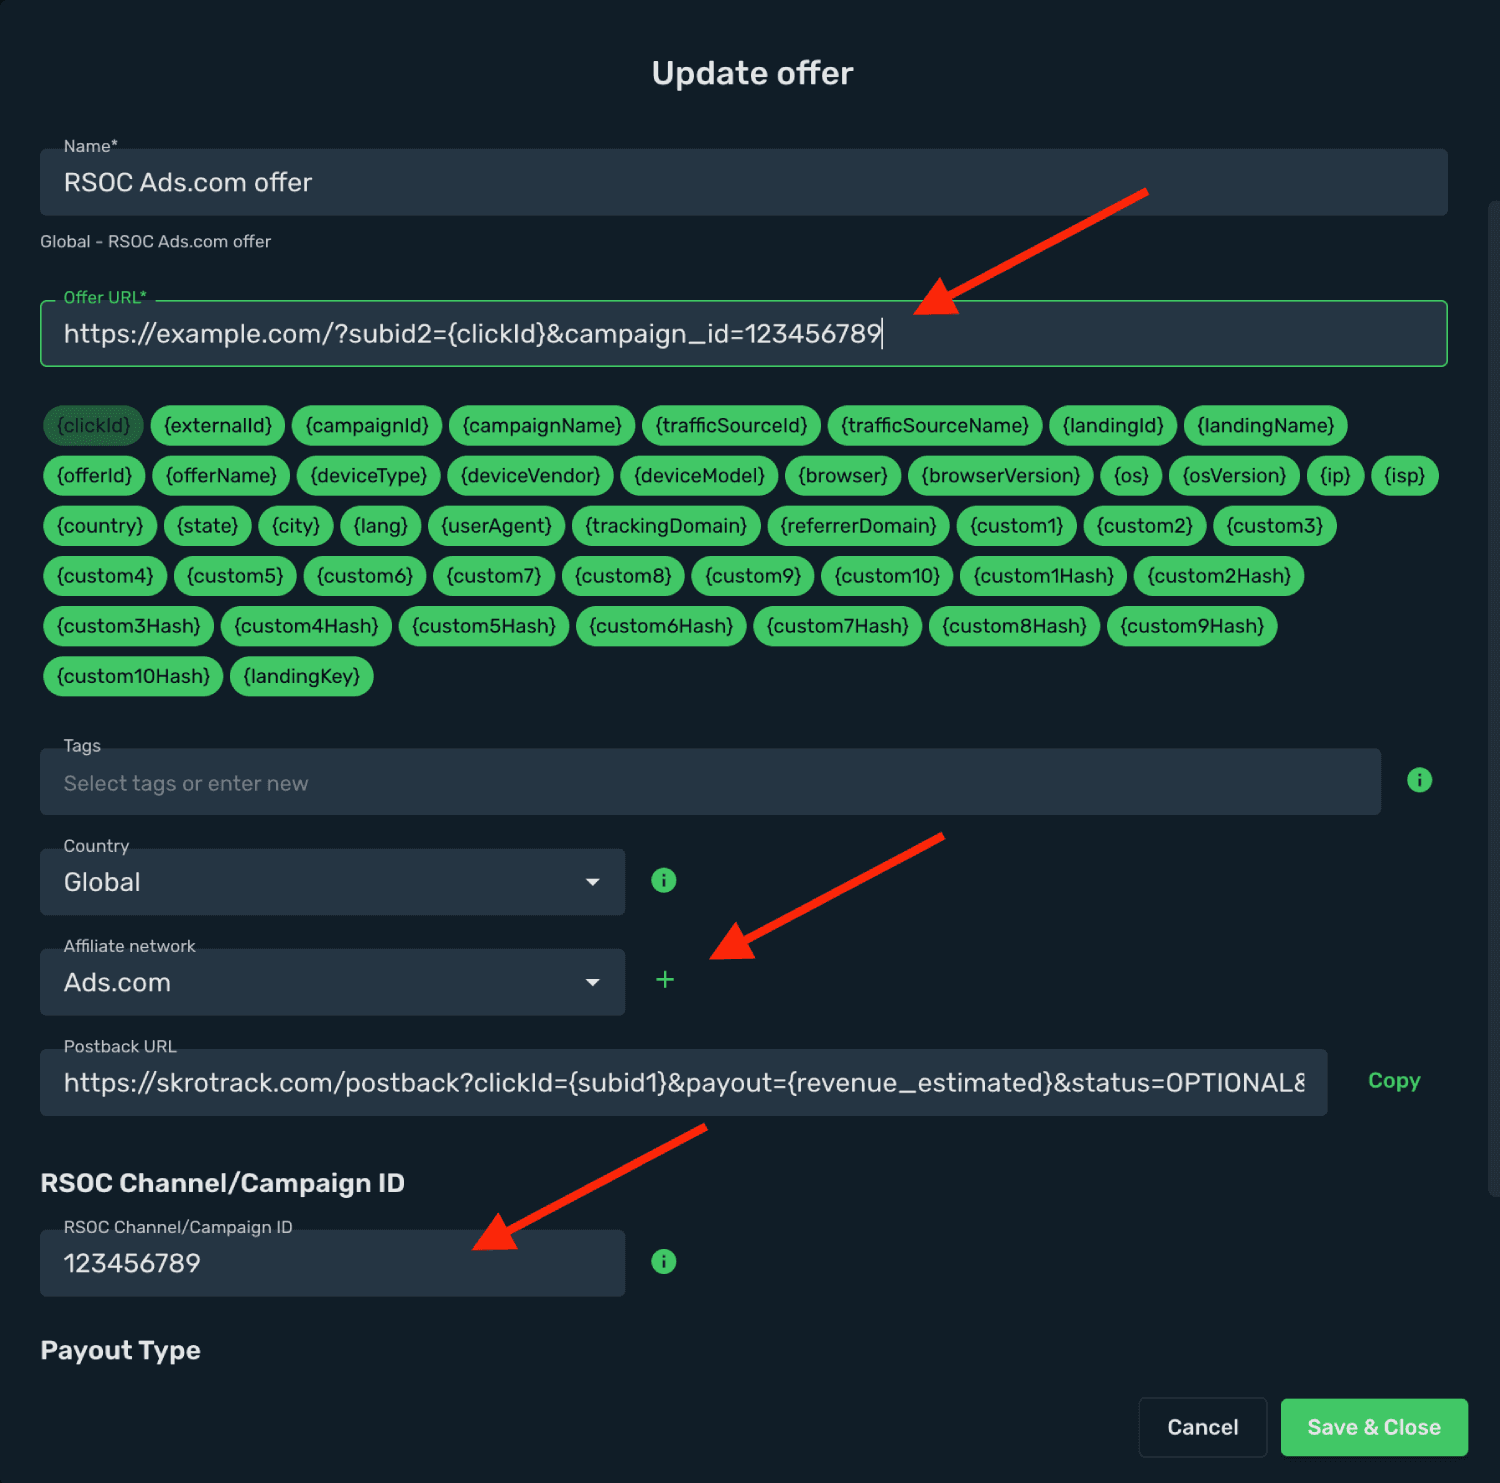
This is an example offer URL which goes to Skro:
https://example.com/?subid2={clickId}&campaign_id=123456789
Offer URL has 2 important parameters:
-
&campaign_id=123456789 - is a Ads.com Channel/Campaign ID.
-
&subid2={clickId}- is a Skro Click ID to track conversions with postback URL.
Note: If you are encoding Offer URL, do not encode Skro click ID macro {clickId}
Step 3. Standard Postback URL for conversions
-
Go to Affiliate Networks and click Create.
-
Search Ads.com and click Ads.com logo.
-
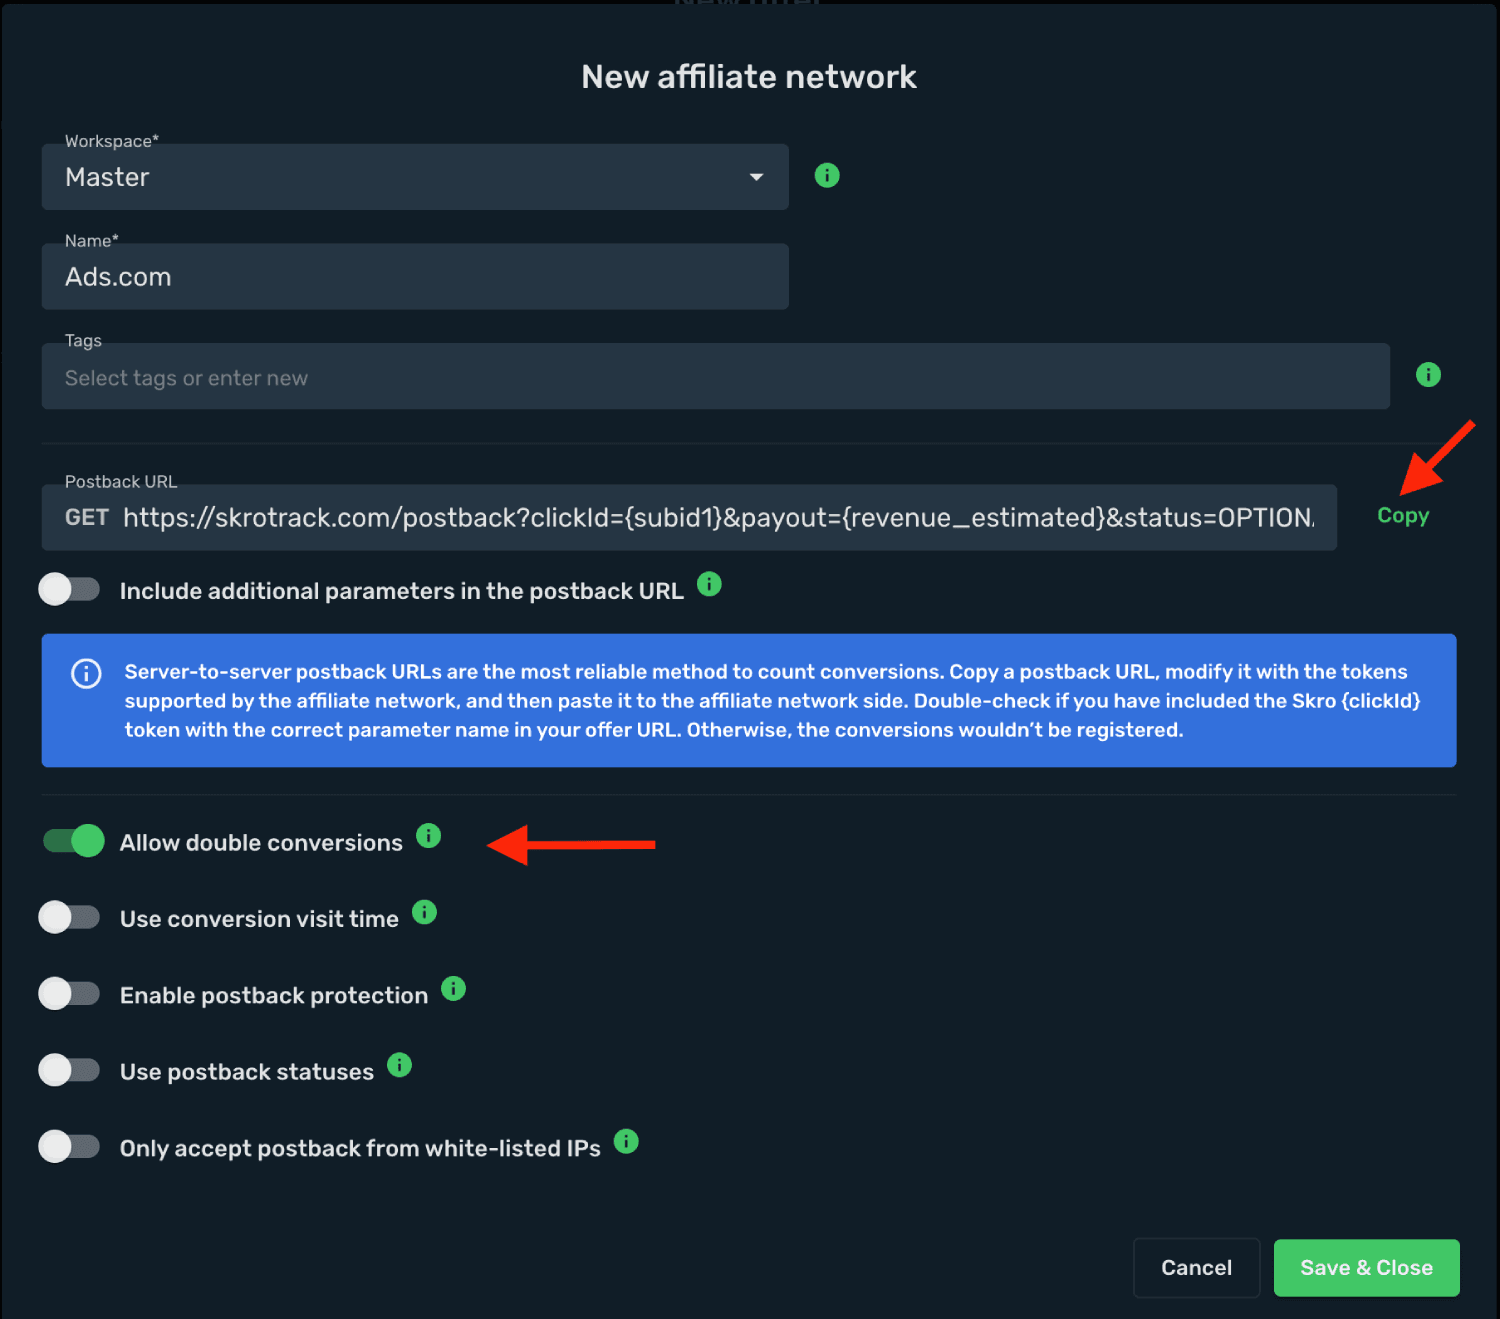
Copy the postback URL.
-
Switch on Allow double conversions.
-
When finished, click Save & Close.
-
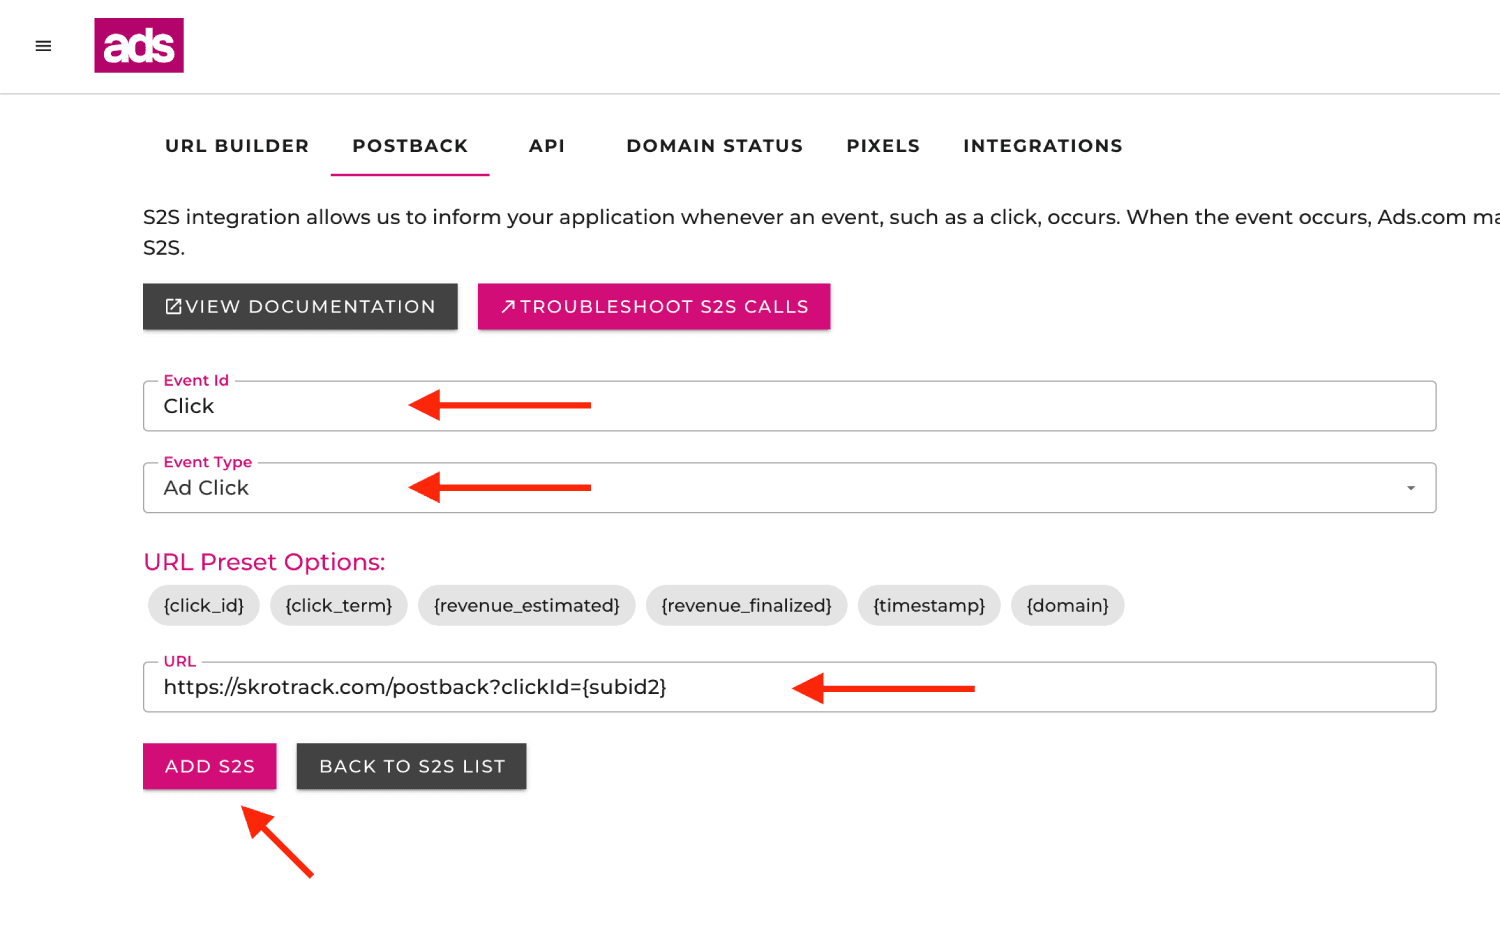
Go to Ads.com and naivigate to the Tracking → Postback and click Create New S2S.
-
Complete the required fields
- Event ID: Click
- Event Type: Ad Click
- Postback URL:
https://skrotrack.com/postback?clickId={subid2}&p1={click_term}
- If you are done, then click ADD S2S.
Step 4. Use Custom Conversions for different Ads.com events (OPTIONAL)
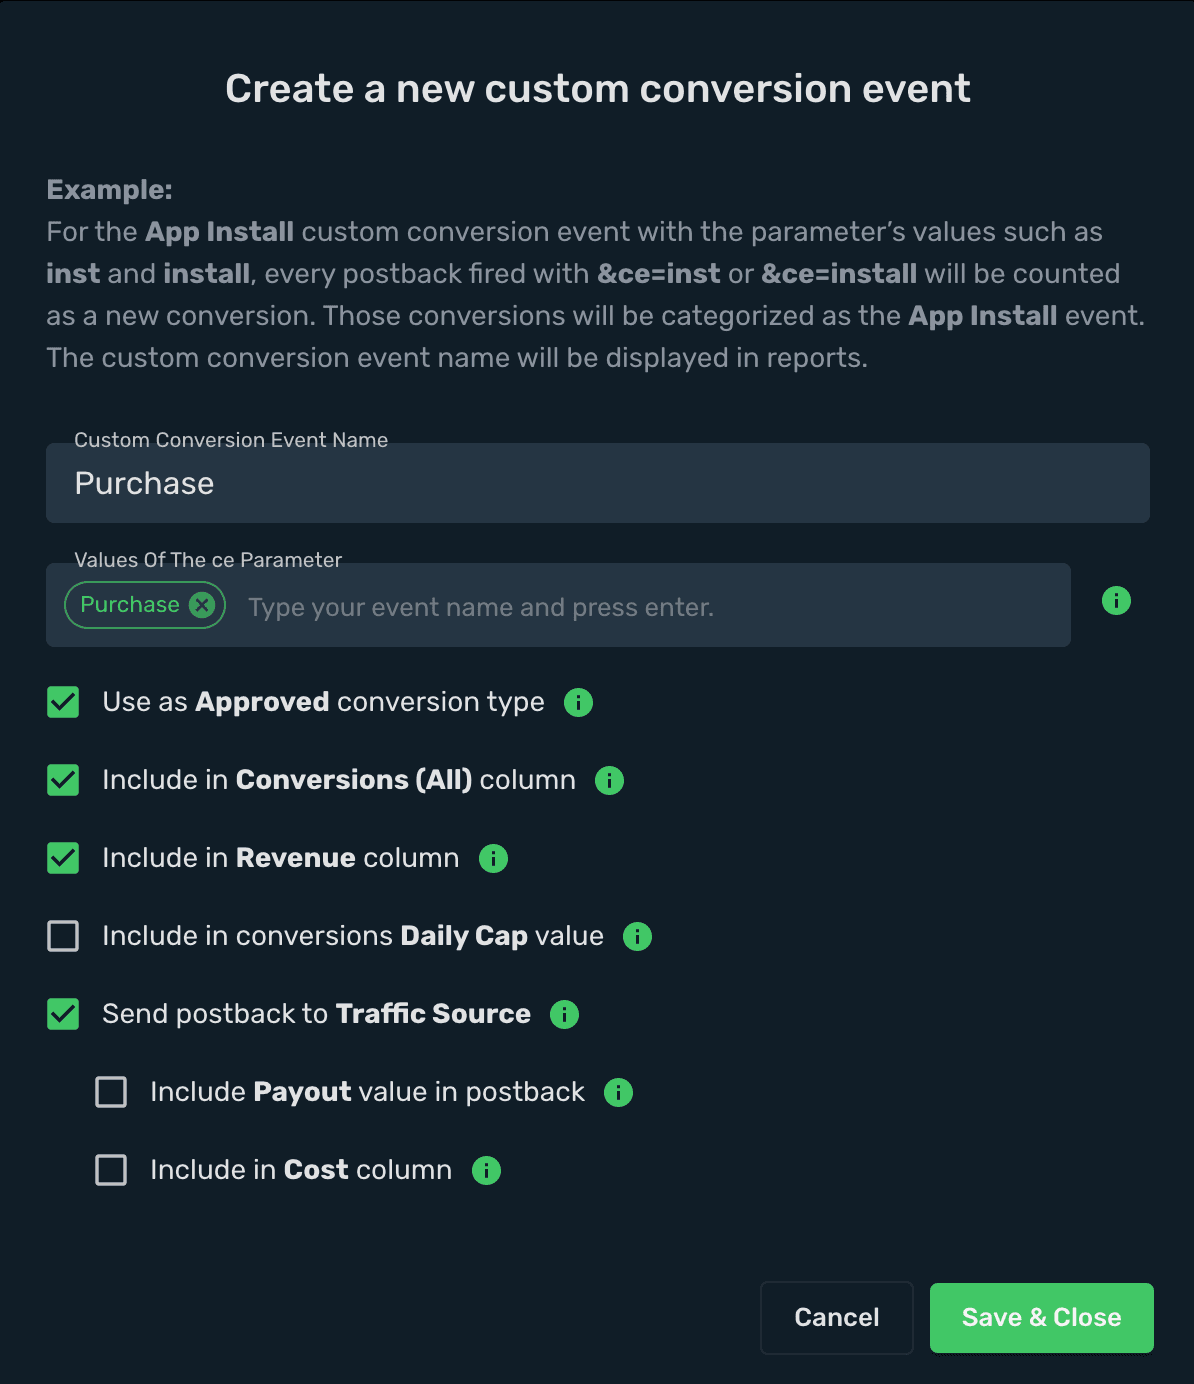
With custom conversion events feature it is possible to track different events, revenue and clicks on a different columns. For Ads.com we are going to create event Purchase.
-
Go back to Skro and navigate to the Settings → Custom Conversions and click Create.
-
Complete the required fields and click Save & Close.
-
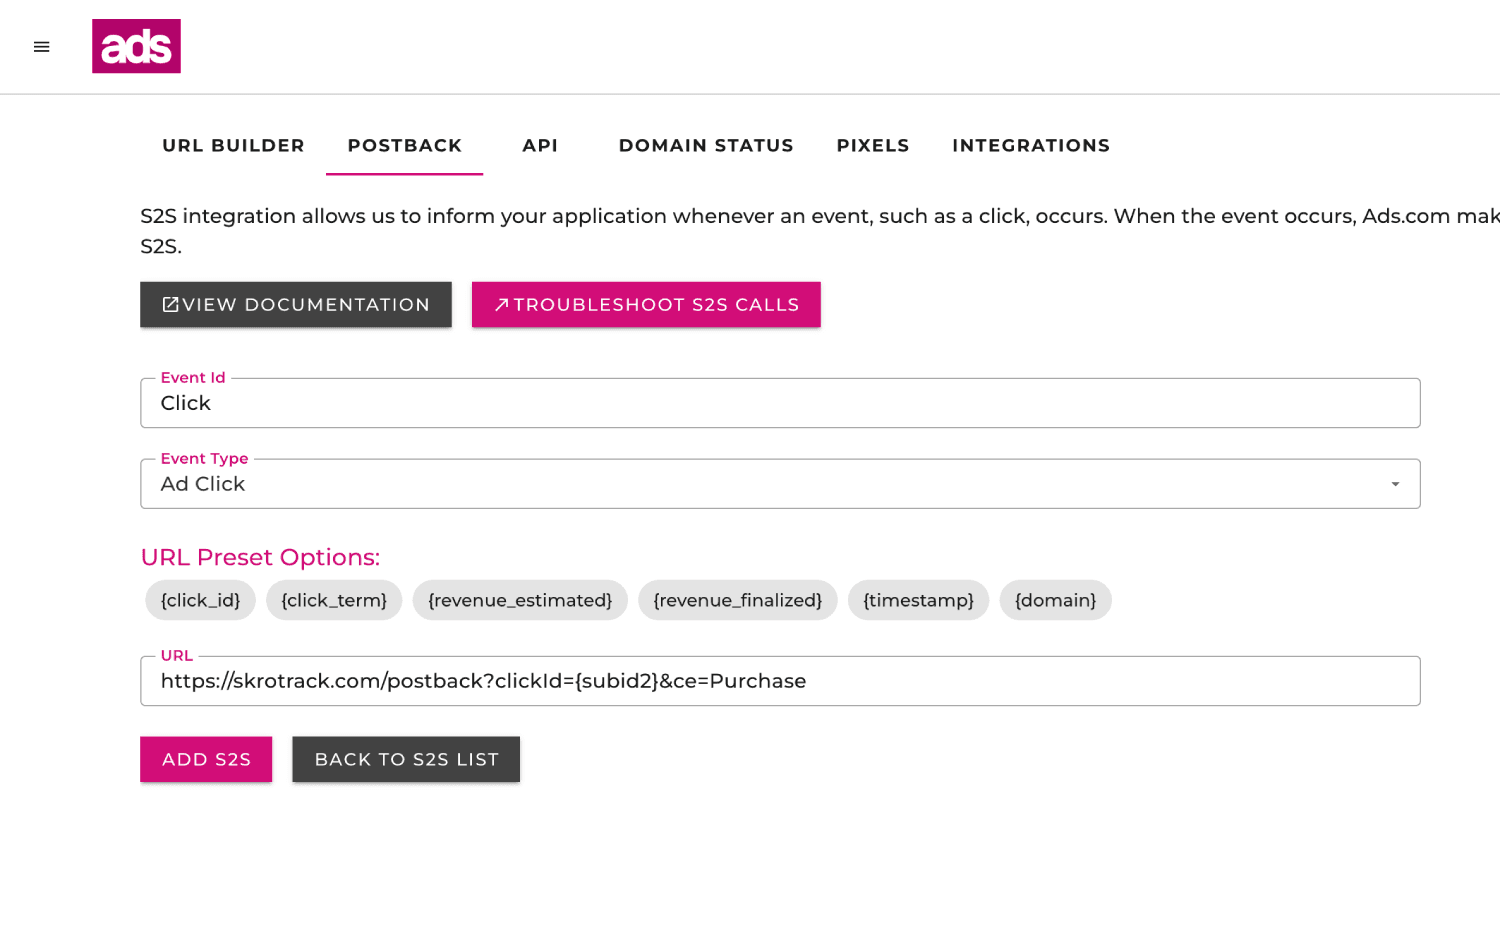
Go to Ads.com and naivigate to the Tracking → Postback and click Create New S2S.
-
Complete the required fields
- Event ID: Click
- Event Type: Ad Click
- Postback URL:
https://skrotrack.com/postback?clickId={subid2}&p1={click_term}&ce=Purchase
- If you are done, then click ADD S2S.
The integration is ready to synchronize earnings data.
Verify the setup
Confirm that the offer identifiers match the values in your integration. After the next revenue synchronization, compare the same date range and currency in Skro and your provider account.
Troubleshooting
If data is missing, check the selected workspace, integration, campaign, and reporting date range. Compare parameter names and macro values with the examples in this guide before repeating the test.
Related guides
Need help with this guide? Contact Skro support.