

AdCombo integration
Connect AdCombo to Skro, map click IDs, and configure postbacks to attribute conversions and revenue to your campaigns.
Step 1. Add affiliate network to Skro
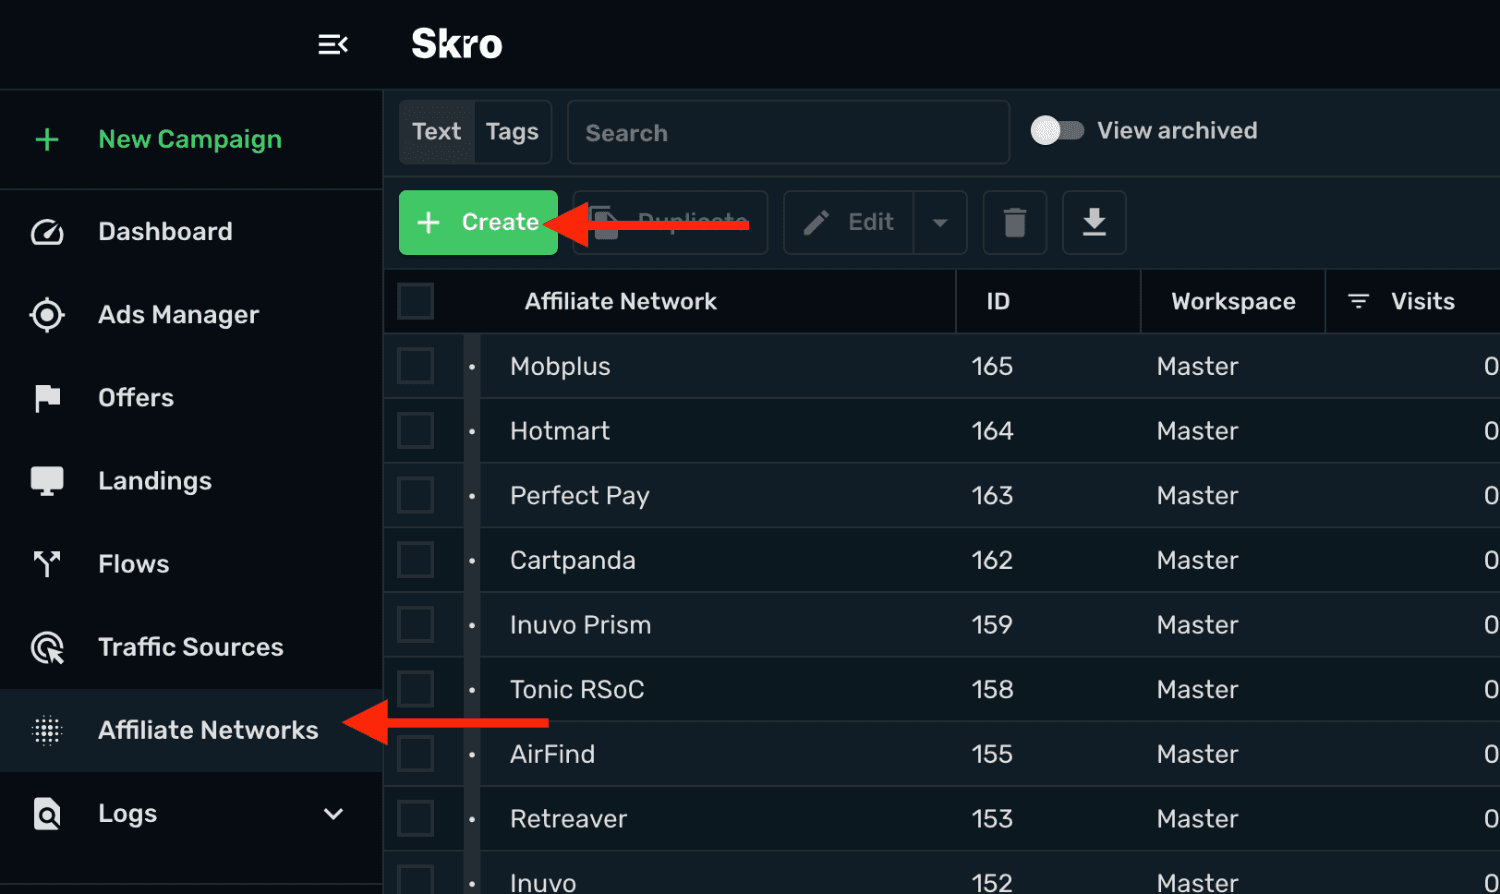
- Go to Affiliate Networks and click Create.
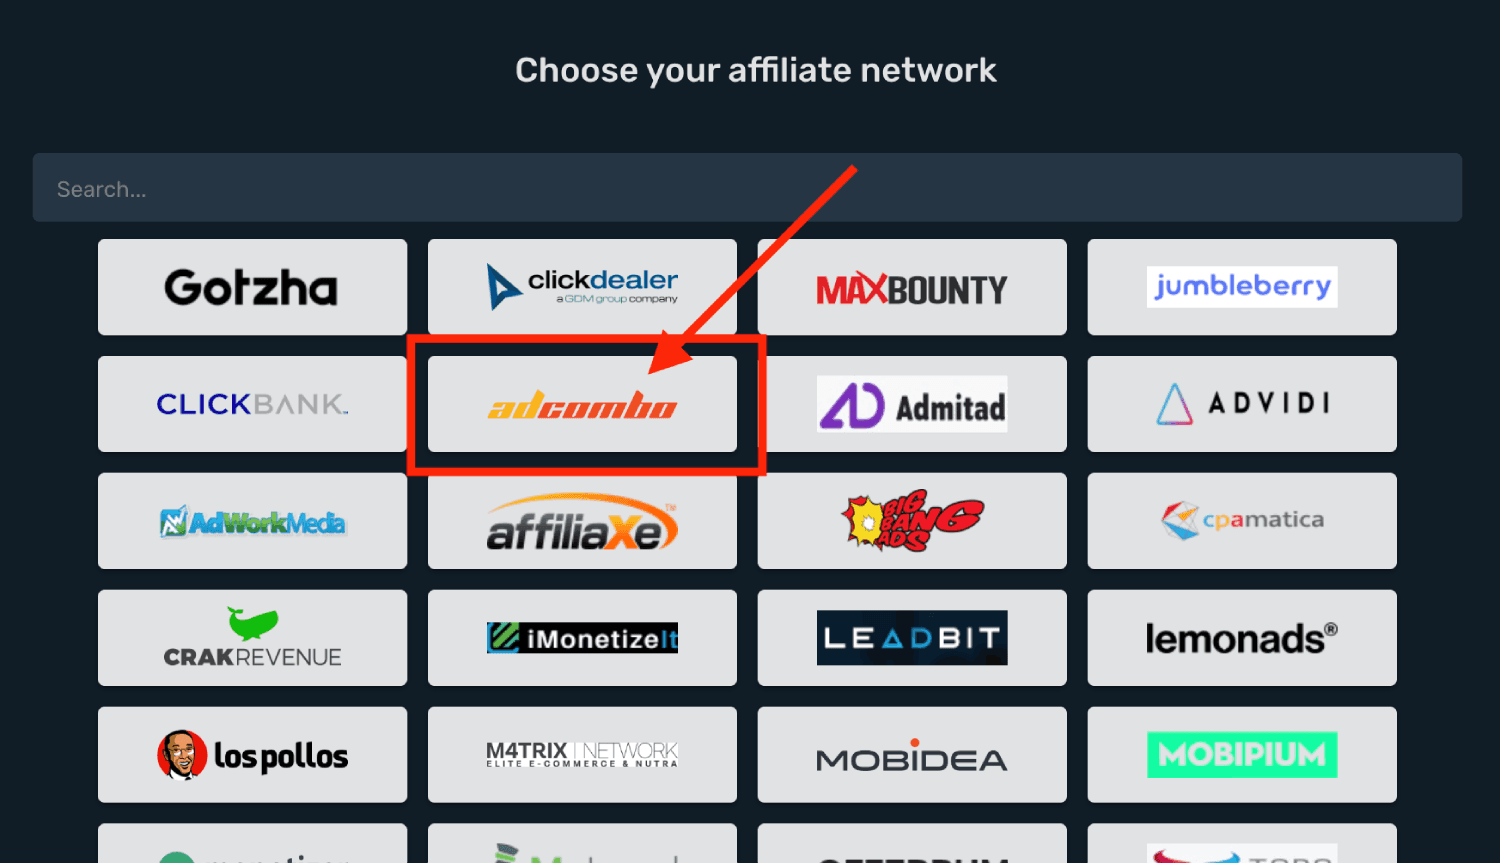
- Search Adcombo and select the Adcombo template.
-
Select your Workspace and Copy postback URL to your clipboard.
-
Click Save & Close.
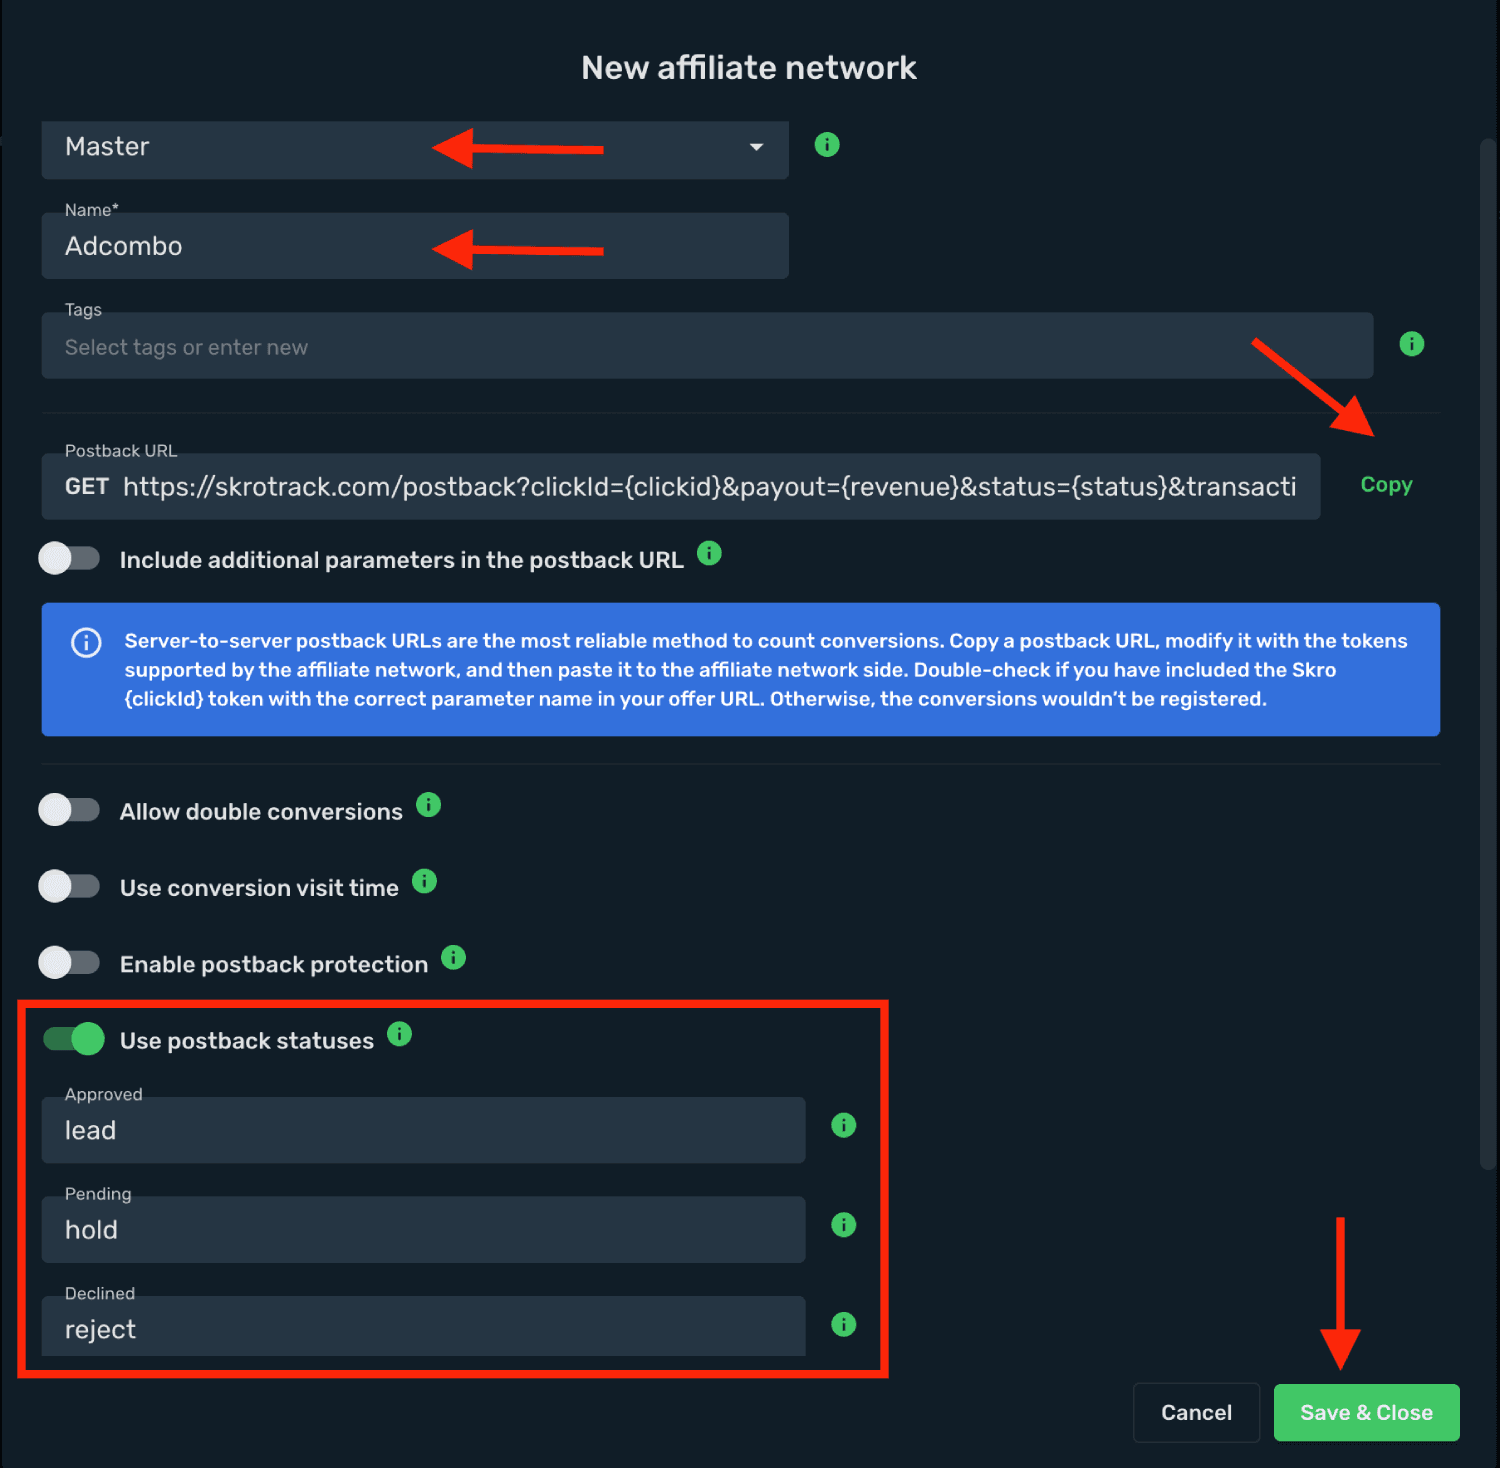
The Adcombo affiliate network is now saved in Skro. Use the copied postback URL in Adcombo in the next step.
Step 2. Setting up a postback URL
-
Log in to Adcombo account.
-
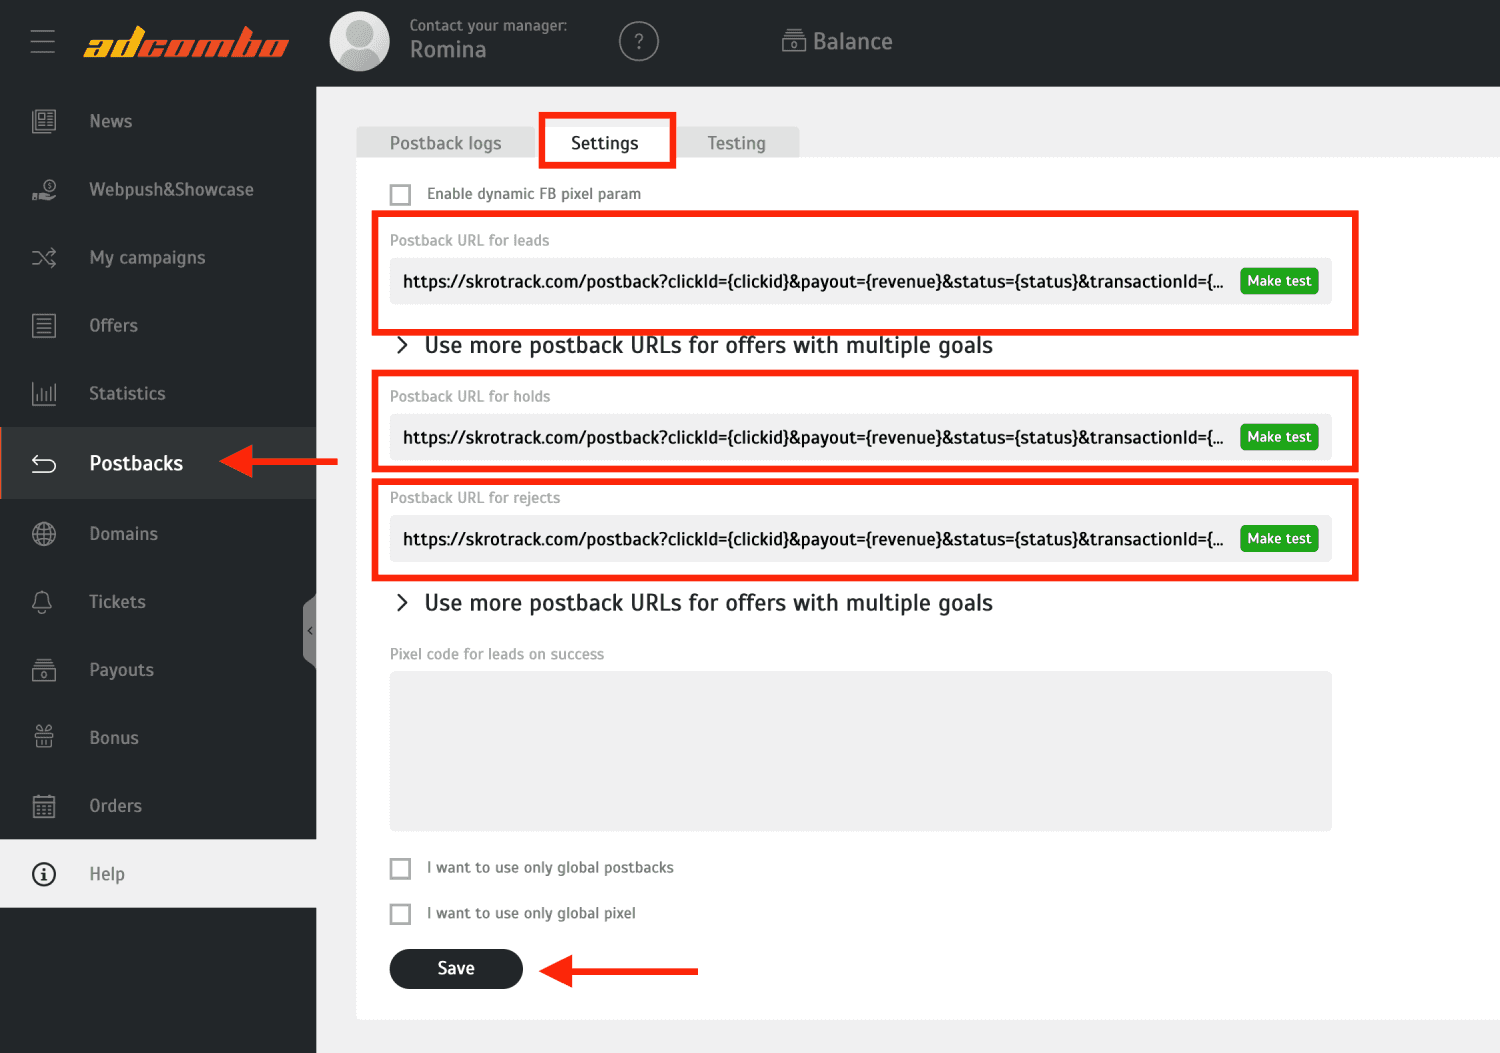
Go to Postbacks on the side of AdCombo.
-
Access Settings section.
-
Paste Postback URLs for different statuses in the corresponding fields.
-
Press Save to store the settings.
Postback URL for leads
https://skrotrack.com/postback?clickId={clickid}&payout={revenue}&status={status}&transactionId={trans_id}
Postback URL for holds
https://skrotrack.com/postback?clickId={clickid}&payout={revenue}&status={status}&transactionId={trans_id}
Postback URL for rejects
https://skrotrack.com/postback?clickId={clickid}&payout={revenue}&status={status}&transactionId={trans_id}
Step 3. Get an offer from Adcombo
-
To get offer link on the side of Adcombo go to Offers page on the panel.
-
Select the desired offer from the list and click its name.
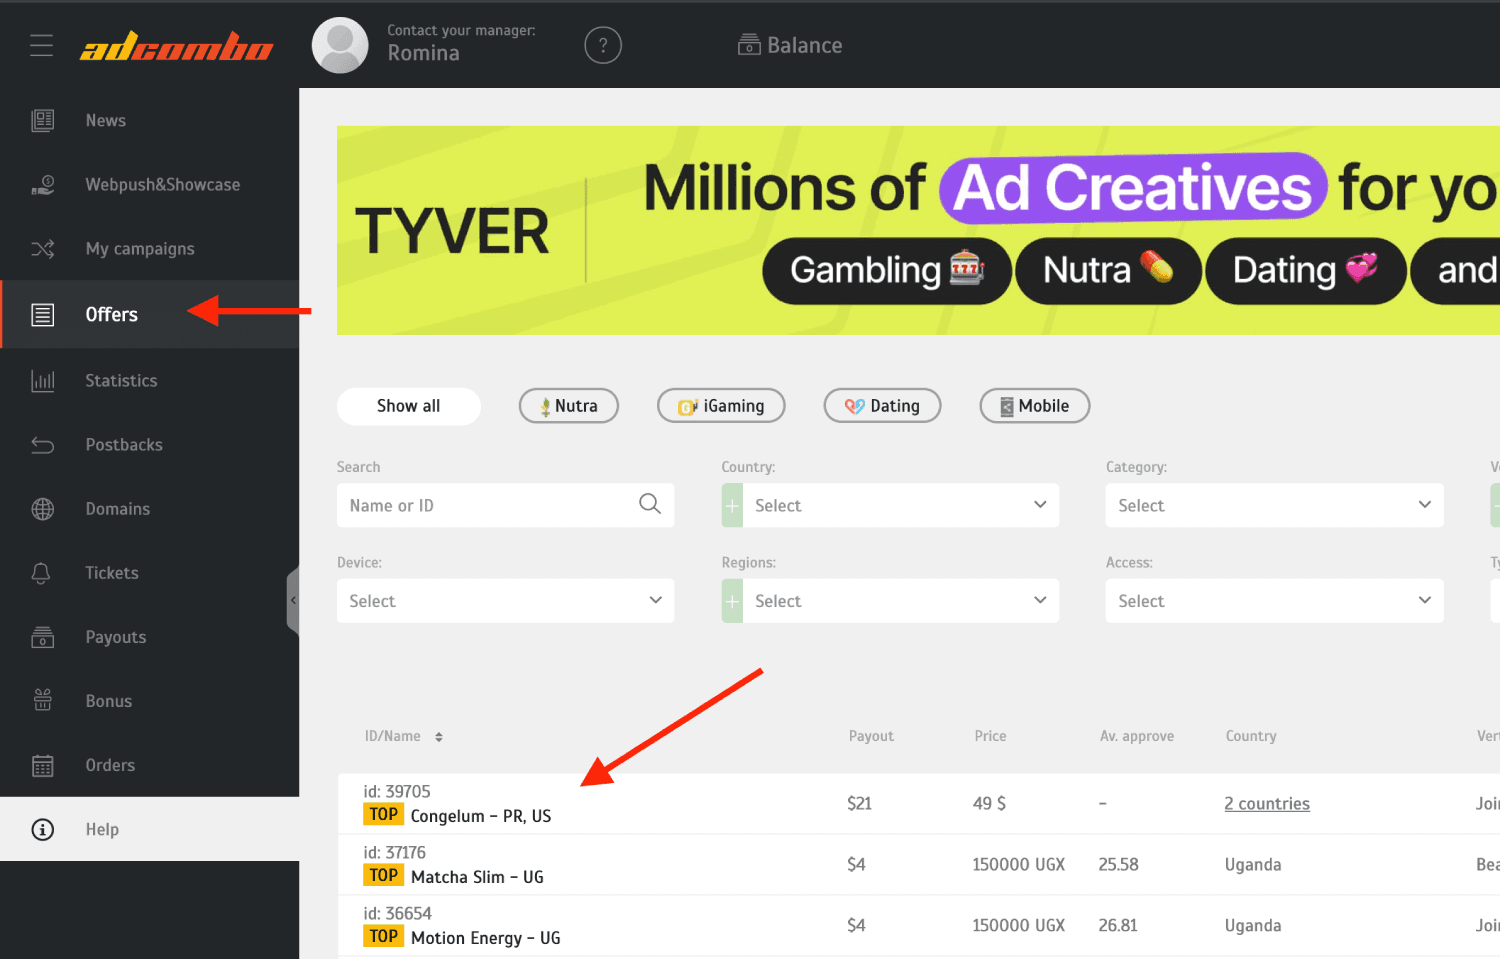
- Press Request approval to get the offer link.
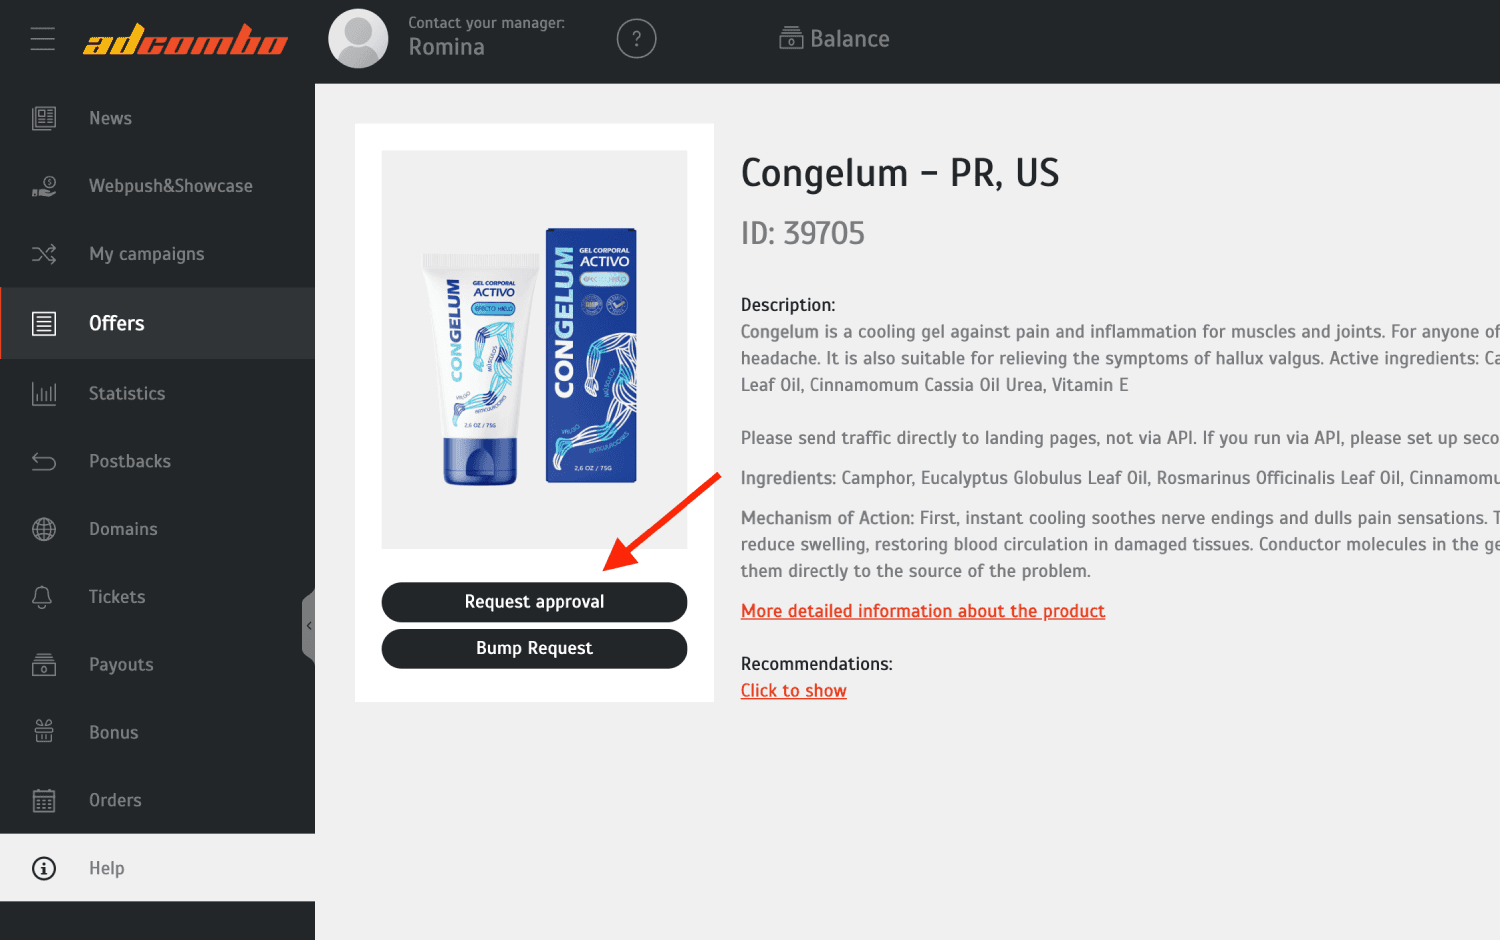
- Copy Offer link after the selected offer is approved by Adcombo.

Step 4. Add offer to Skro
-
Go back to Skro and navigate to the Offers and click Create.
-
Choose your workspace.
-
Give a name to your offer.
-
Grab the offer link from Adcombo and add it to Offer URL field and change the macros to this
&clickid={clickId}
{clickId} - The Skro click ID macro for conversion tracking.
Example Offer URL:
https://uh89493594uh.exdsx.pro/?target=-343mdsJDKLKDJSLKADJALSKDJLK&al=34343&clickid={clickId}
- Choose Adcombo from the Affiliate Network select box.
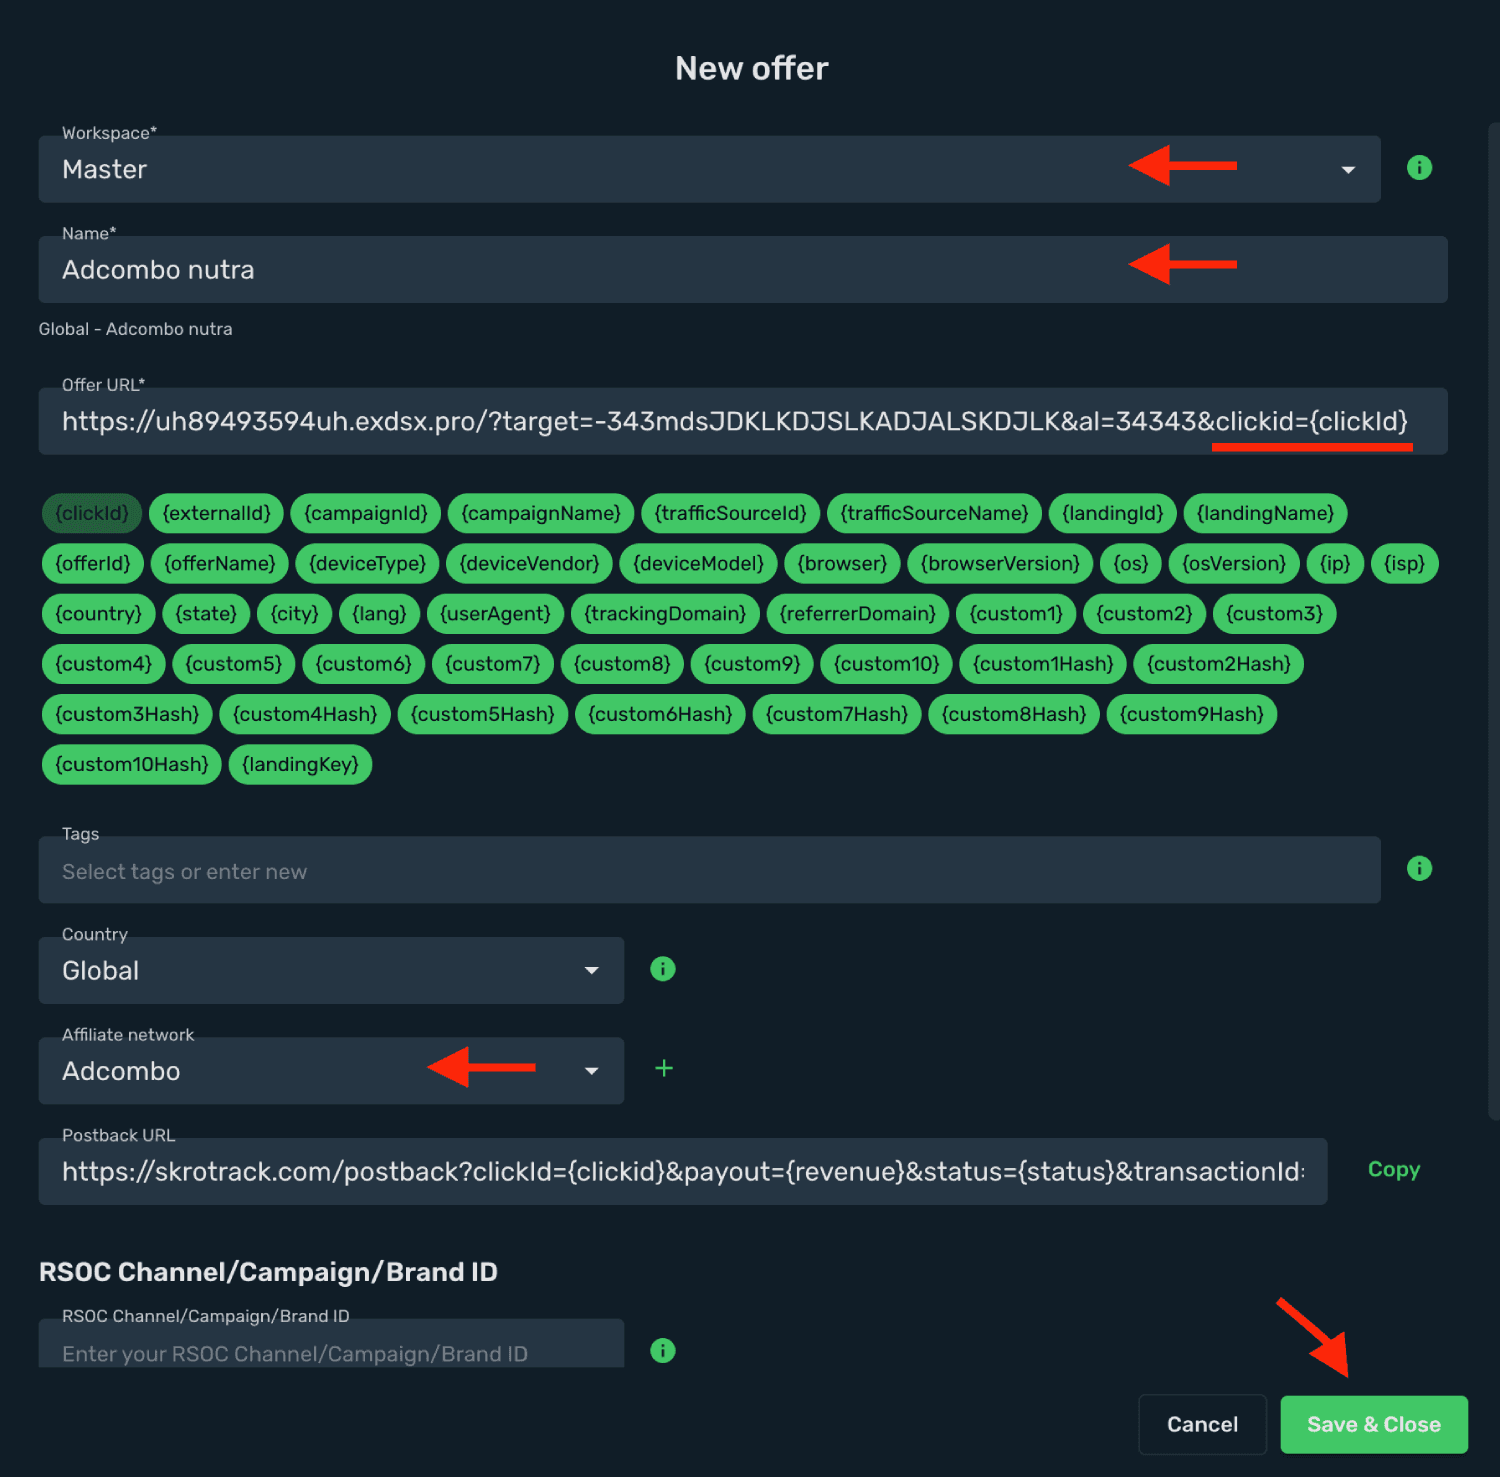
- Click Save & Close.
Step 5. Create a campaign on Skro
- Start with the following guide:
Get started with Facebook integration
Verify the setup
Follow a campaign link and complete a test conversion using your provider’s test workflow. Confirm that the original click ID reaches the provider and is returned to Skro, then check the event and revenue in your campaign report.
Troubleshooting
If data is missing, check the selected workspace, integration, campaign, and reporting date range. Compare parameter names and macro values with the examples in this guide before repeating the test.
Related guides
Need help with this guide? Contact Skro support.
Meta Ads automation
Create performance-based or scheduled rules for Meta campaigns, ad sets, and ads. Configure conditions, budget limits, notifications, and action logs.
Admitad integration
Connect Admitad to Skro, map click IDs, and configure postbacks to attribute conversions and revenue to your campaigns.