

Hotmart integration
Connect Hotmart to Skro, map click IDs, and configure postbacks to attribute conversions and revenue to your campaigns.
Hotmart is a global, all-in-one platform for selling and distributing digital products, especially online courses, e-books, subscriptions, and other educational content.
It essentially creates an ecosystem for three main roles:
- Creators: People who create digital products and host them on Hotmart. They get the tools for content hosting, payment processing, and marketing.
- Affiliates: Individuals who promote the products of Creators in exchange for a commission on every sale made through their unique affiliate link. They can choose from thousands of products in the Hotmart Marketplace.
- Buyers: People who purchase the digital products available on the platform.
A key aspect of Hotmart's business model is that it typically operates on a commission-based system, meaning there are often no upfront monthly fees, and they only charge a percentage of the sales made. This makes it a popular choice for people looking to monetize their knowledge and expertise online.
If you’re looking for a tracking tool to gain deeper insights into your performance, Skro is a perfect solution. In this guide, we’ll show you how to easily integrate your Hotmart with Skro.
- See the true ROI of every ad
- Track every approved sales event and commission fee
- Compare advertising costs with attributed revenue
- Send supported conversion events to Facebook and TikTok
This guide will teach you how to set up webhook for Hotmart and track approved events for paid ads. Please note: this guide does not cover every option available in Skro or your traffic source. You should already have basic knowledge of creating campaigns in both Skro and your traffic source.
Step 1. Set up Webhook (S2S Postback) For Hotmart
-
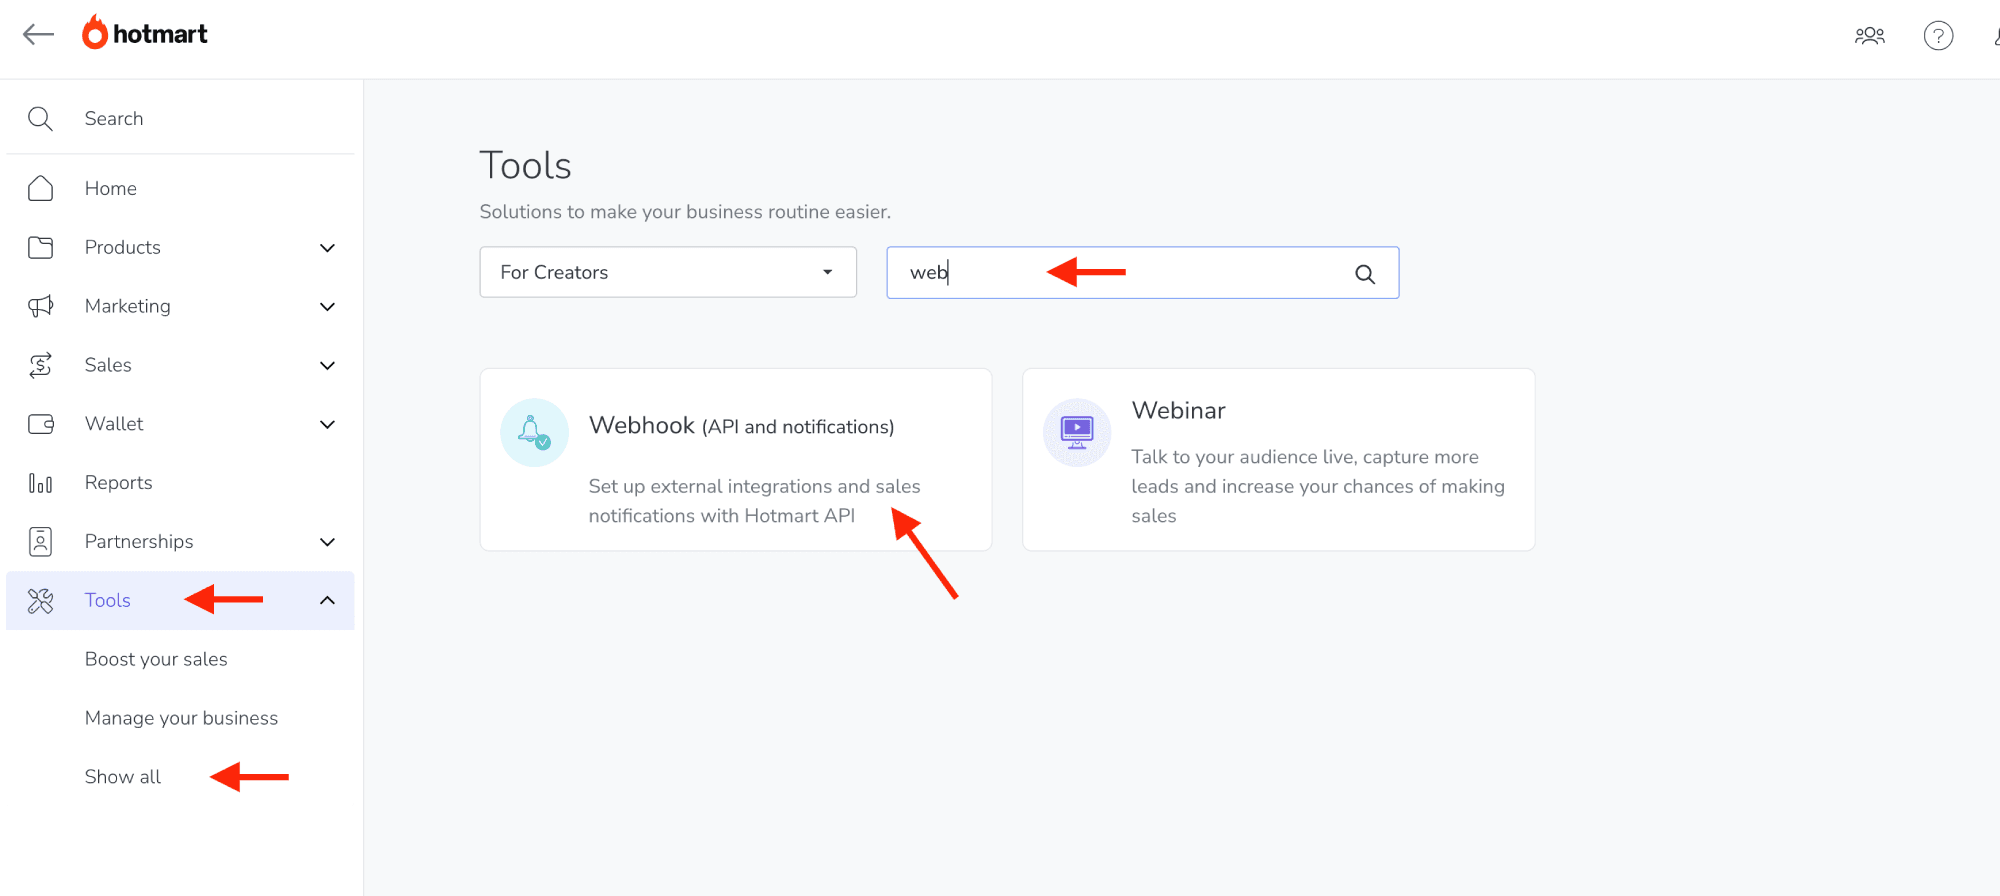
Go to your Hotmart → Tools → Show all and type webhook into search box.
-
Click Webhook (API and notifications)
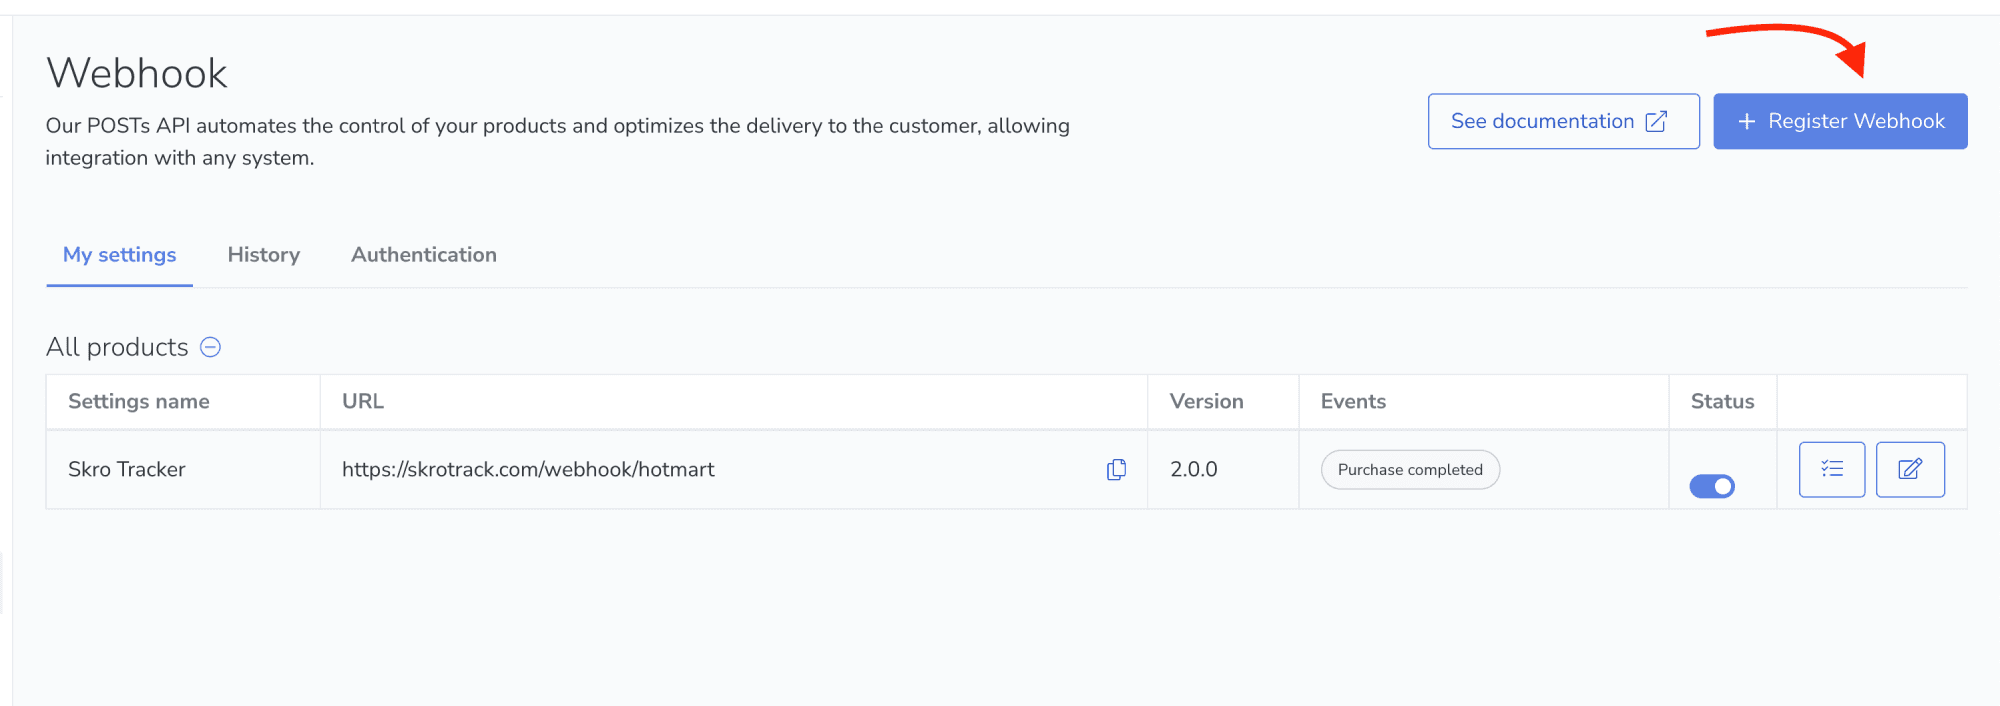
- Click Register Webhook.
-
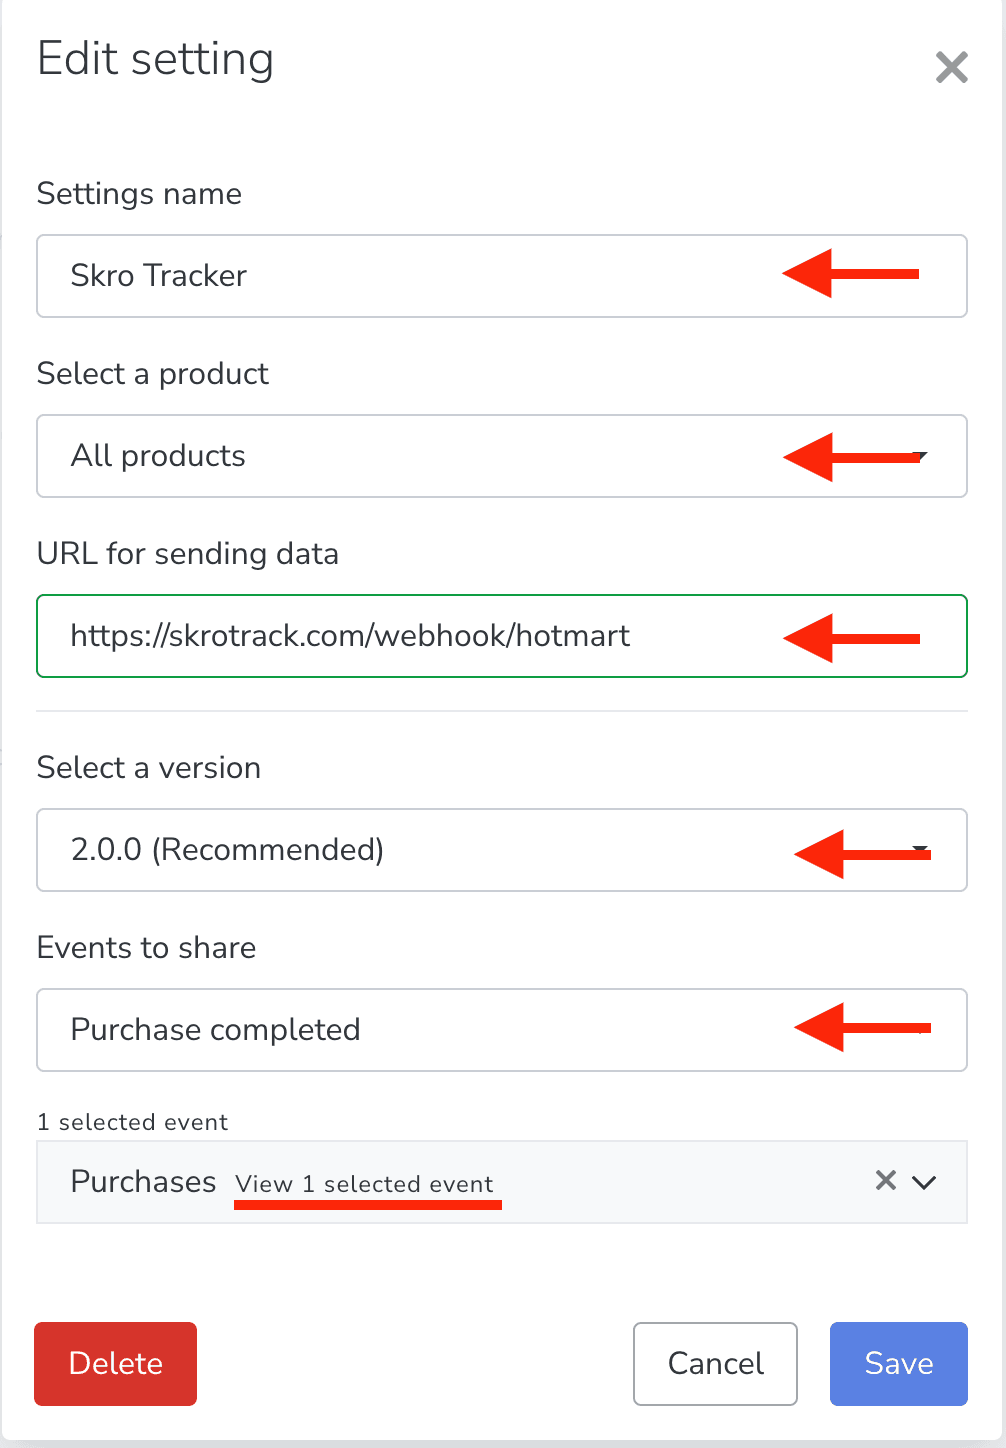
Add name to your webhook.
-
Select products where you want to fire that webhook.
-
Add this Webhook URL. (You can use your own tracking domain instead of skrotrack.com)
https://skrotrack.com/webhook/hotmart
-
Select a version 2.0.0 (Recommended)
-
Select only Purchase Complete event from the list.
Well done! Your webhook for Purchase Complete event has been successfully integrated.
Step 2. Add Offer Link and Create Campaign in Skro
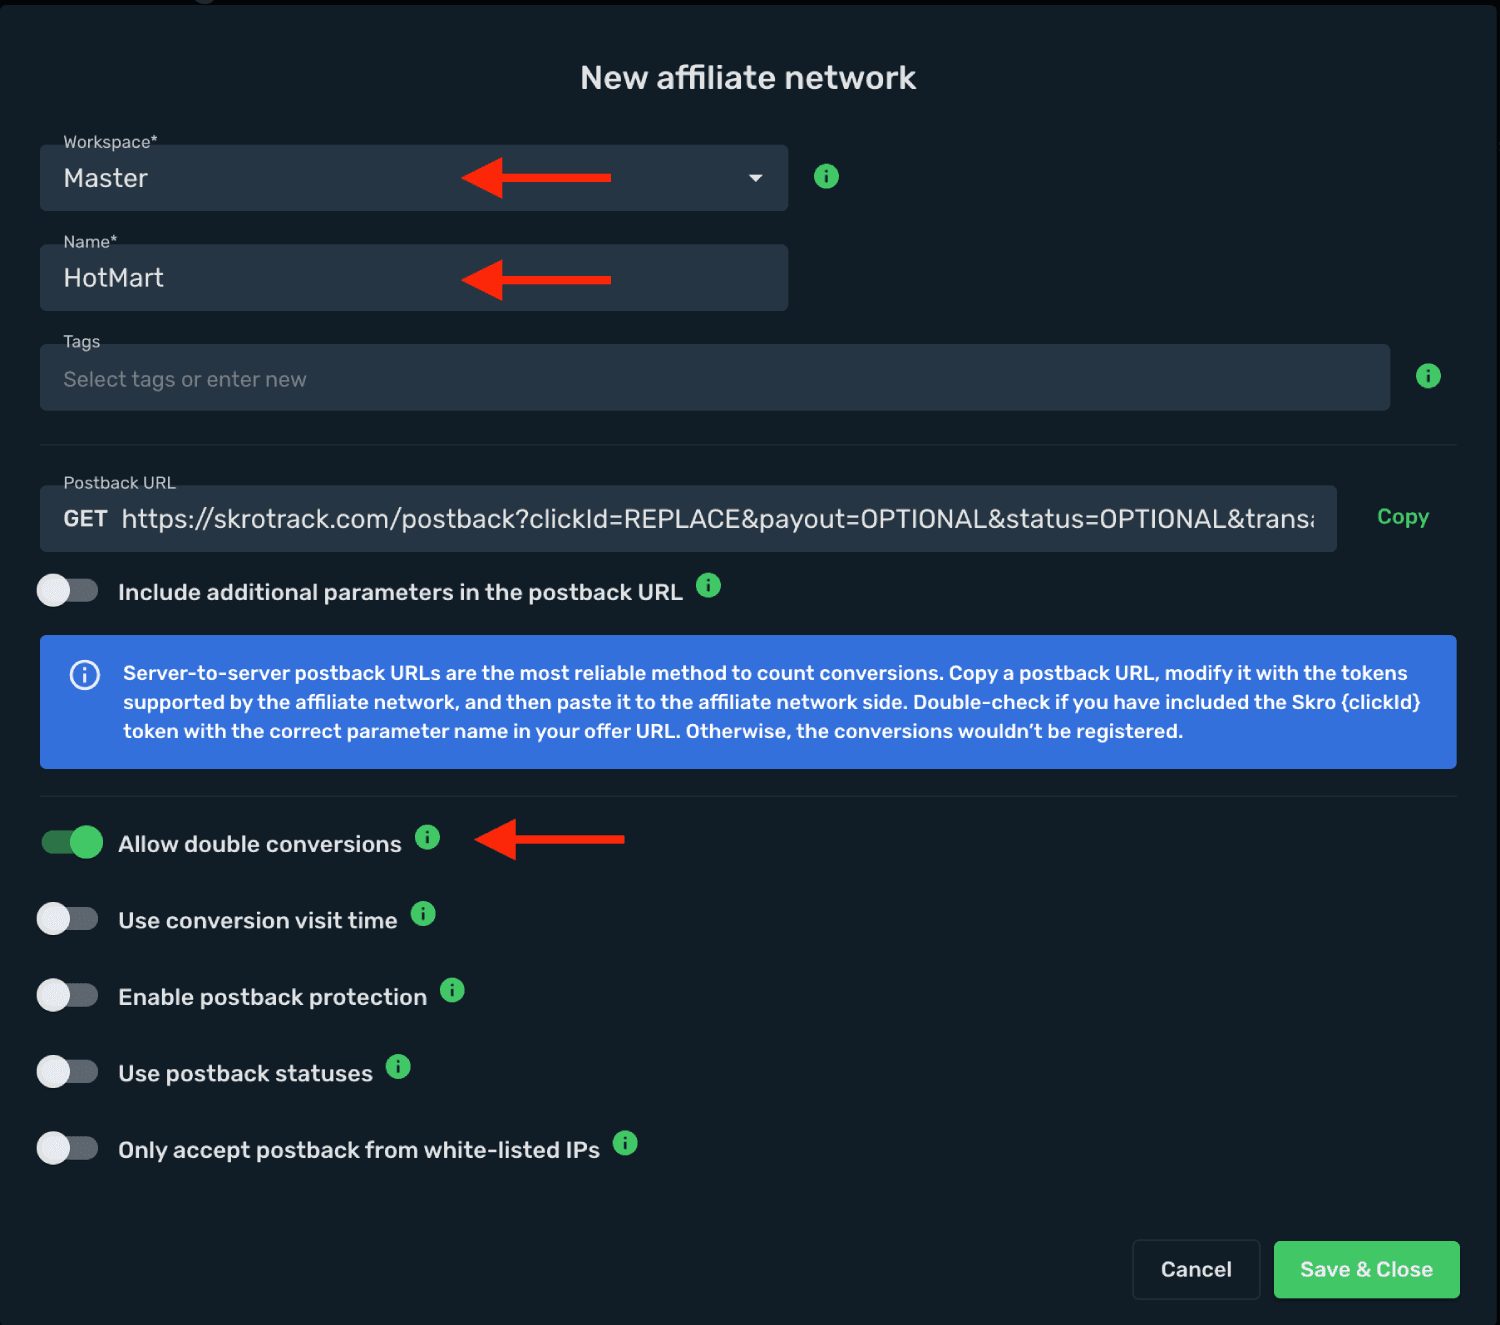
- In Skro, go to the Affiliate Networks view, click Create, select Hotmart, and fill in the details.
-
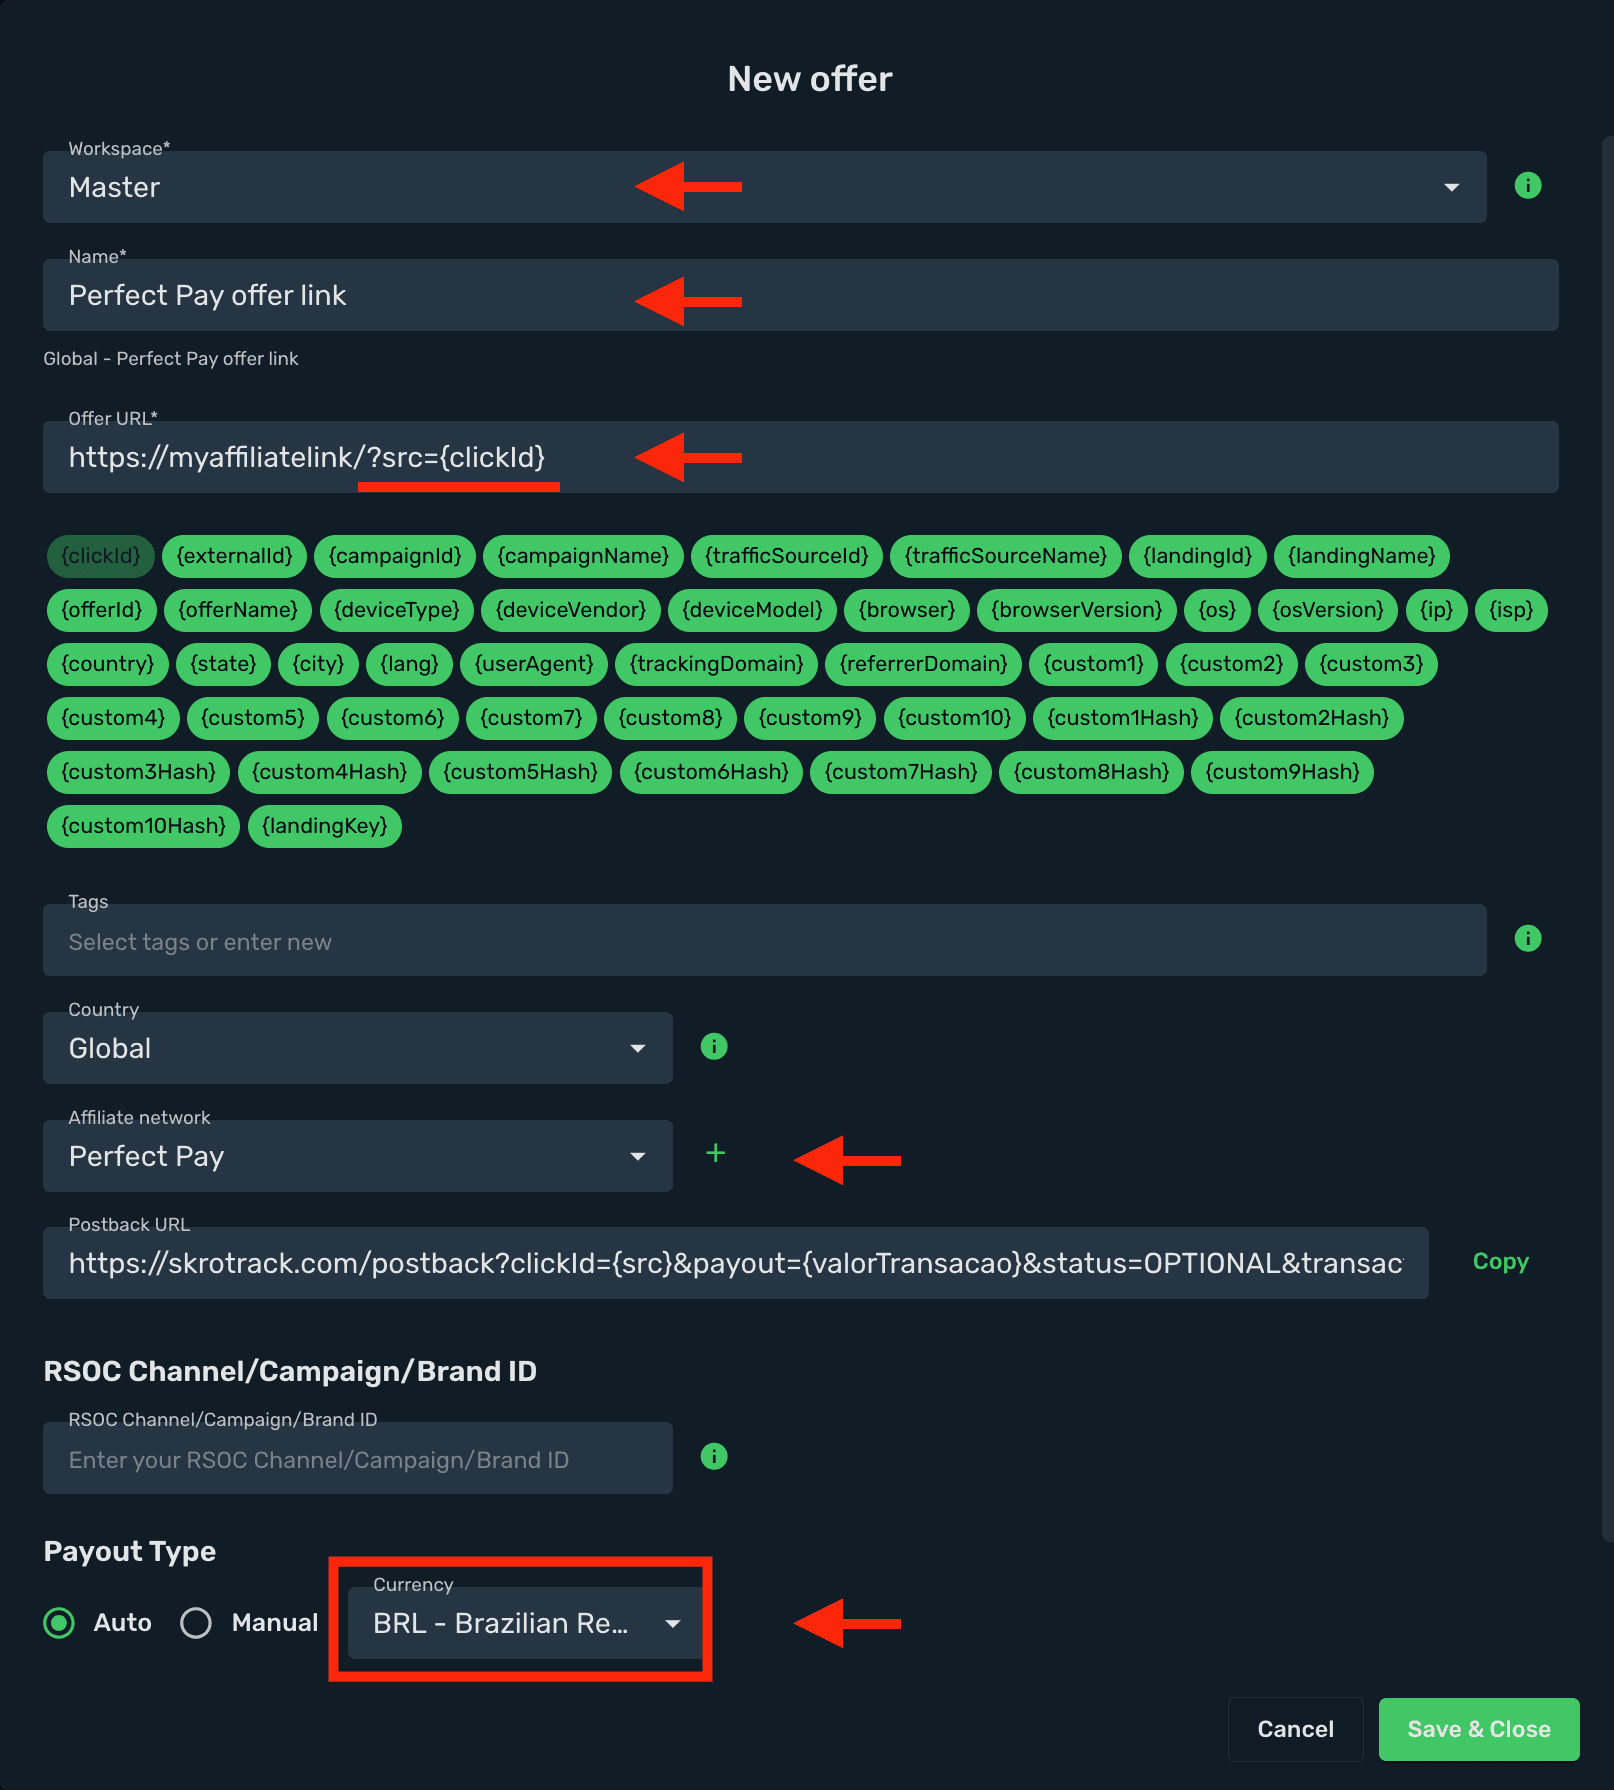
Add your affiliate link as offer. Go to the Offers view, click Create, and enter your affiliate link details.
-
Select a workspace.
-
Enter a name for your offer.
-
Enter your offer URL (Checkout link) with the Skro Click ID parameter:
?src={clickId}
https://go.hotmart.com.br/XXX3333XXX?src={clickId}
-
Select Hotmart as the affiliate network.
-
Payout Type - Make sure you select correct currency for your payouts.
-
Click Save & Close.
-
(Optional) If you use a pre-lander (Sales page), go to the Landings view, click Create, and add your sales page there.
-
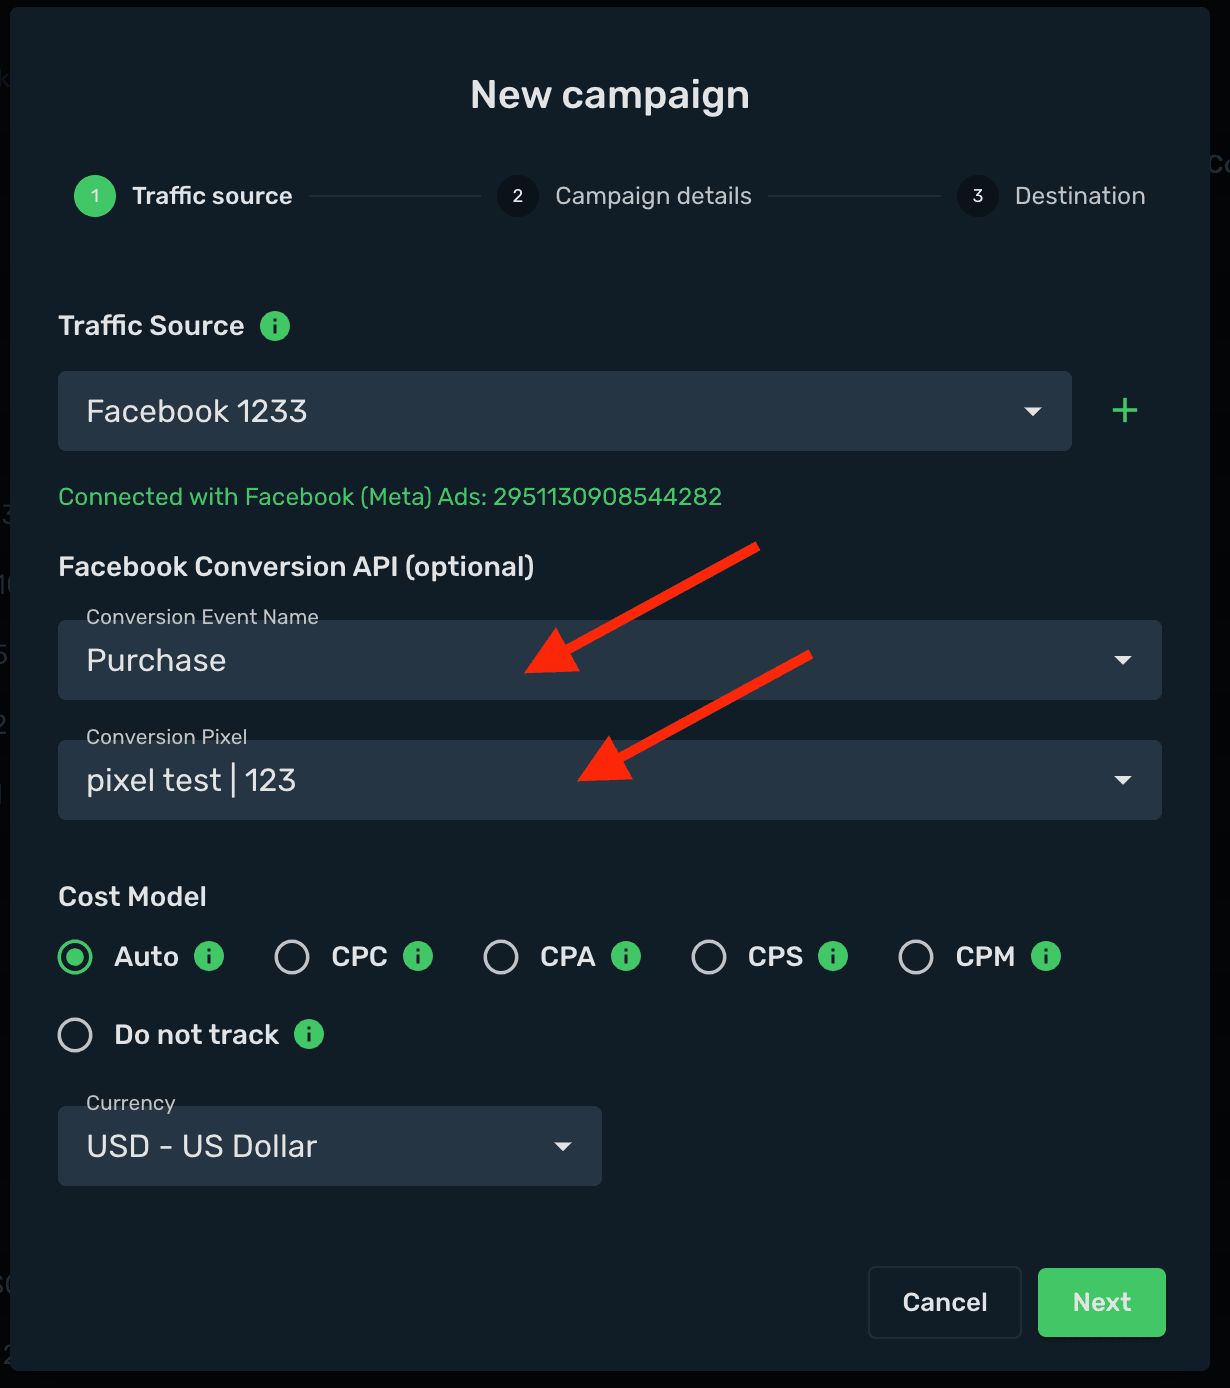
Navigate to the Ads Manager view and click Create.
-
Select your integrated Traffic Source (e.g. Facebook).
-
Select your Conversion Event Name. Event naming must be exactly the same in Skro and in your traffic source. Naming is case-sensitive.
-
Select your Conversion Pixel. This is required for sending conversion data back to your traffic source.
-
Set Cost Model to Auto.
-
Select your cost currency.
-
Click Next.
-
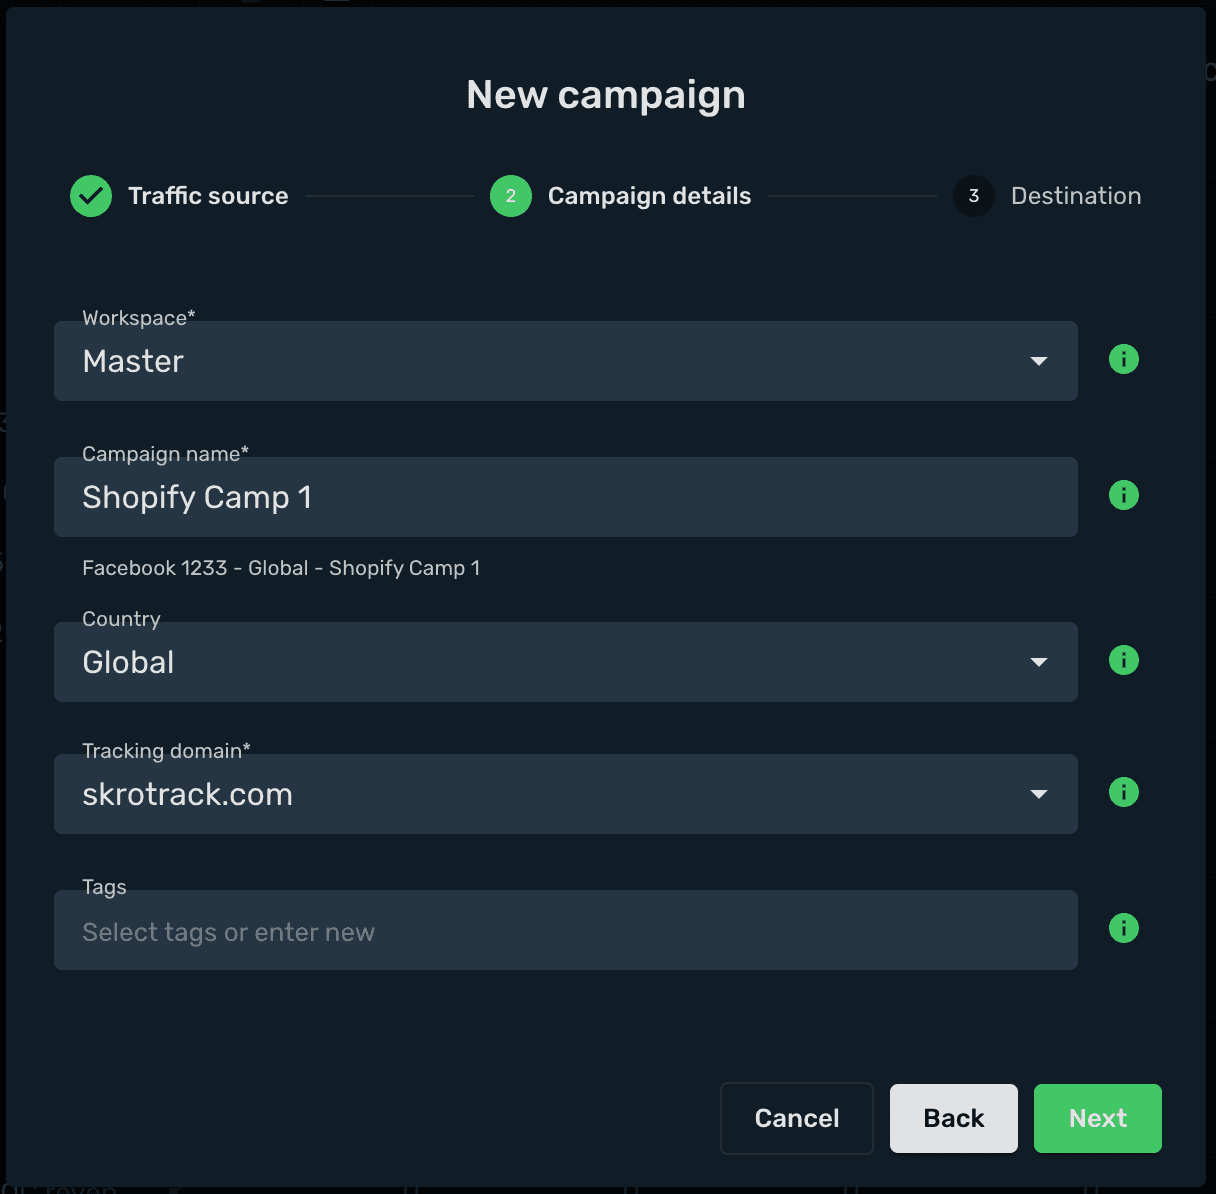
Choose a workspace.
-
Add a descriptive campaign name.
-
Click Next.
-
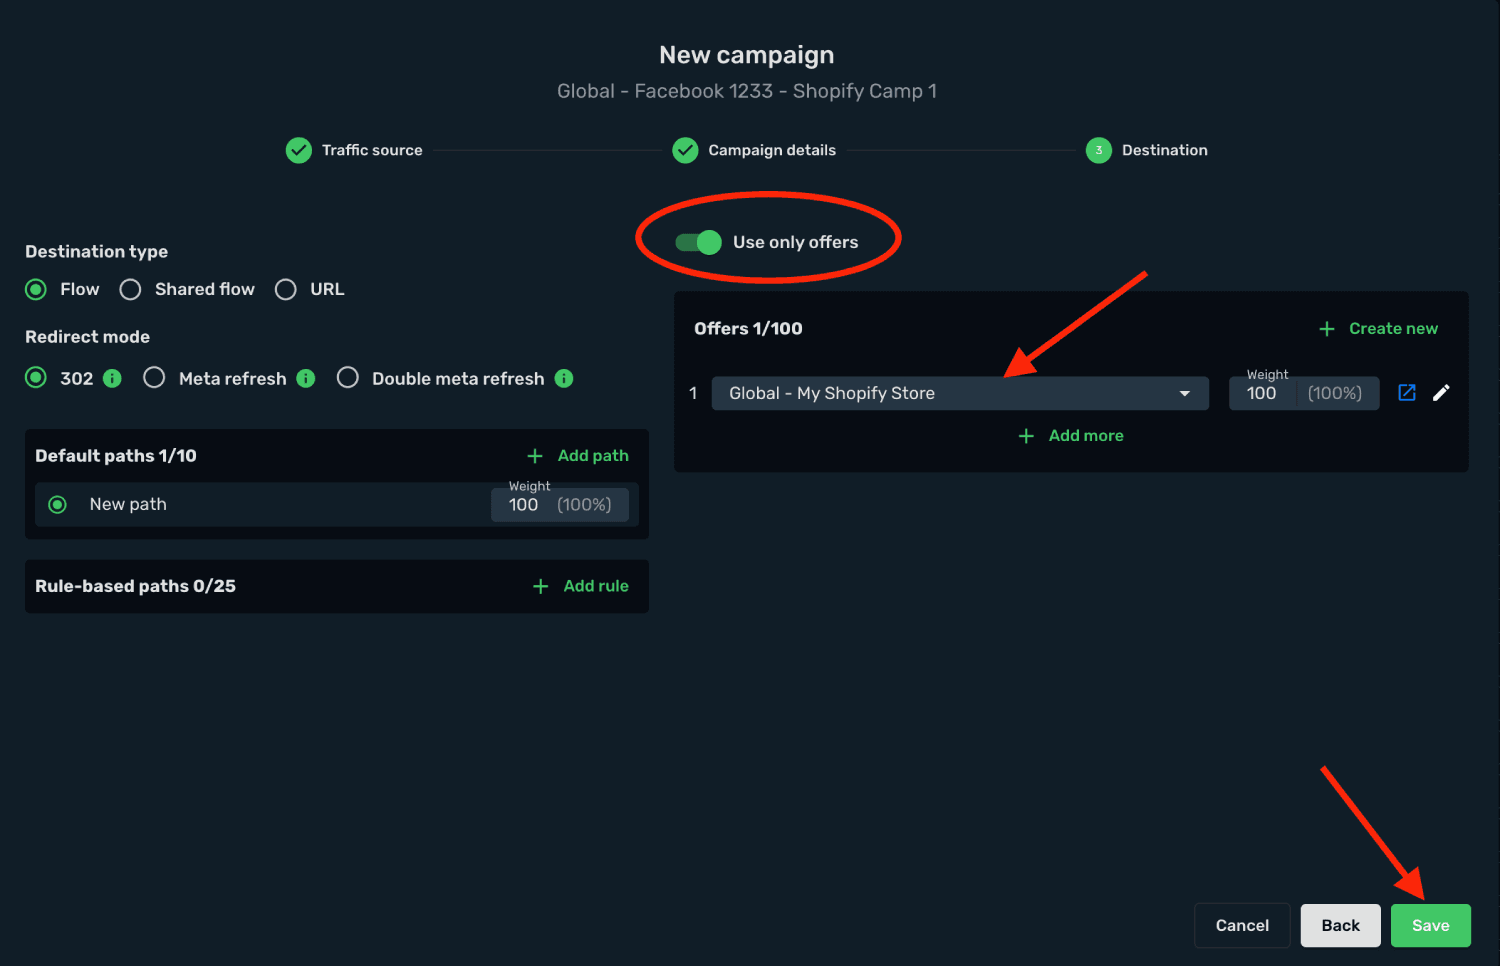
Choose your Destination Type (in this example: flow).
-
Select your redirect mode (in this example: 302 redirect).
-
Select your landing setup (in this example: use only offers).
-
Select your Hotmart offer.
-
Click Save.
- Choose your tracking method: Redirect or Direct. (In this example we use Redirect.)
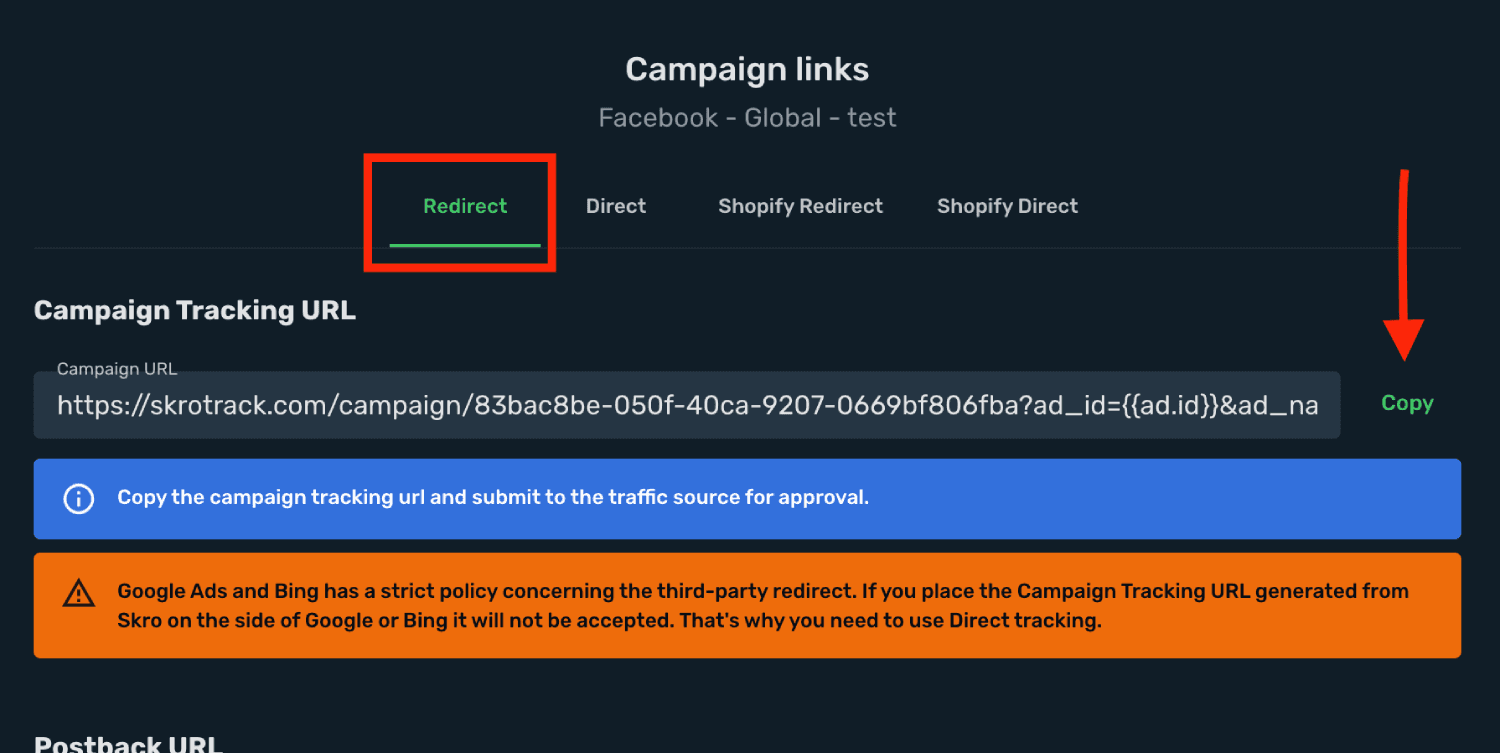
Your Hotmart integration is complete! You can now use the Skro Campaign Tracking URL in Facebook Ads (or any other traffic source). Remember: all traffic must go through your Skro campaign link, otherwise the tracking will not work.
Get started with Facebook integration
Verify the setup
Follow a campaign link and complete a test conversion using your provider’s test workflow. Confirm that the original click ID reaches the provider and is returned to Skro, then check the event and revenue in your campaign report.
Troubleshooting
If data is missing, check the selected workspace, integration, campaign, and reporting date range. Compare parameter names and macro values with the examples in this guide before repeating the test.
Related guides
Need help with this guide? Contact Skro support.