

Clickadu integration
Set up Clickadu tracking in Skro, configure traffic source parameters, and connect your advertising campaigns.
Supported Ad Formats
- Popunder Ads – Ads that open in a new window/tab behind the main browser, ideal for broad reach.
- Banner Ads – Standard graphic display ads in sizes like 300×250 and 300×100.
- Instant Text Message (ITM) – Clickable text messages often used for mobile engagement.
- In-Page Push Ads – Native-style notifications that appear within a webpage without subscription requirements.
- Video Pre-Roll – Video ads shown before the main video content, using IAB VAST protocol.
- SKIM Ads – Ads triggered by clicks on selected text or links, often yielding high CTR.
Integration enables you to track all your campaigns, zones, ads, etc. Additionally, it provides a comprehensive overview of your cost and conversions for the optimization.
Step 1. Create a Clickadu traffic source and configure the postback URL
-
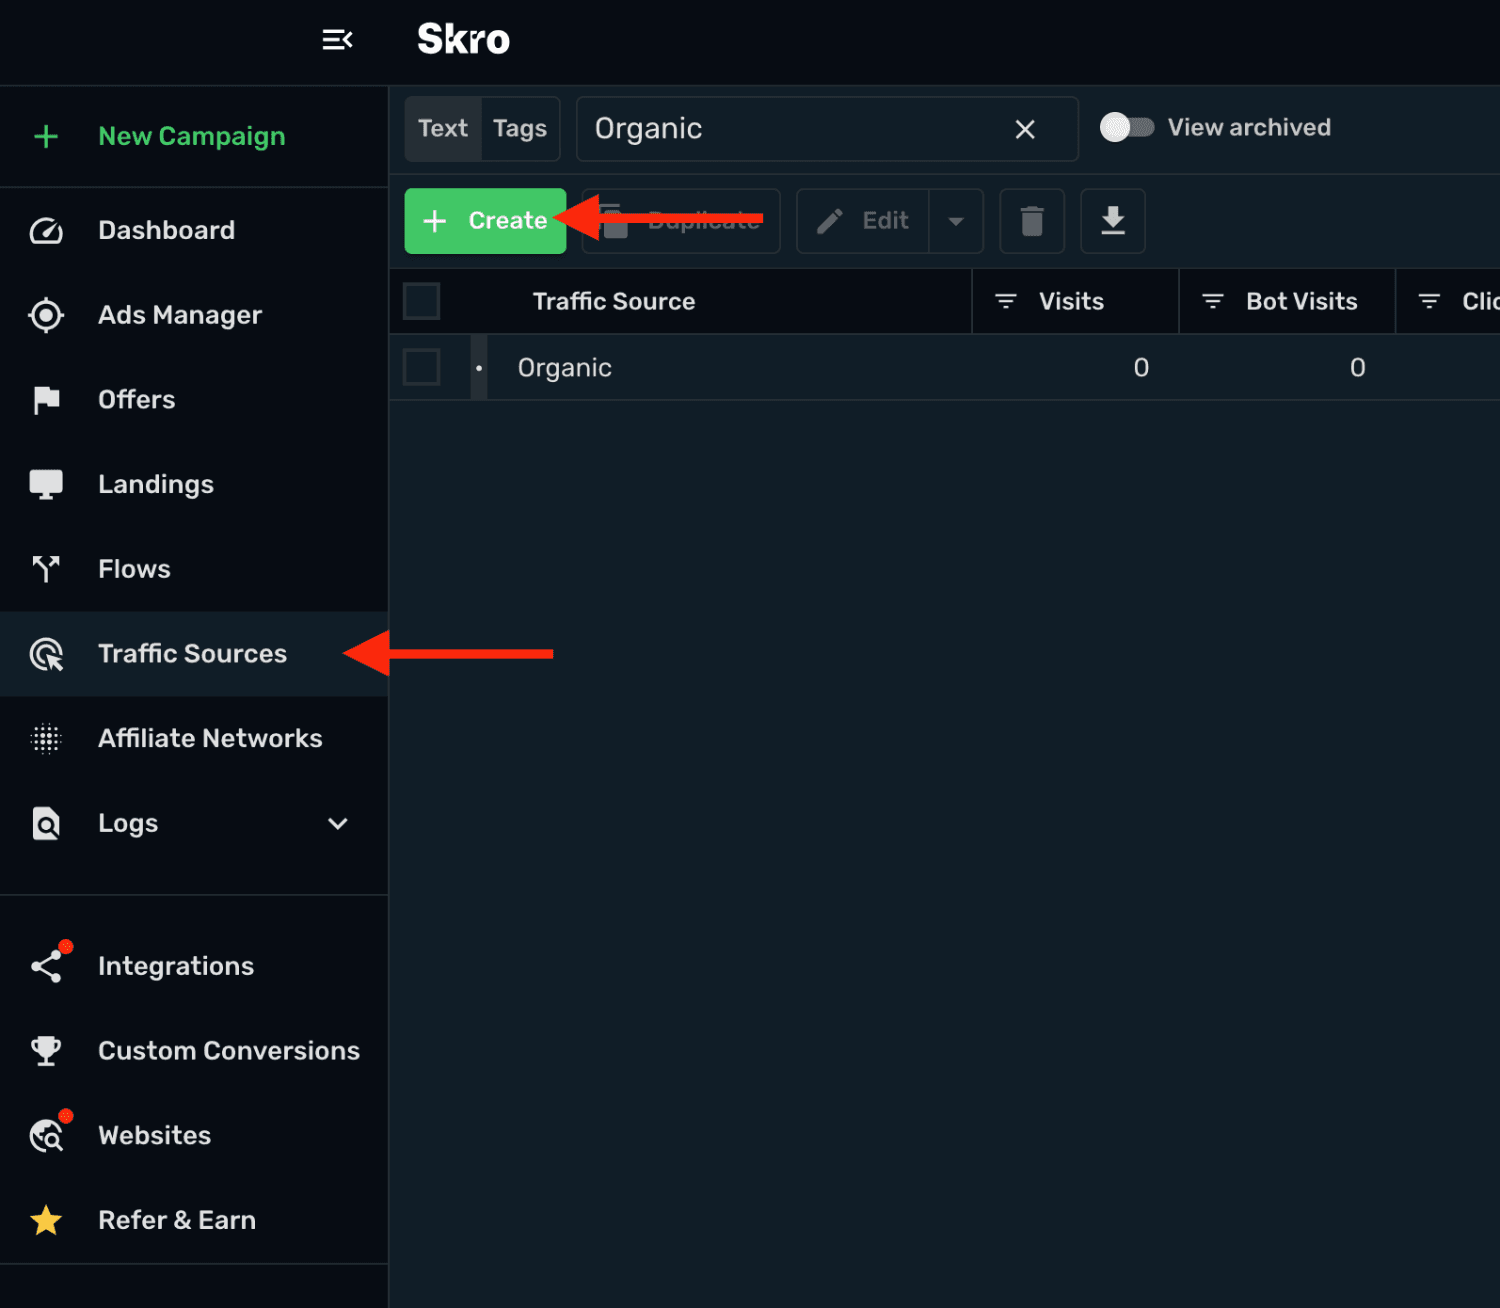
Navigate to Traffic Sources.
-
Click Create.
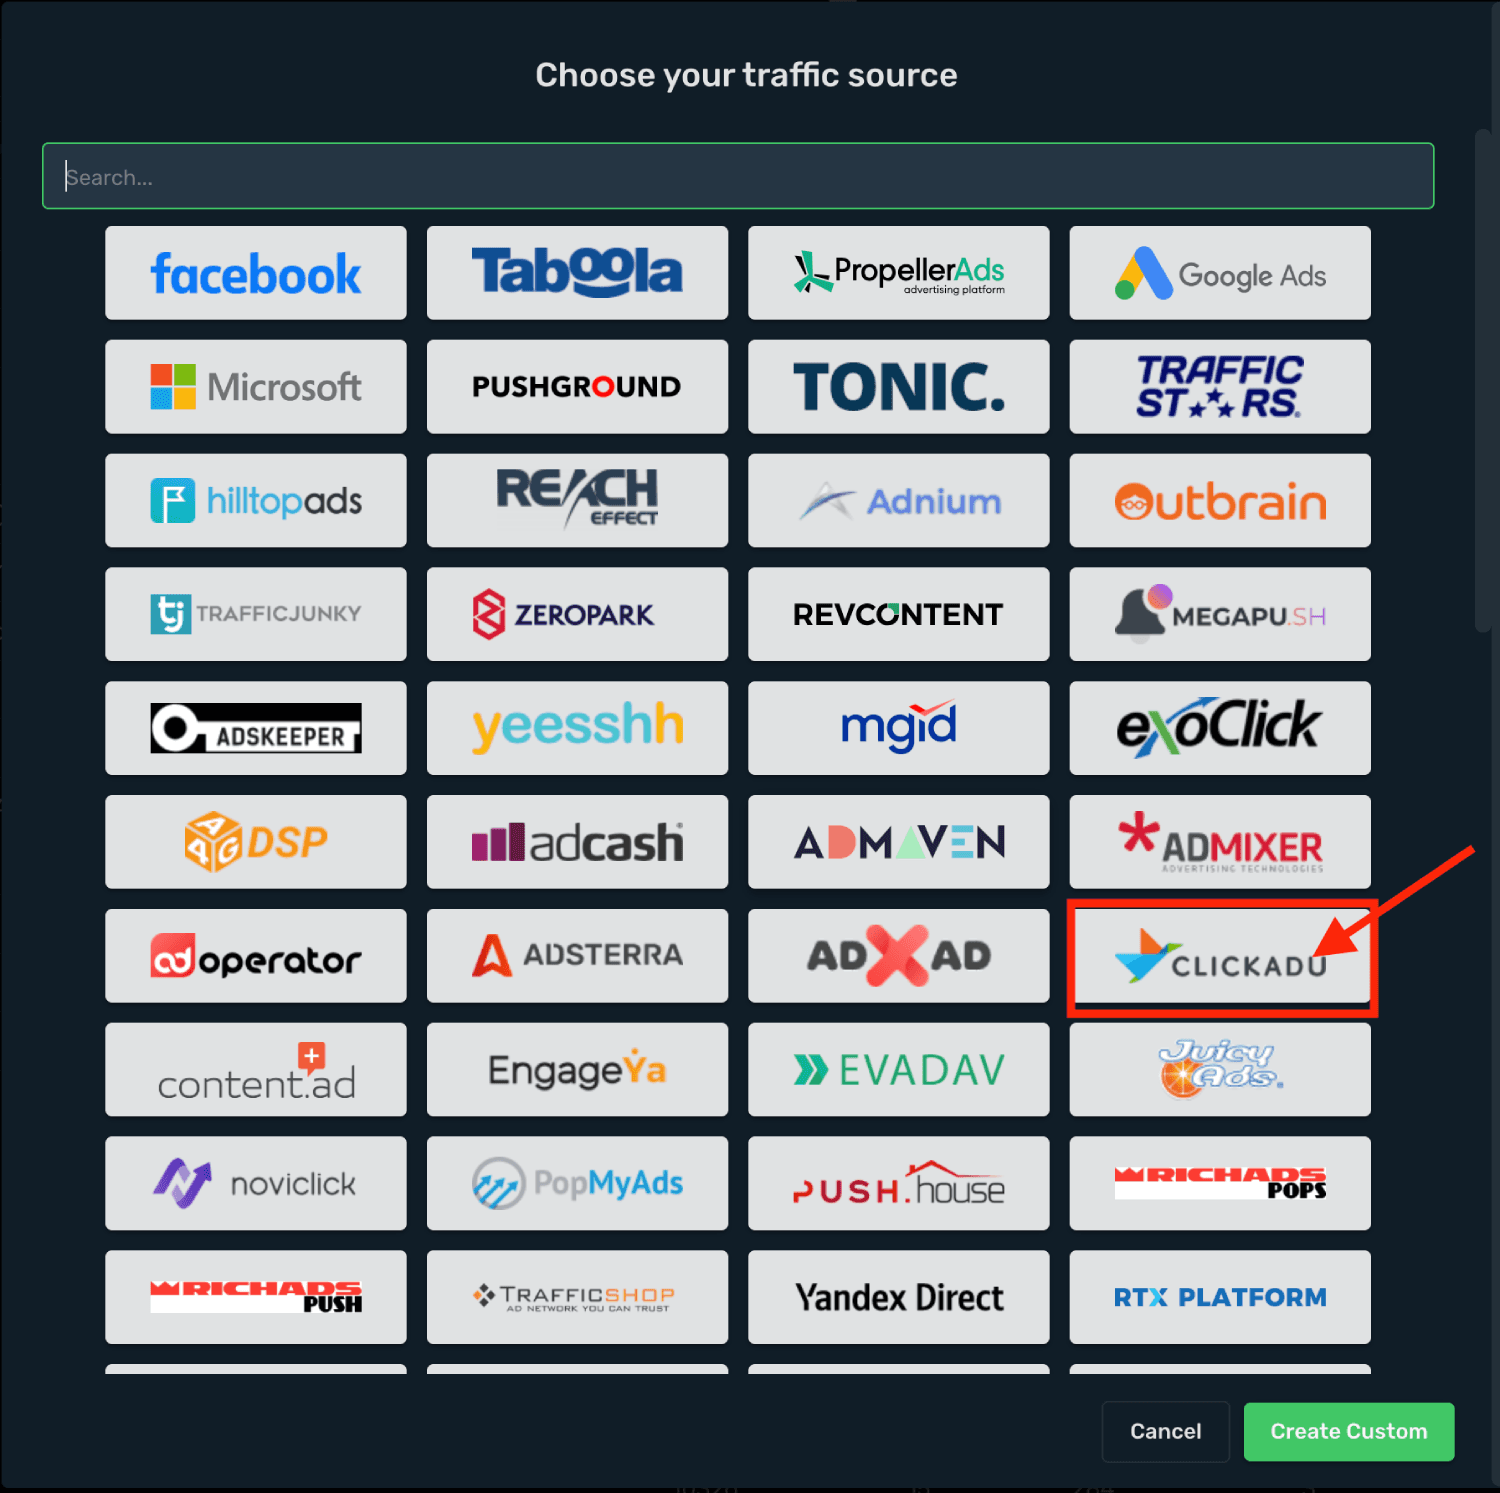
- Search clickadu and select the Clickadu template.
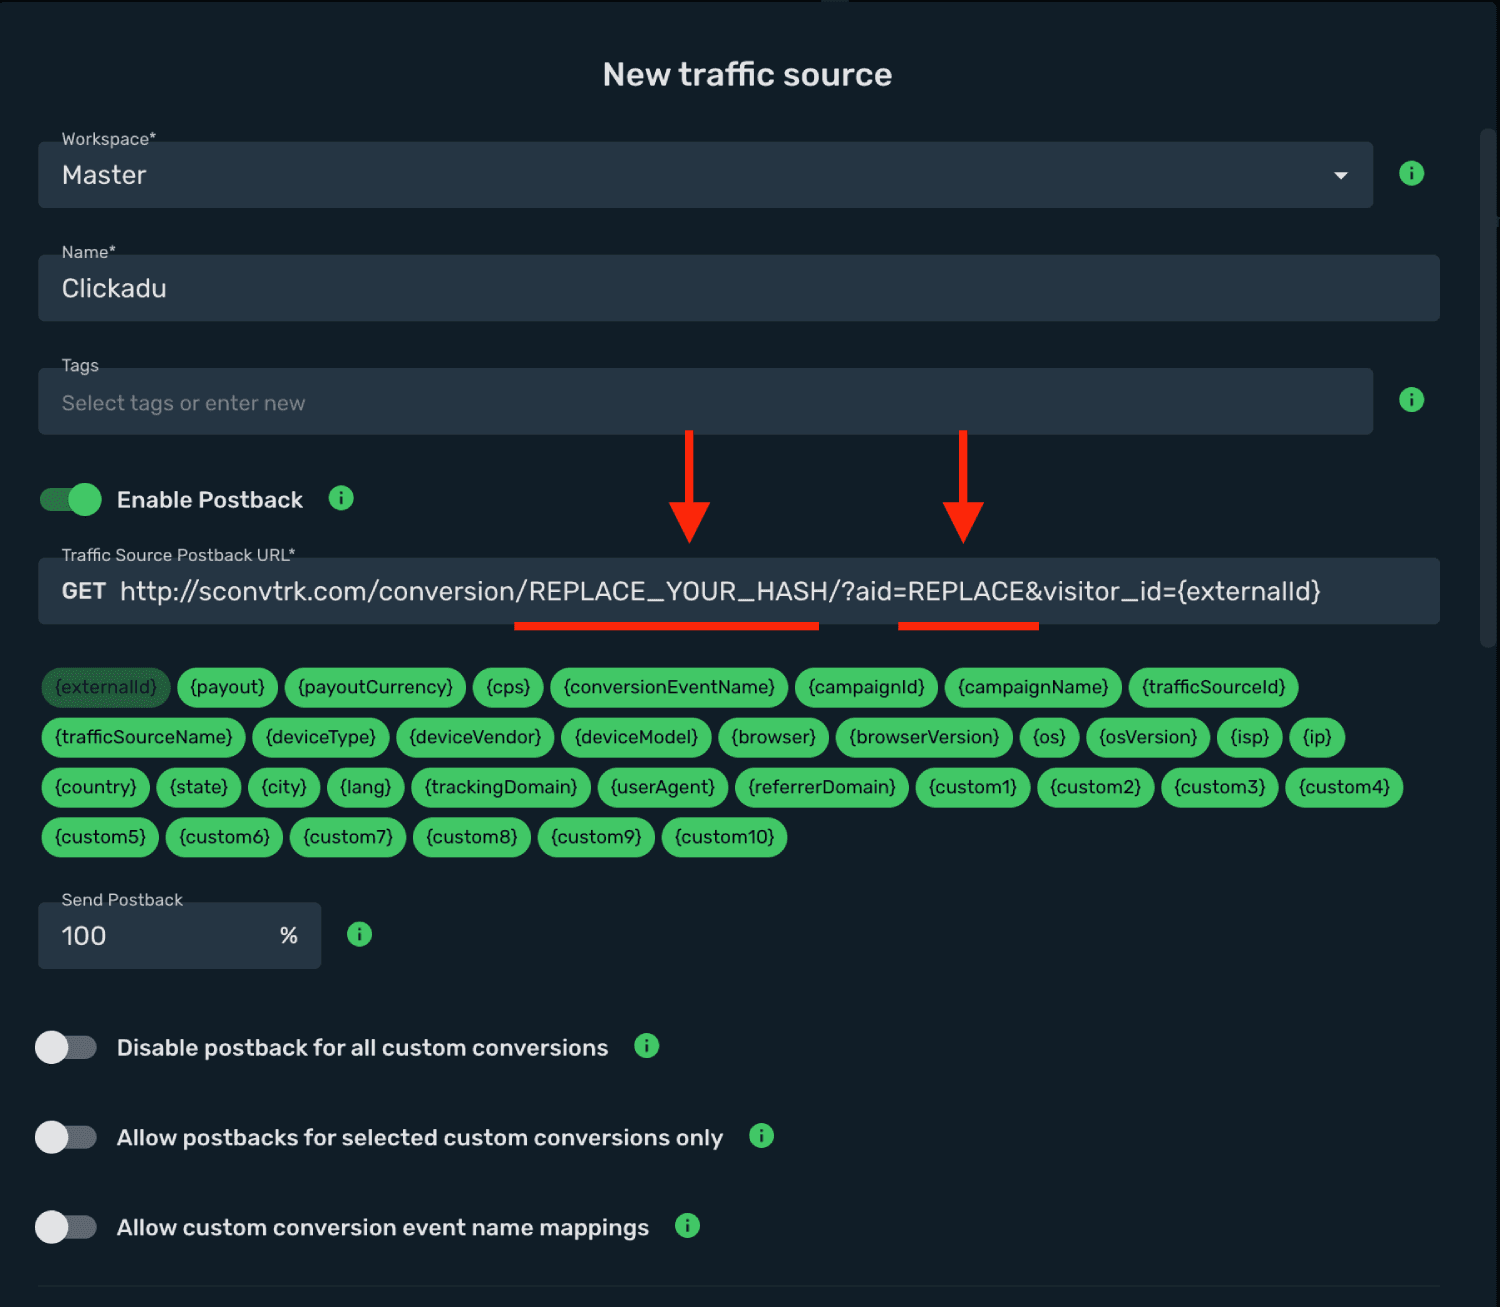
- You need to change 2 values on your postback URL.
-
Log in to your Clickadu account.
-
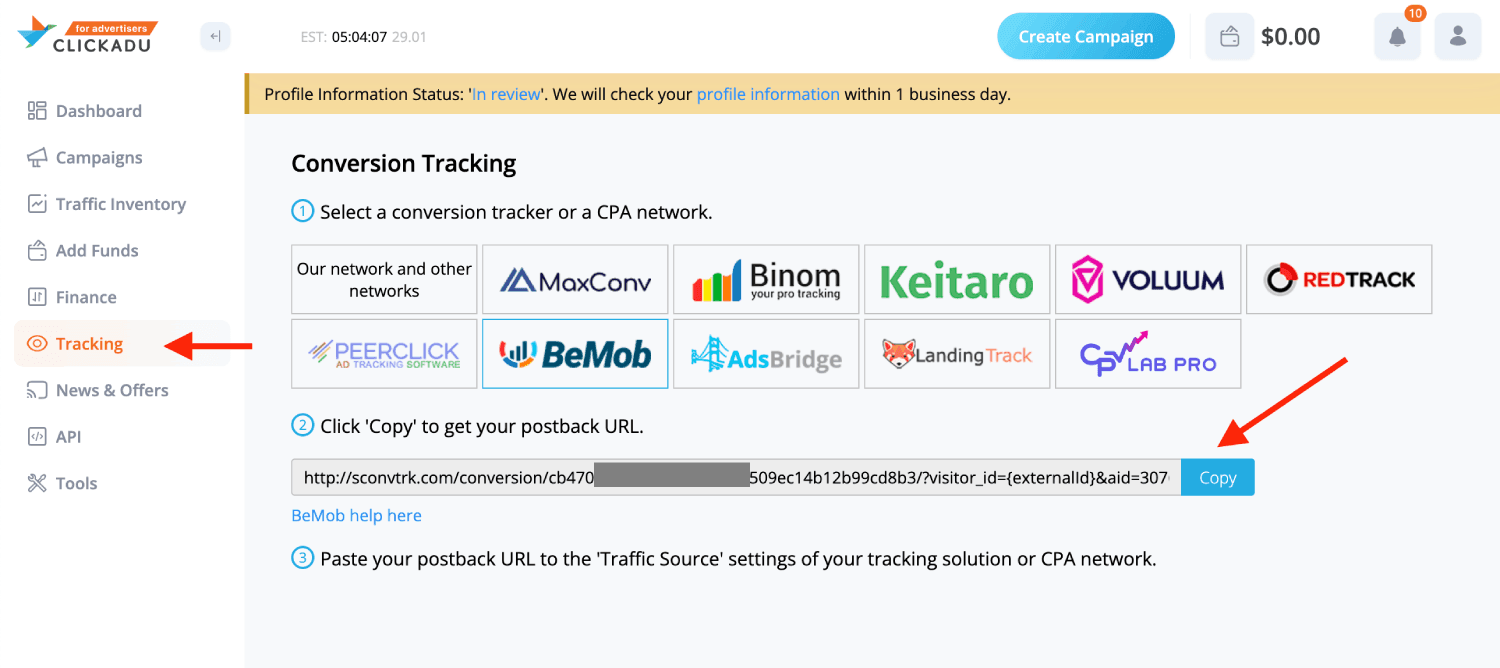
Go to Tracking section and click Skro logo, then copy the Postback URL to your clipboard.
-
Go back to Skro and replace the postback URL.
-
Final postback URL must look like this:
http://sconvtrk.com/conversion/cb4705c0bda444444409ec14b12b99cd8b3/?visitor_id={externalId}&aid=111111
- All tracking parameters are already prefilled for you.
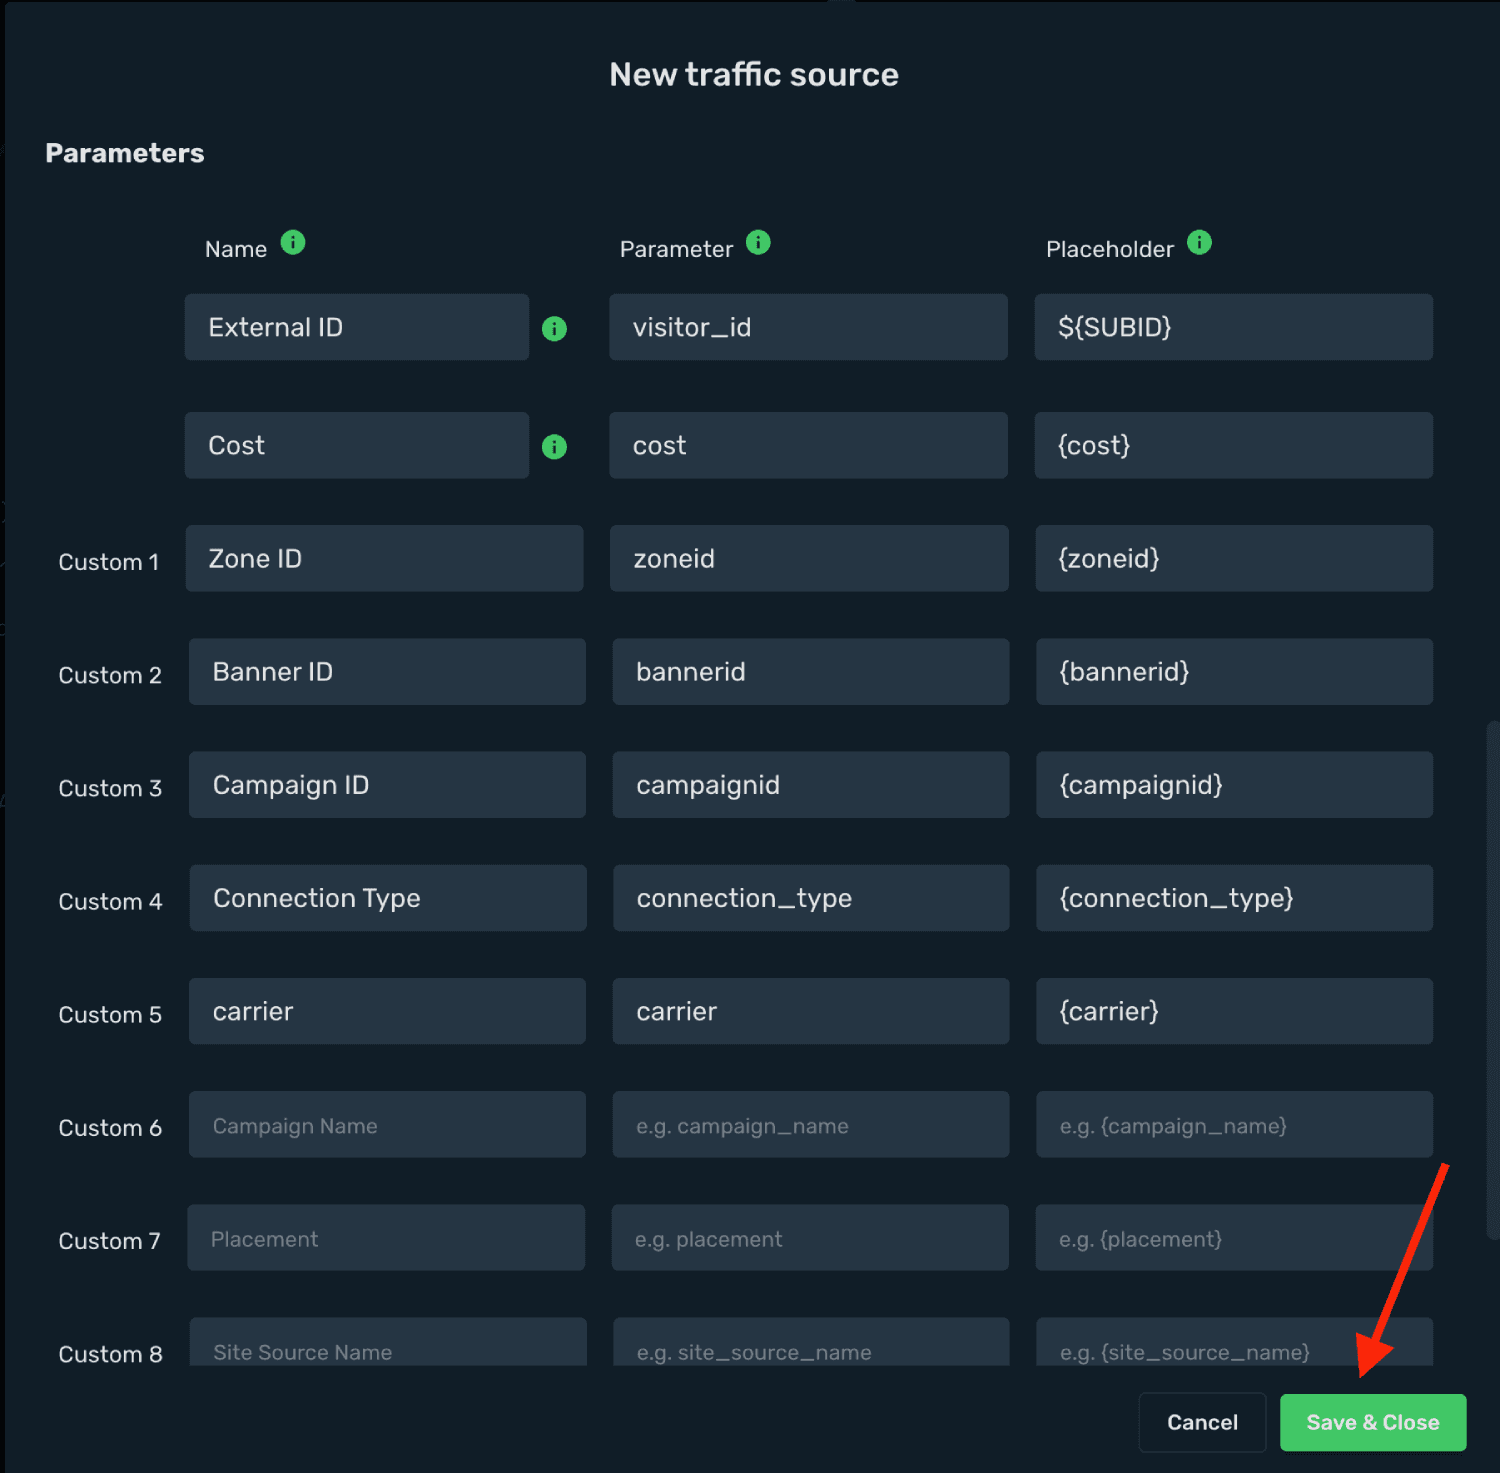
- Click Save & Close.
The integration is ready. Continue by creating a campaign.
Step 2. Create a campaign on Skro
-
Go to Ads Manager and click Create.
-
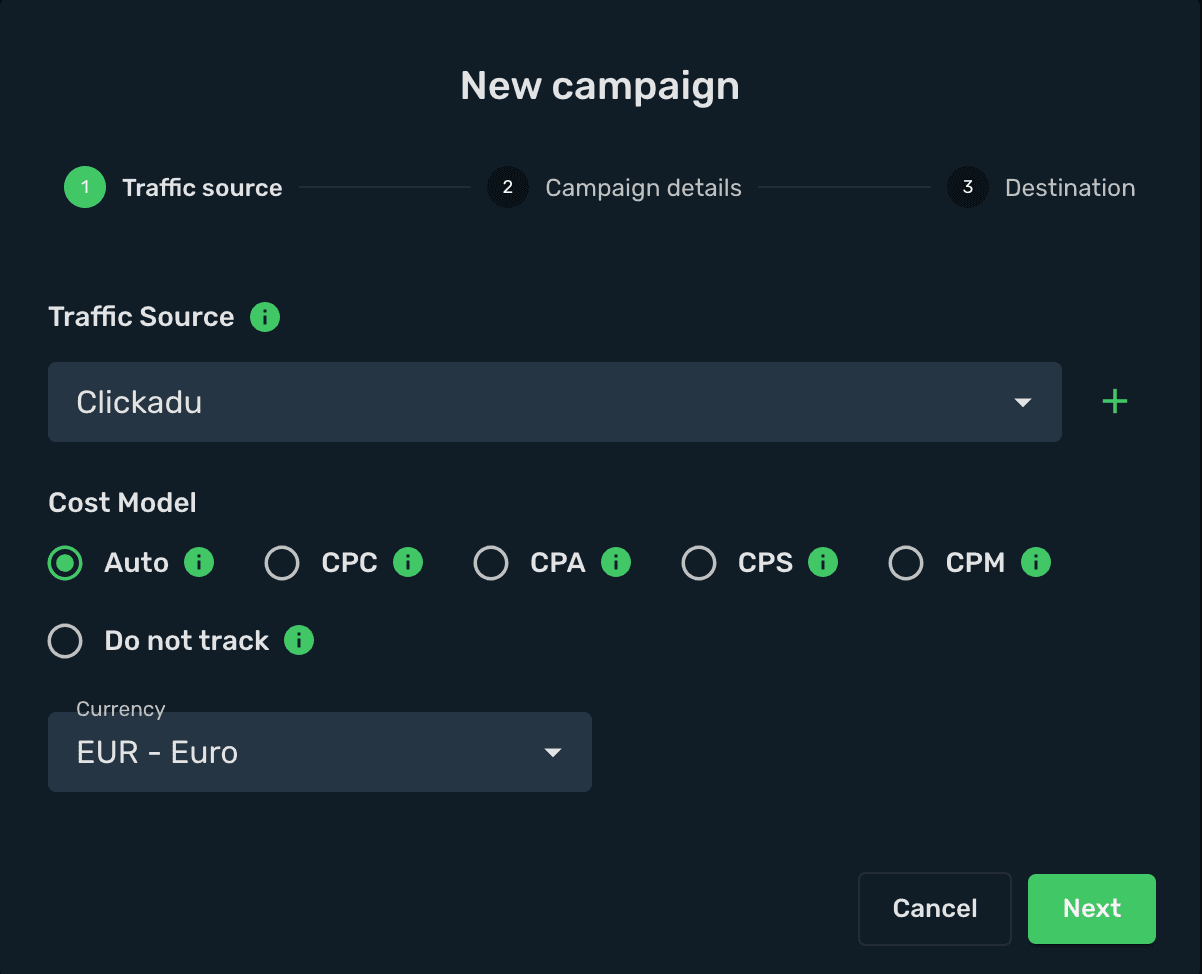
Select your Traffic source and click Next.
-
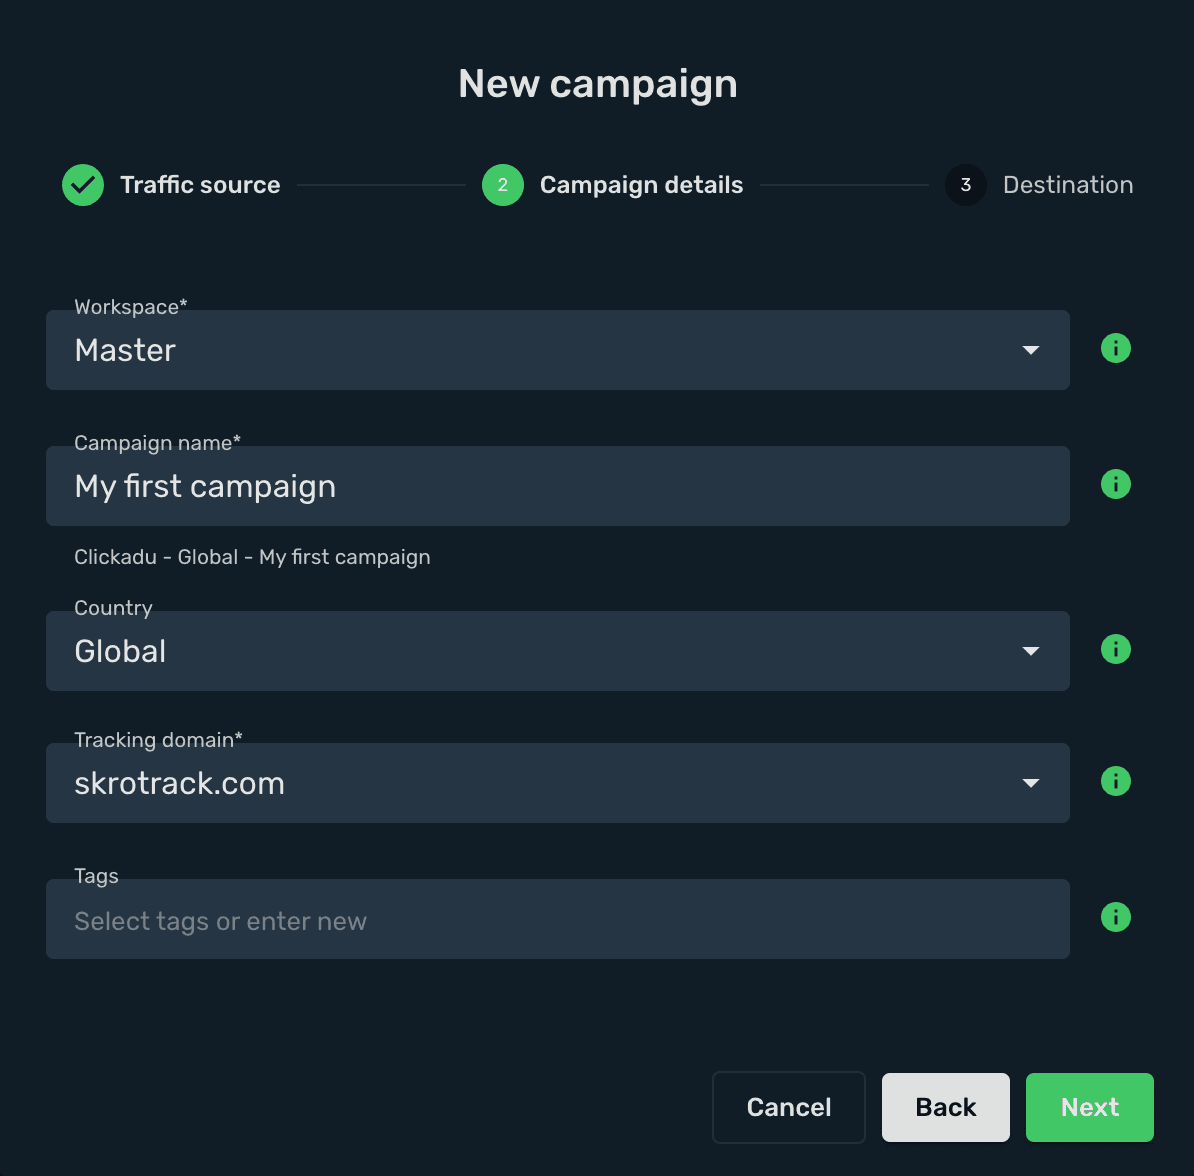
Select your campaign Workspace.
-
Enter a descriptive campaign name.
-
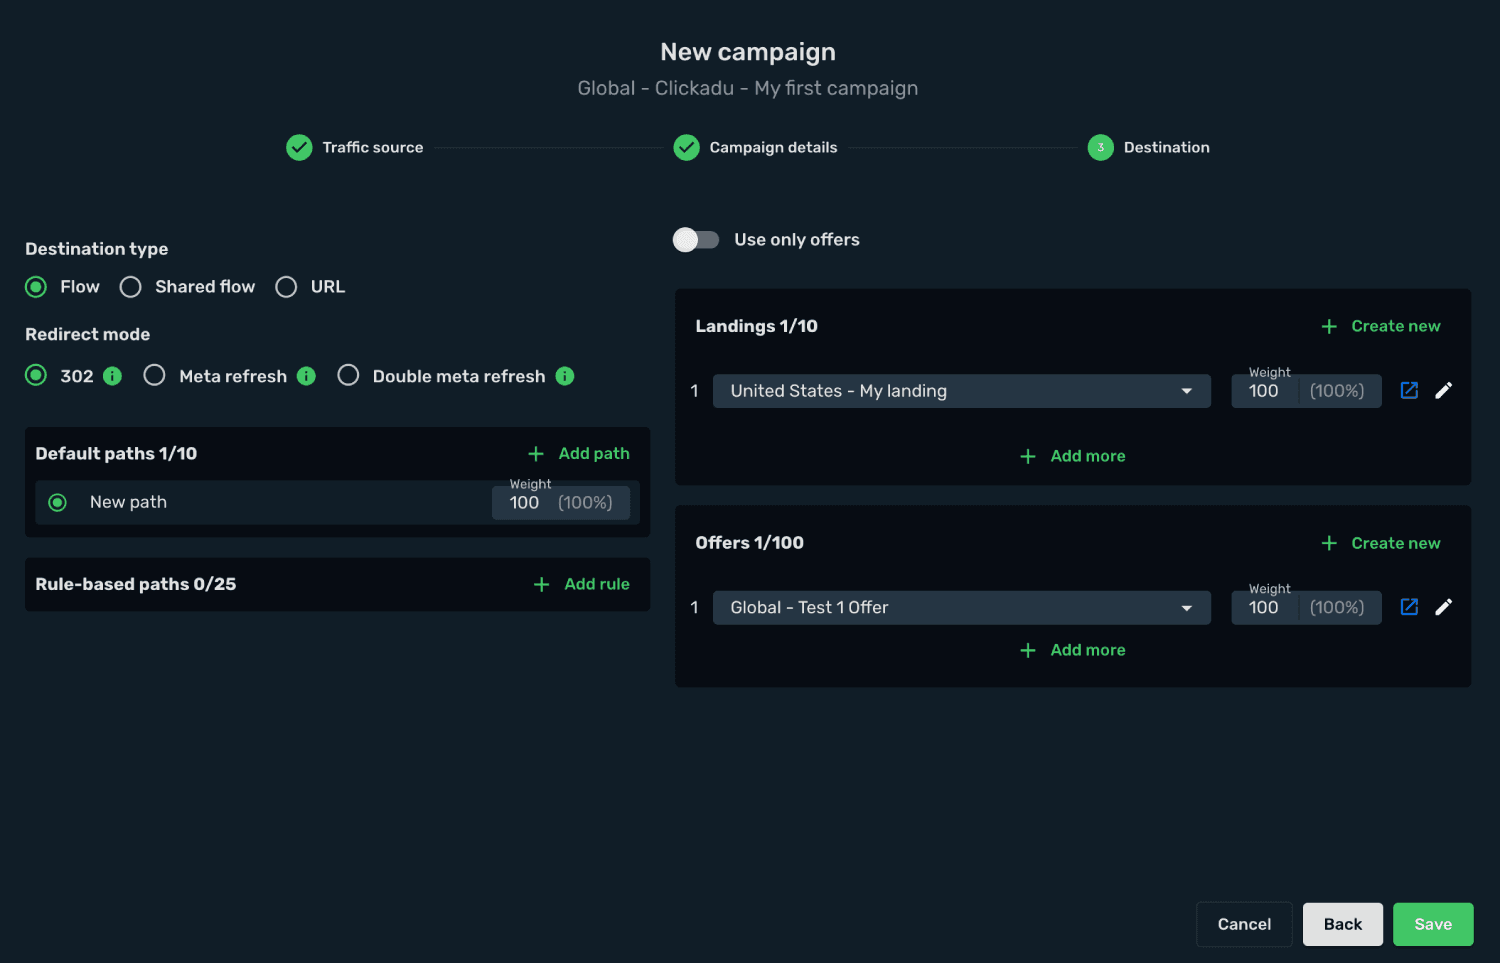
Select or create your landings and offers.
-
Click Save.
- Copy the Campaign Tracking URL to clipboard.
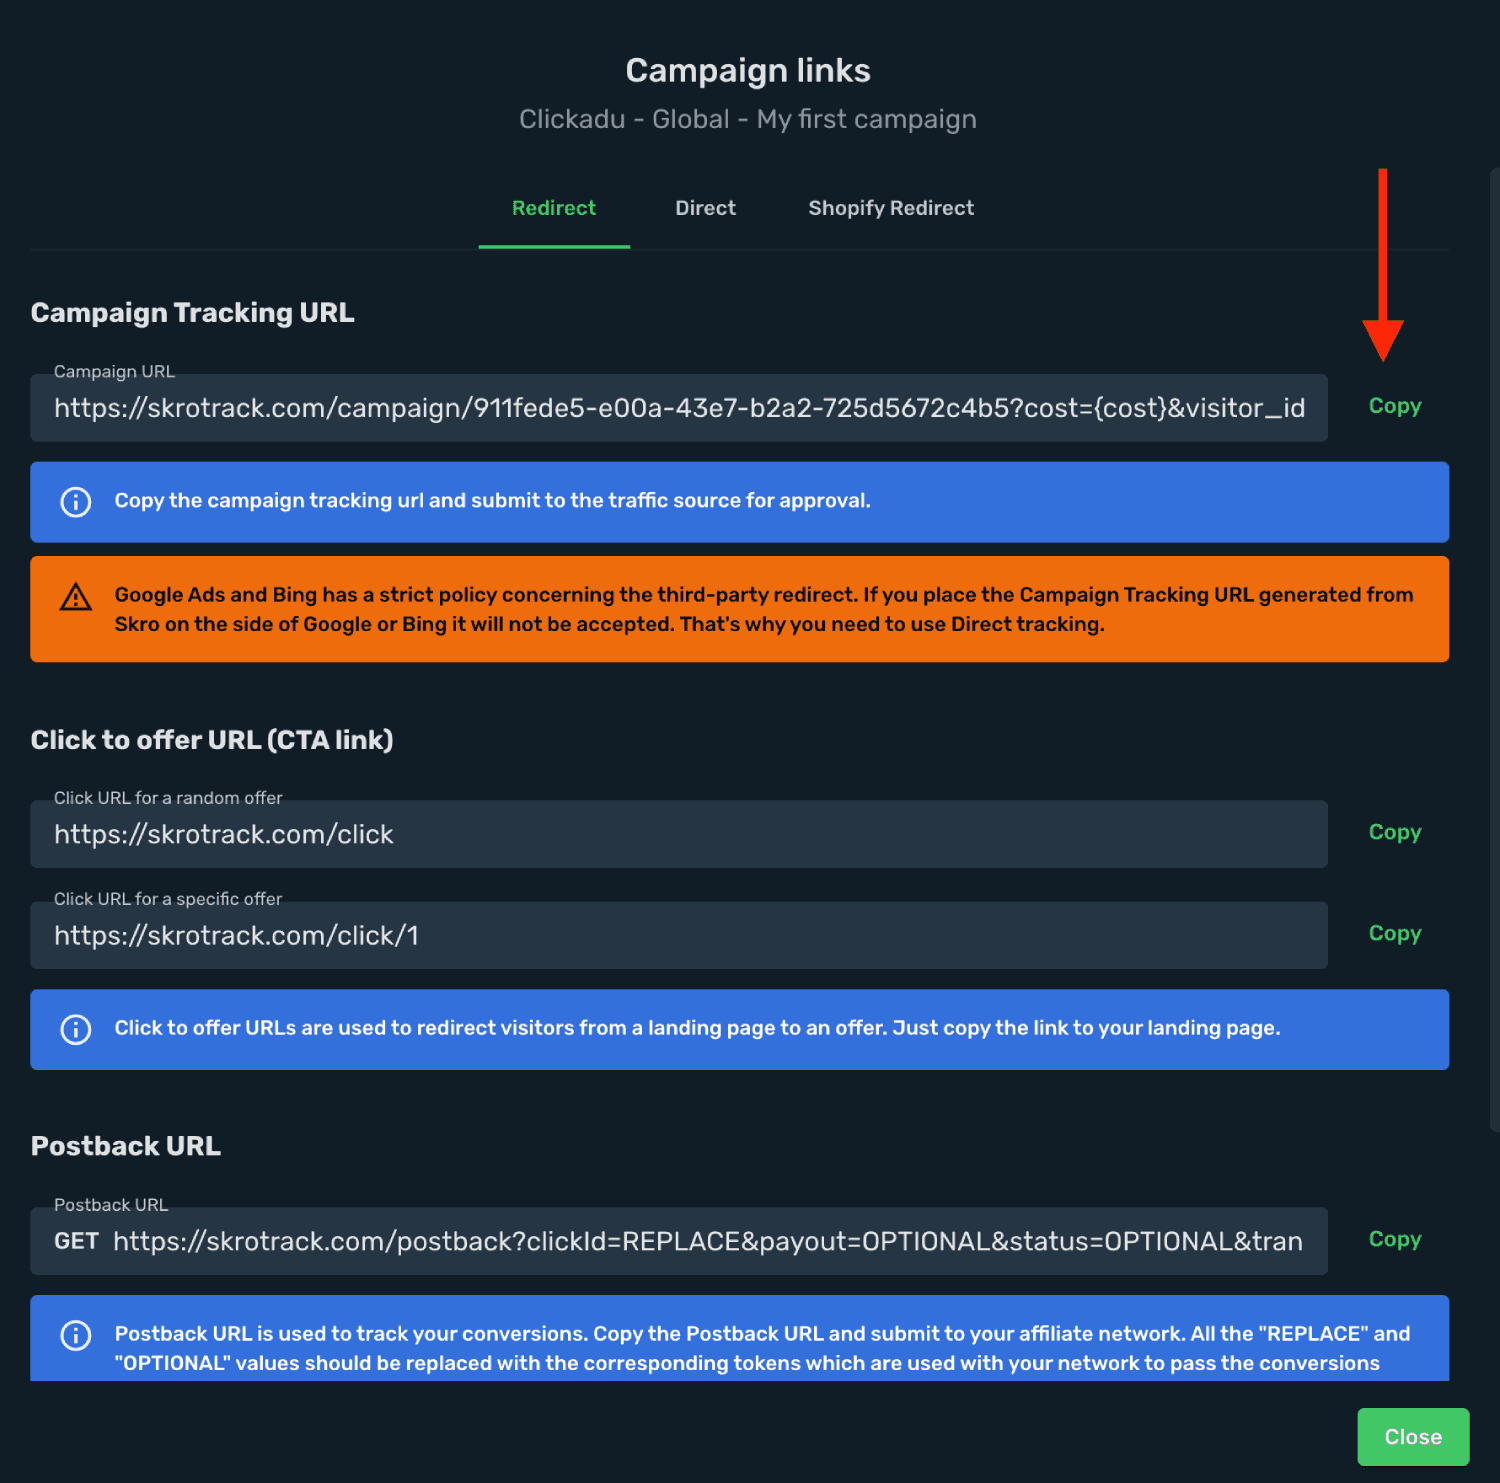
Step 3. Create a campaign on Clickadu
-
Log in to your Clickadu account.
-
Navigate to the Campaigns view and click Create Campaign.
-
Click Target URL field.
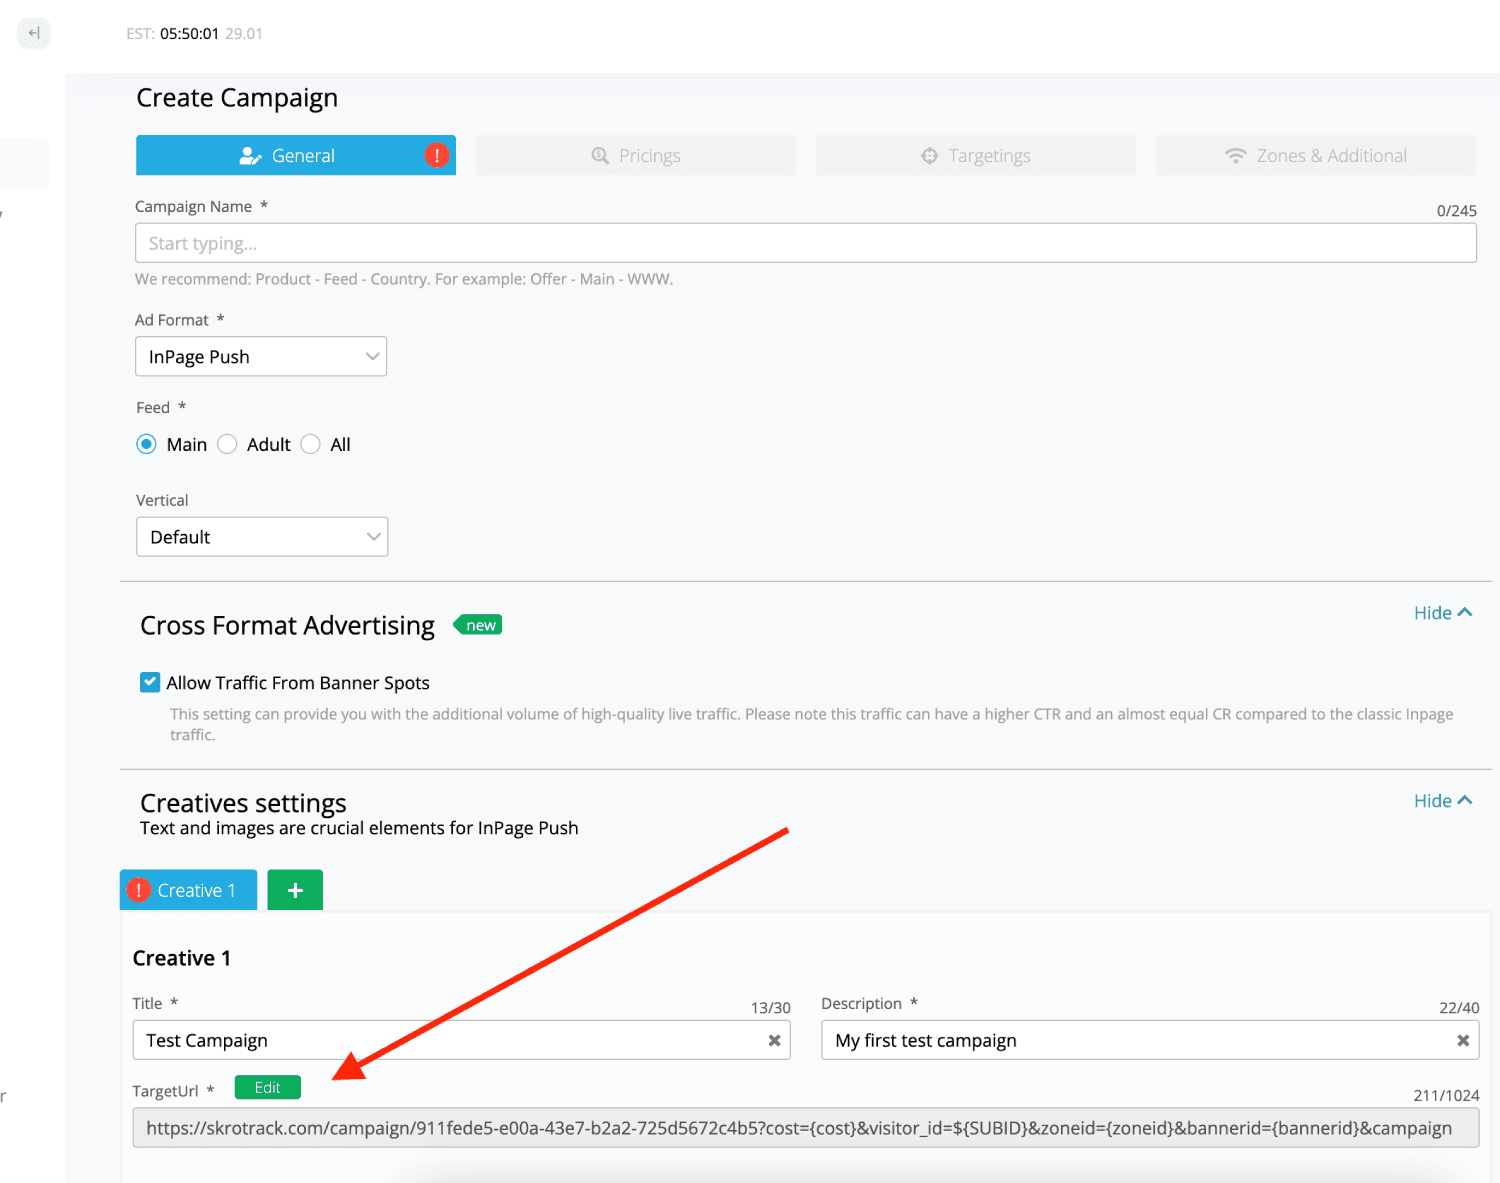
- Paste the Skro campaign tracking link to that Target URL field with tracking parameters.
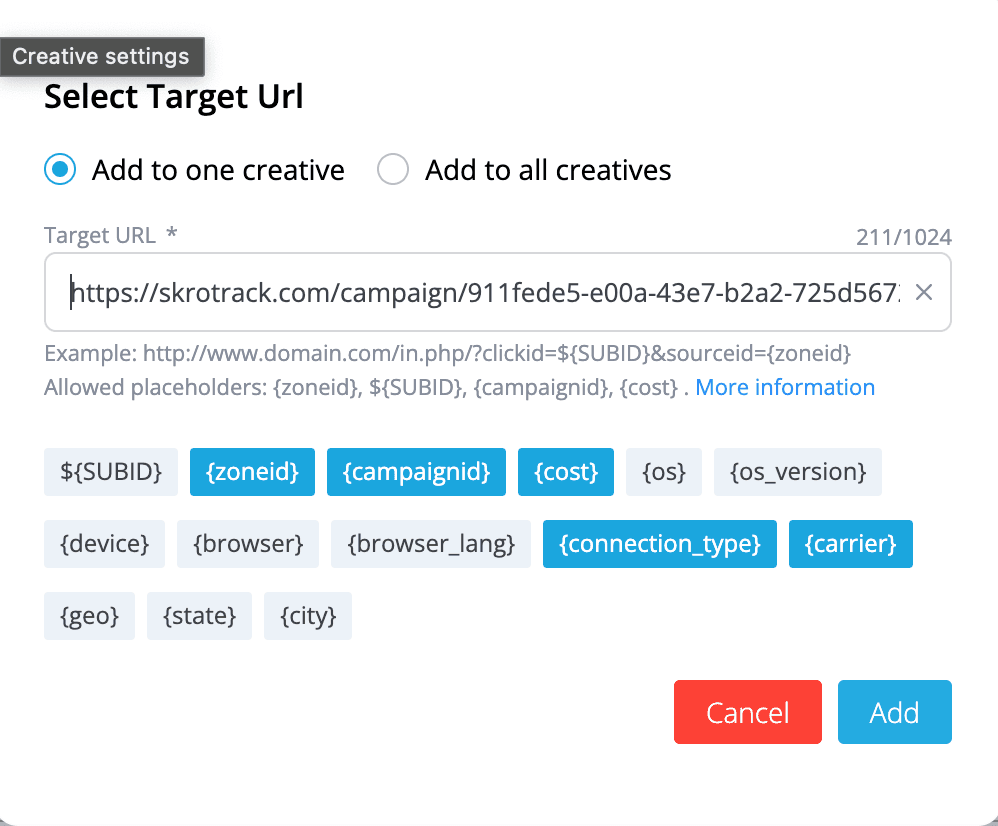
- Fill all other fields where needed and start your campaign.
Verify the setup
Open the generated campaign URL and check that the visit appears in Skro. Confirm that traffic source macros resolve to actual values. If you send conversions back to the source, verify a test conversion in both systems.
Troubleshooting
If data is missing, check the selected workspace, integration, campaign, and reporting date range. Compare parameter names and macro values with the examples in this guide before repeating the test.
Related guides
Need help with this guide? Contact Skro support.