

RichAds integration
Set up RichAds tracking in Skro, configure traffic source parameters, and connect your advertising campaigns.
Step 1. Create a RichAds traffic source and configure the postback URL
-
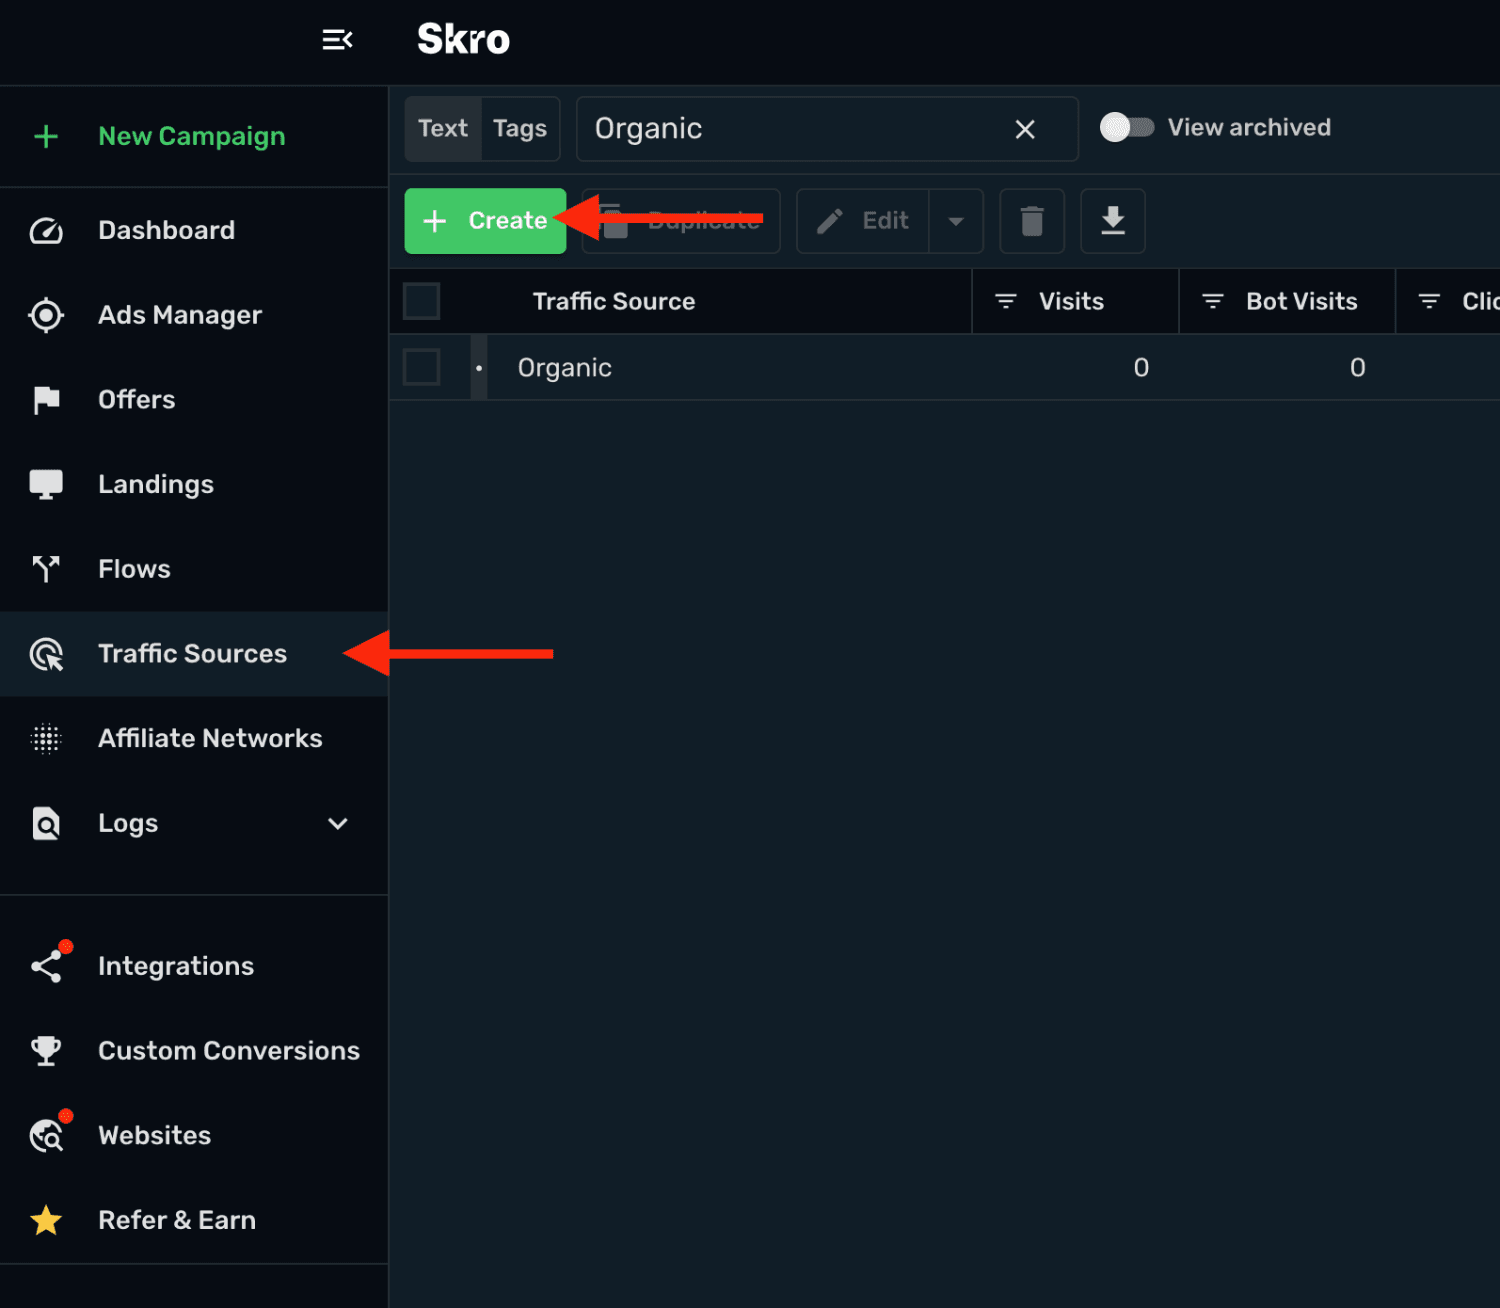
Navigate to Traffic Sources.
-
Click the Create.
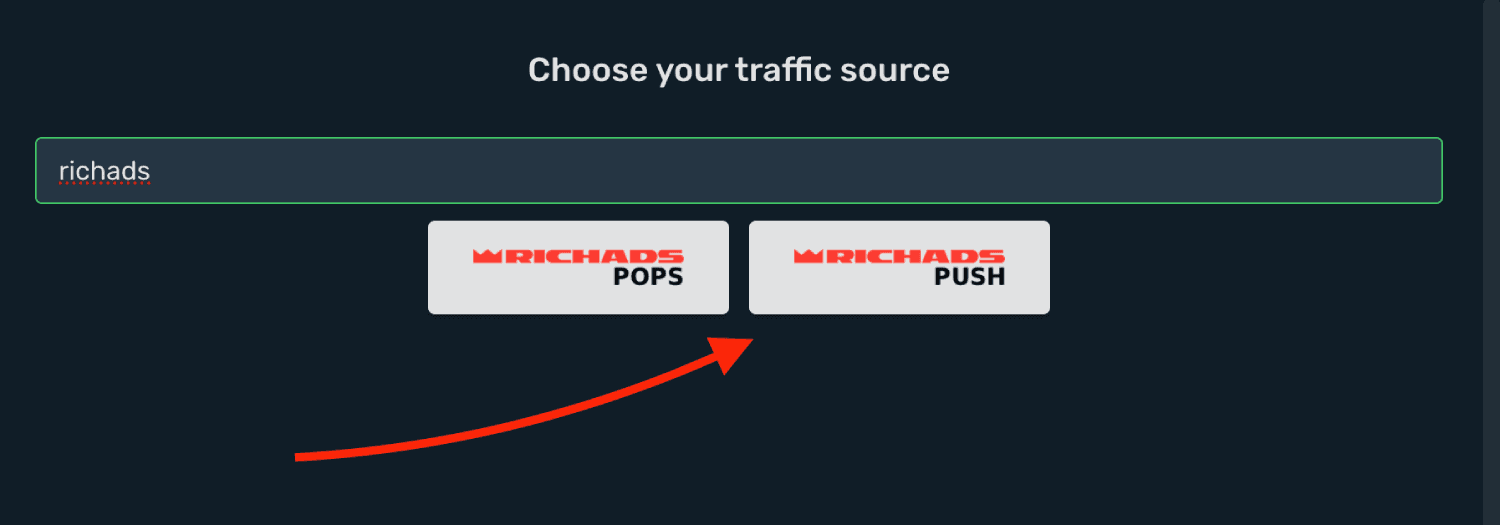
- Search for richads and click the RichAds Pops or RichAds Push logo. It depends on what type of ads are you going to run.
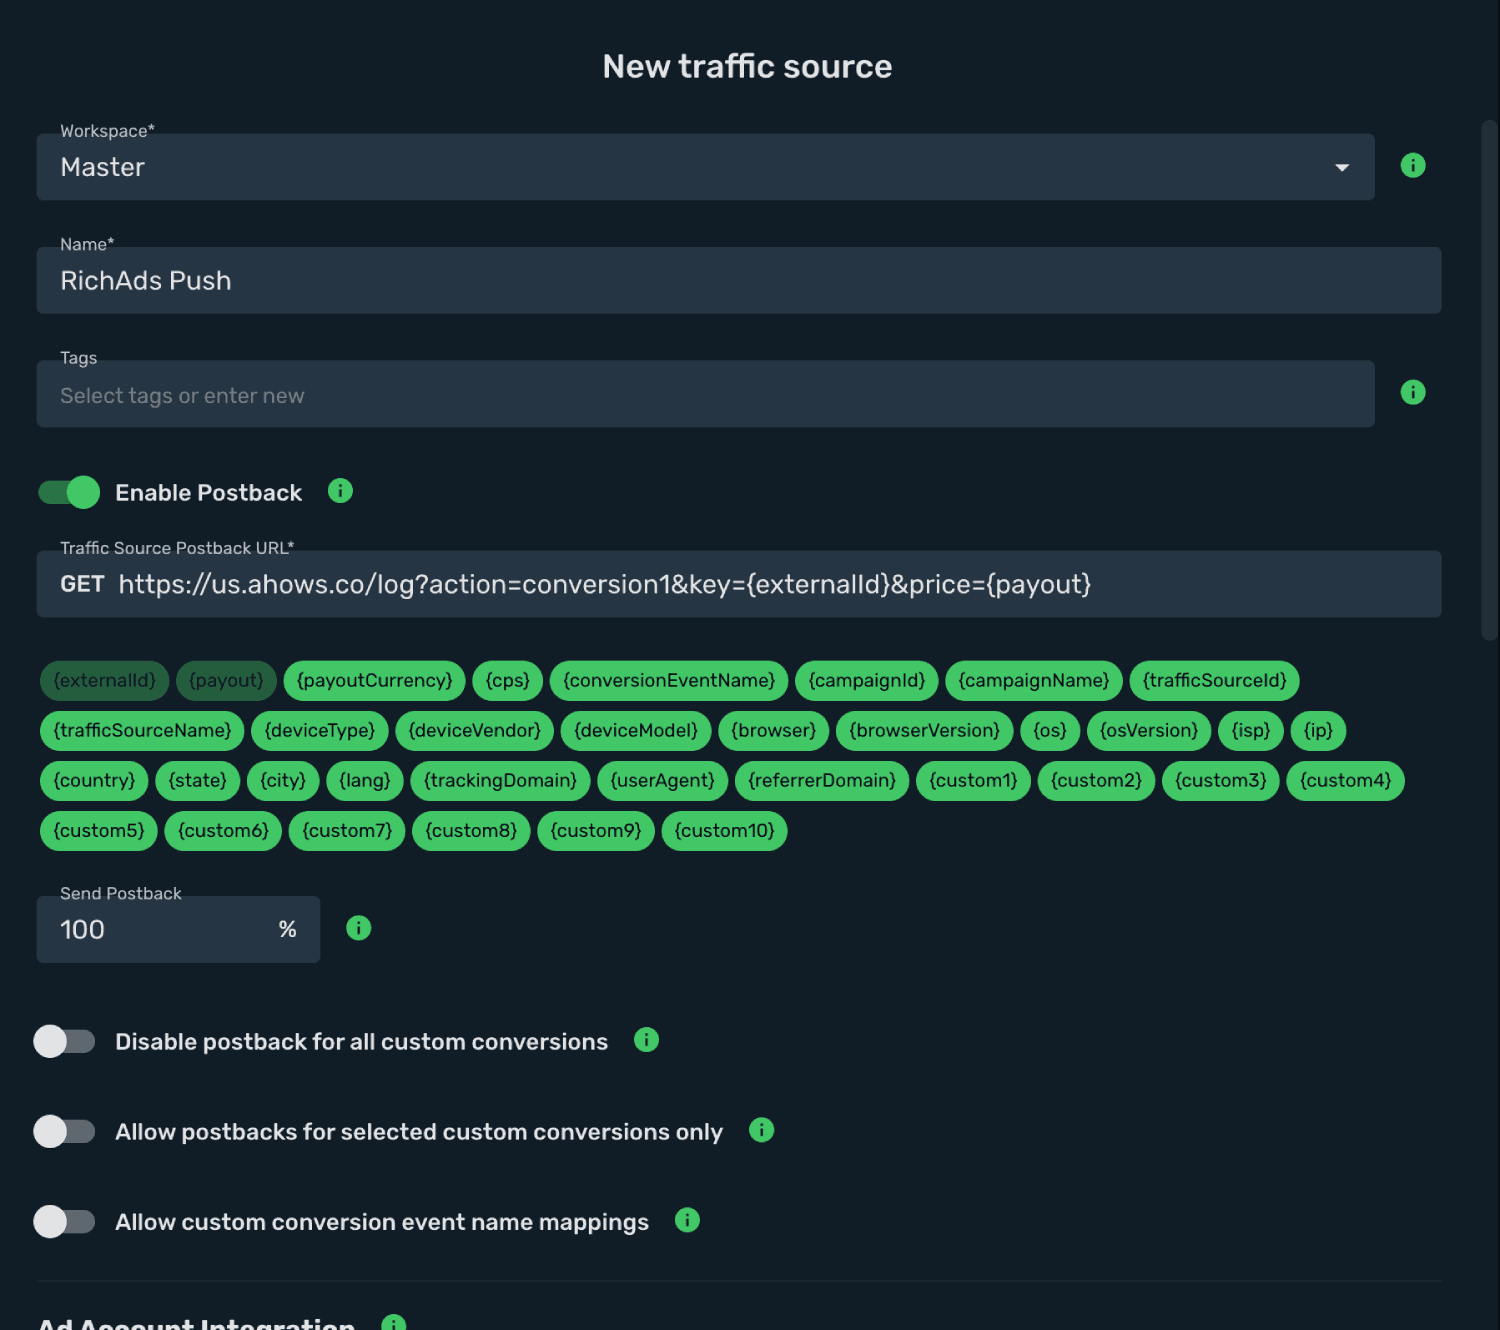
- Choose your Workspace and Traffic Source Postback URL is already prefilled for you. But you can double check if the postback URL domain looks same.
-
Log in to your RichAds account.
-
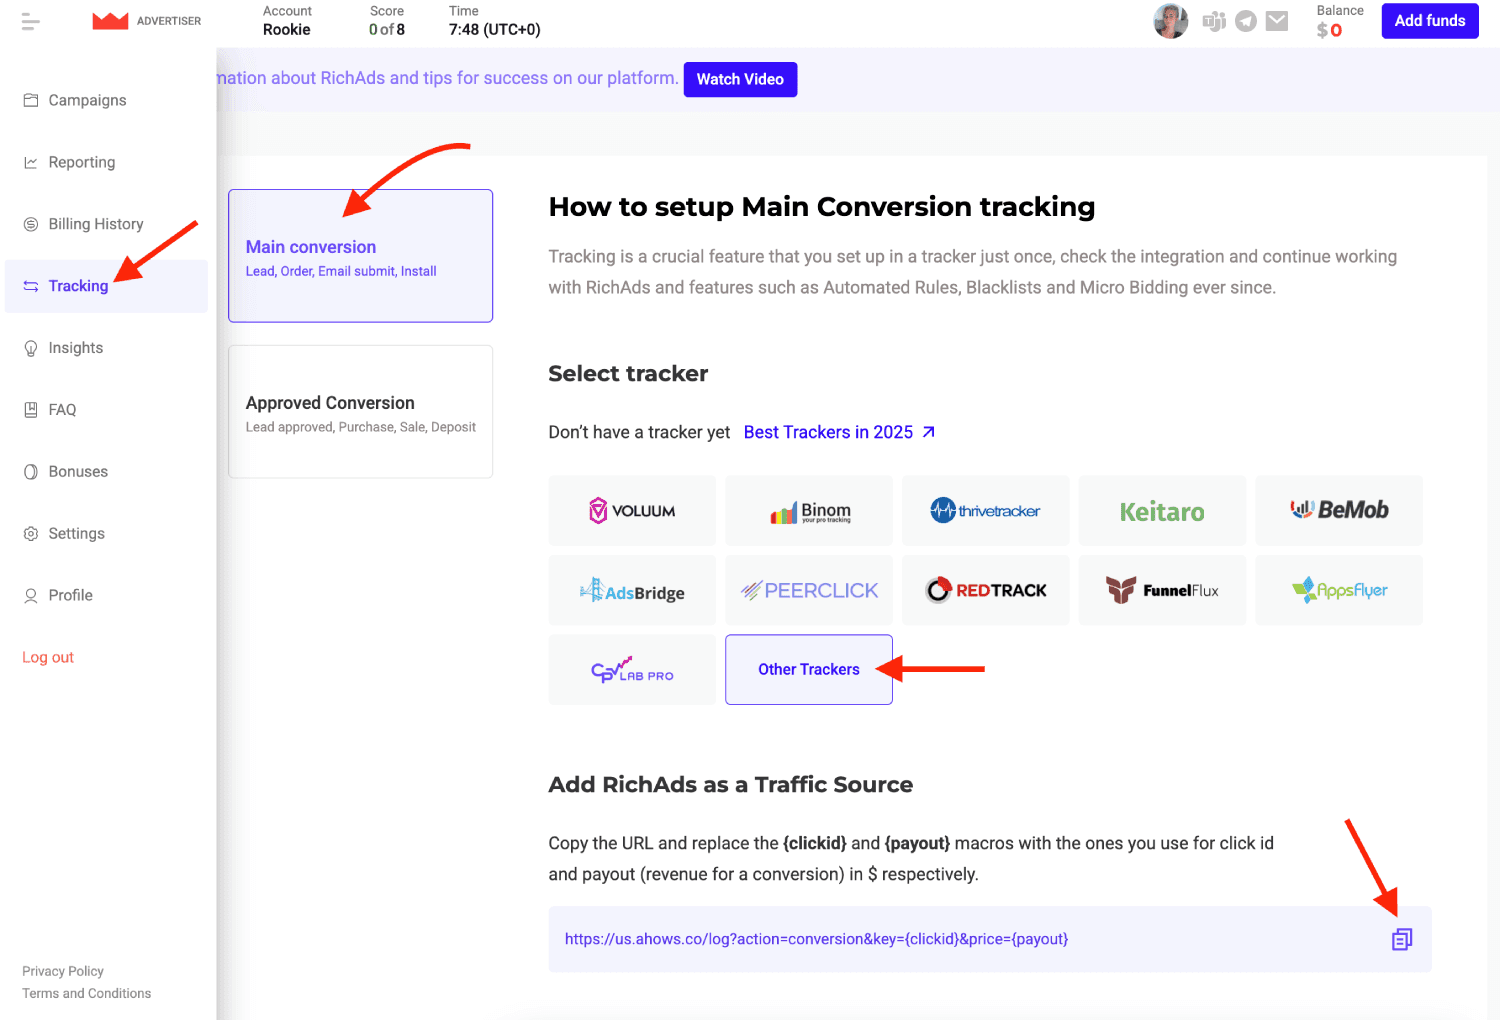
Go to Tracking → Setup Tracker → Main Conversions → Other Trackers.
-
Copy the Postback URL to your clipboard
-
Go back to Skro and replace the postback URL with the updated values.
-
Final postback URL look similar to this:
https://us.ahows.co/log?action=conversion1&key={externalId}&price={payout}
key={externalId} - This macro replace RichAds click ID.
price={payout} - This macro replace conversion payout.
- All tracking parameters are already prefilled for you.
- Click the Save & Close.
Integration setup is complete, and you are now ready to create your first campaign.
Step 2. Create a campaign in Skro
-
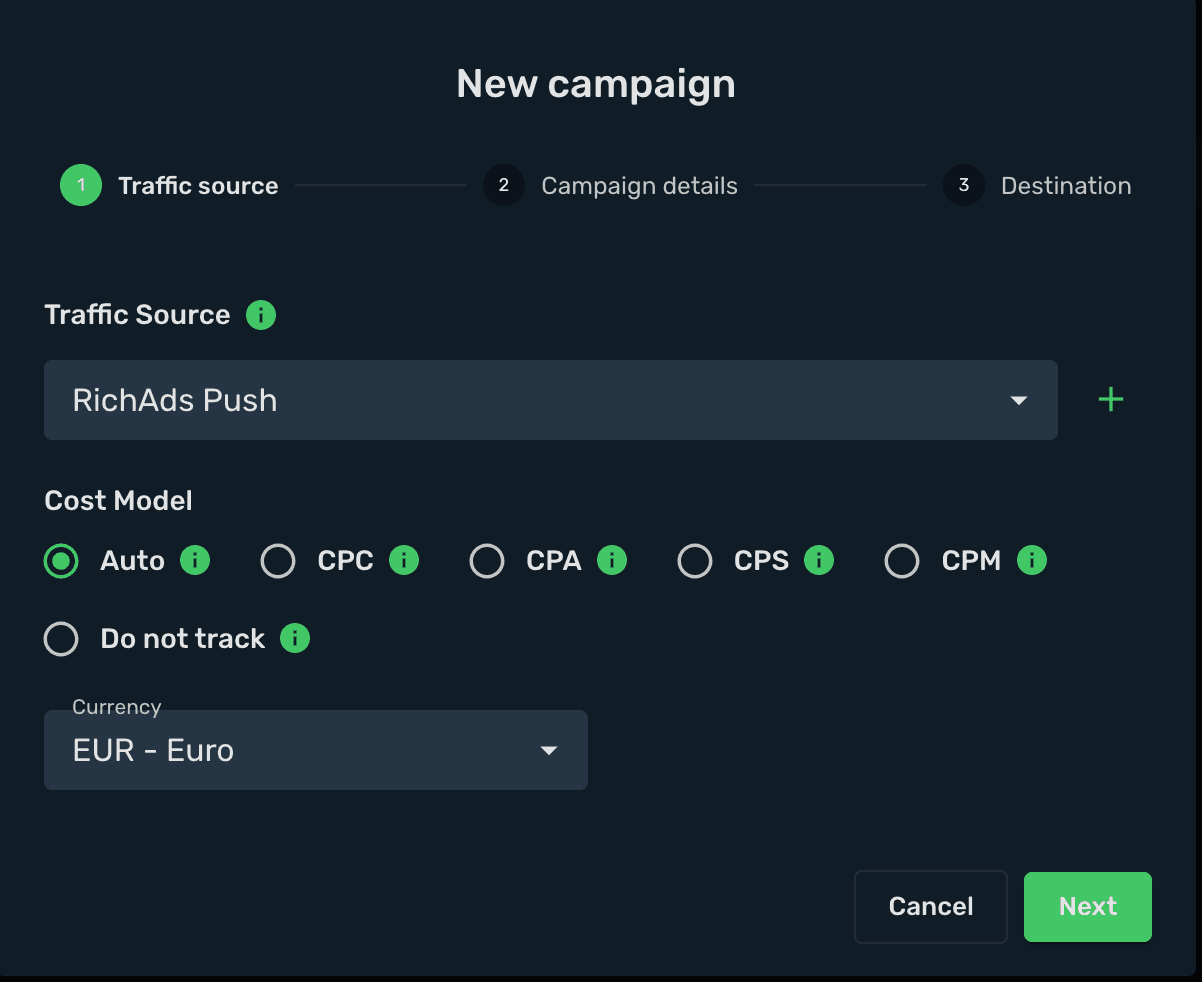
Go to Ads Manager and click the Create.
-
Select your Traffic source and click Next.
-
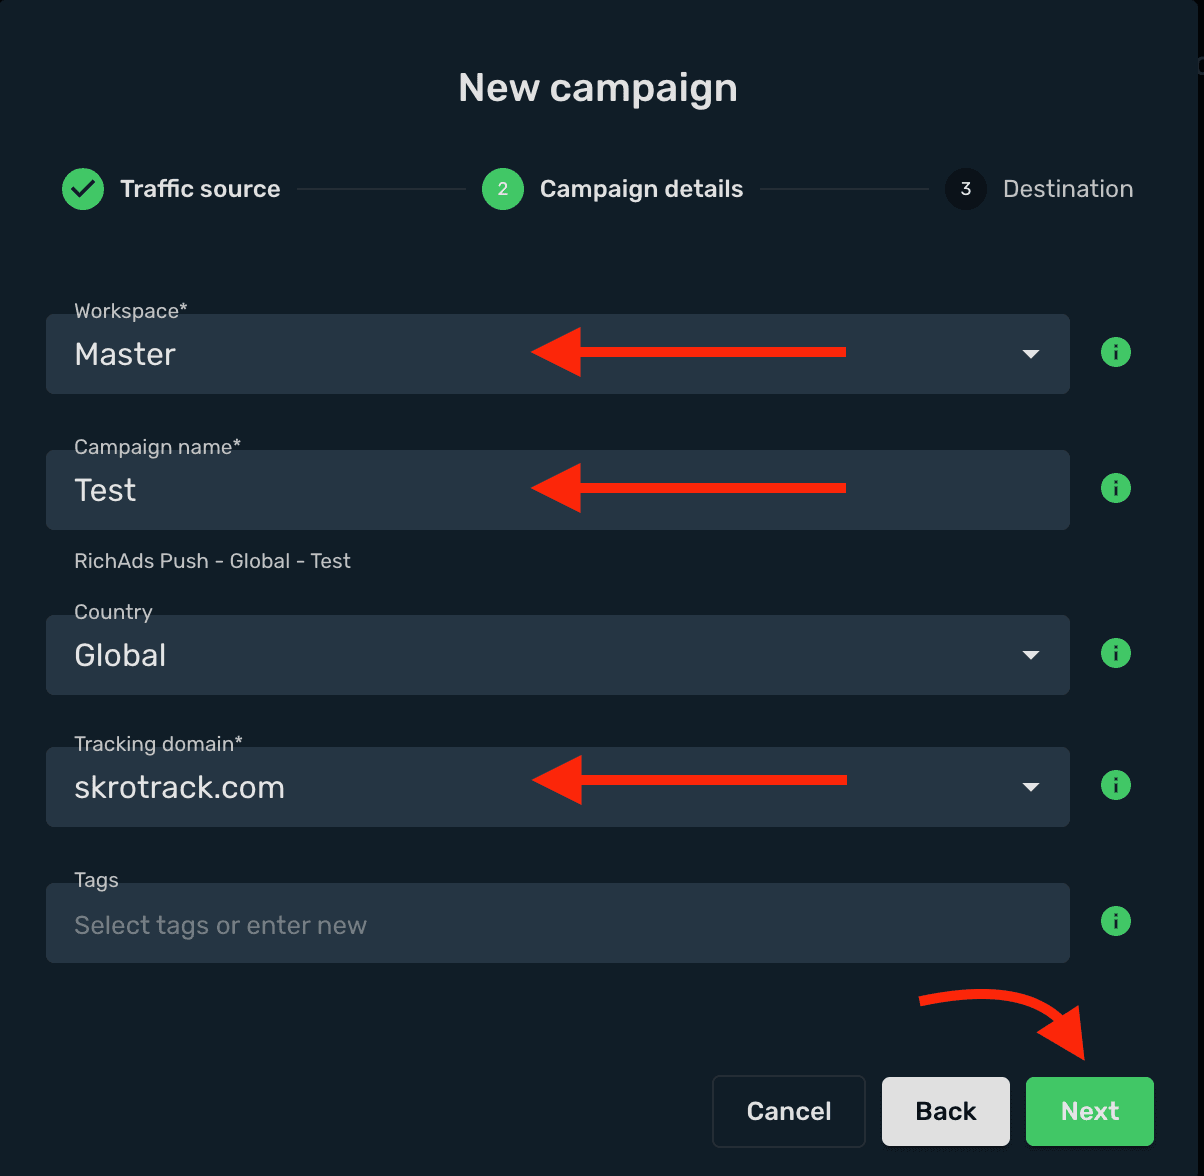
Select your campaign Workspace.
-
Enter a descriptive campaign name.
-
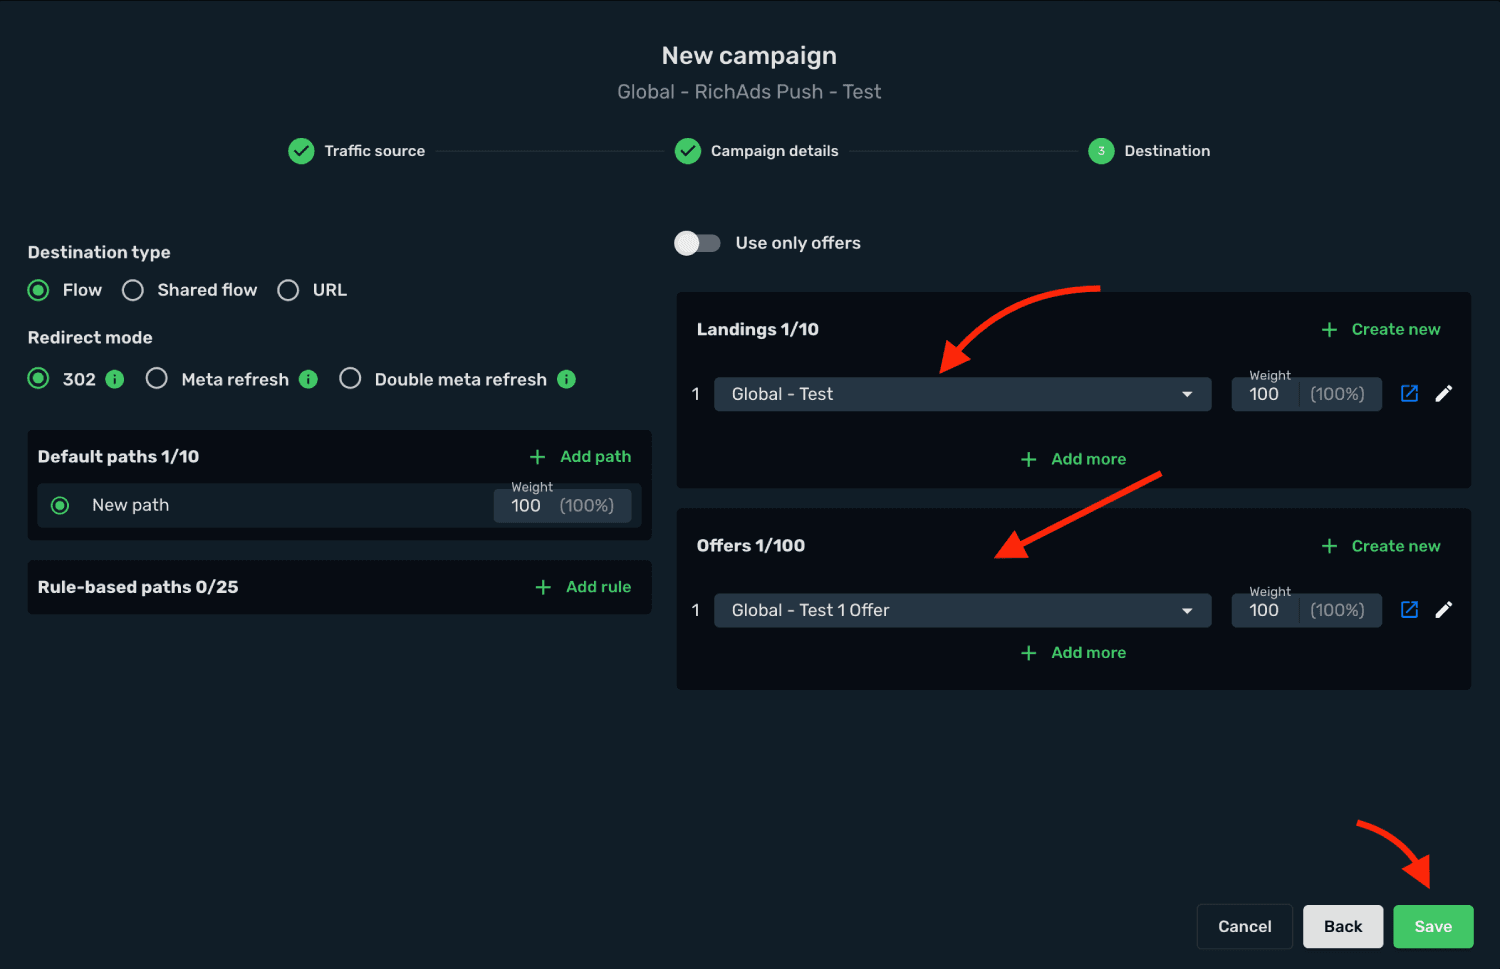
Select or create all your landings and offers.
-
Click the Save.
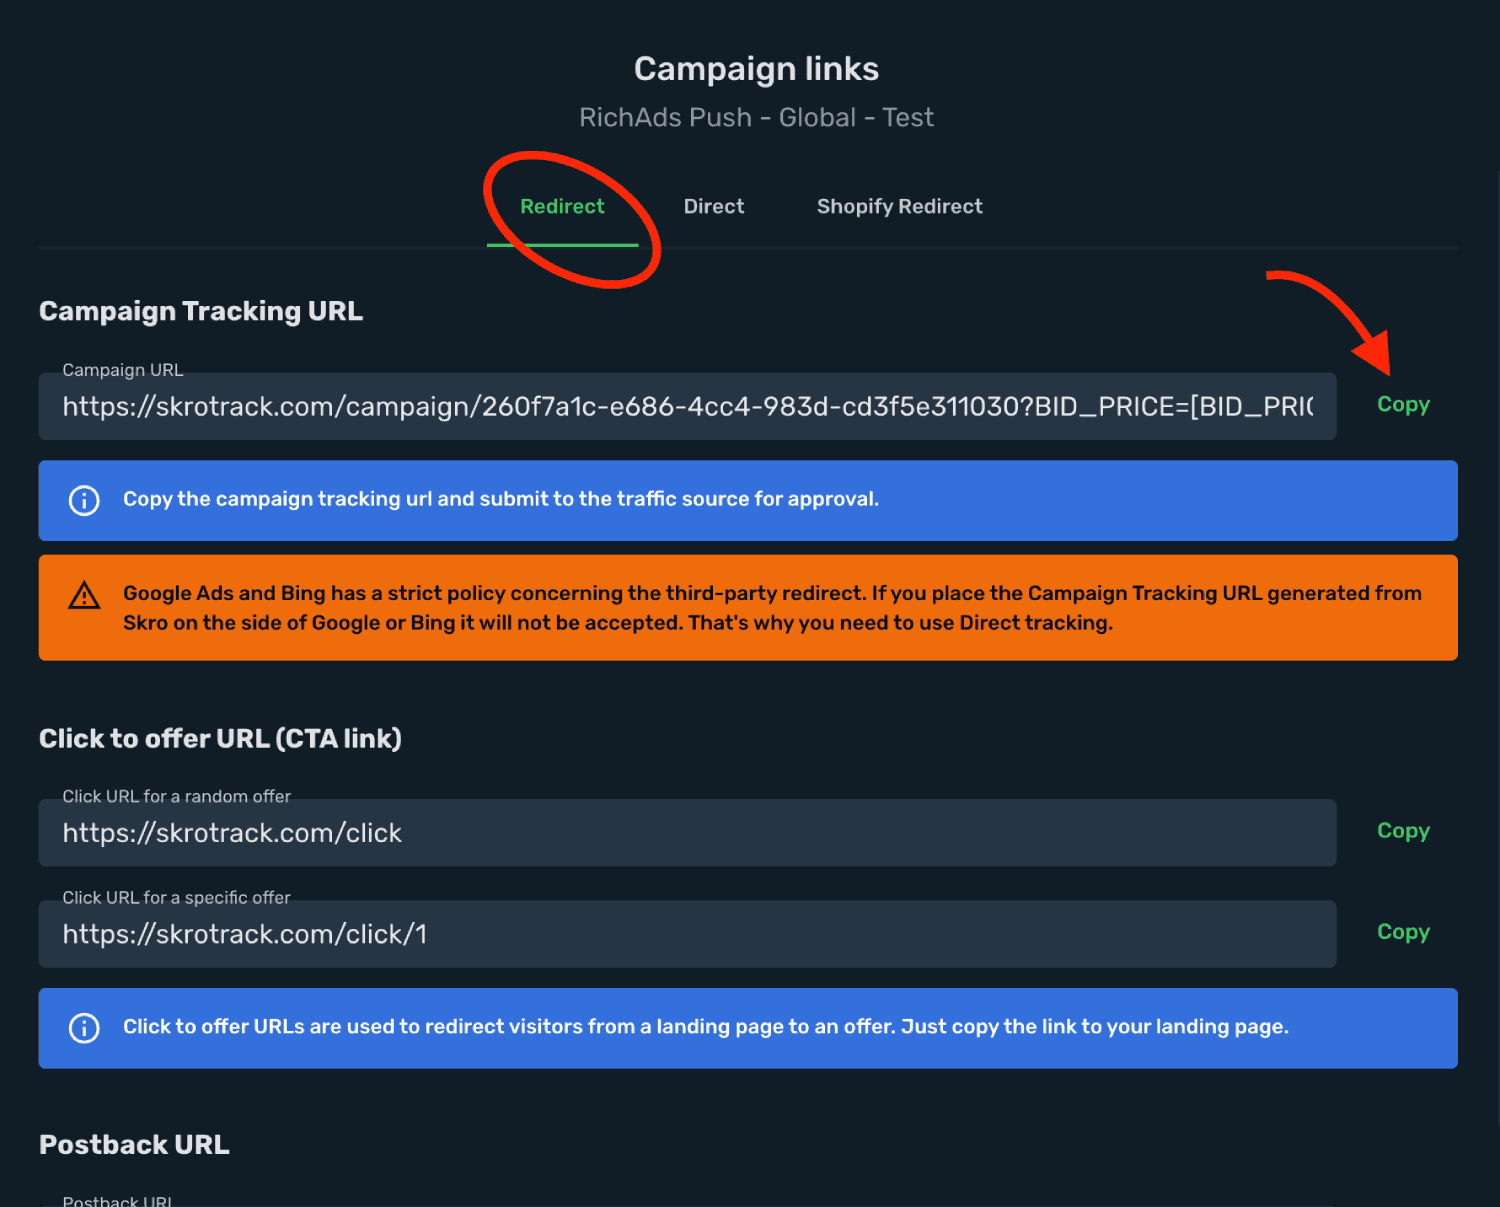
- Copy the Campaign Tracking URL to clipboard.
Step 3. Create a campaign in RichAds
This guide explains how to set up a high-performance campaign in RichAds using your Skro tracking link.
Step 1: Initialize Campaign & Format
-
Log in to your RichAds dashboard.
-
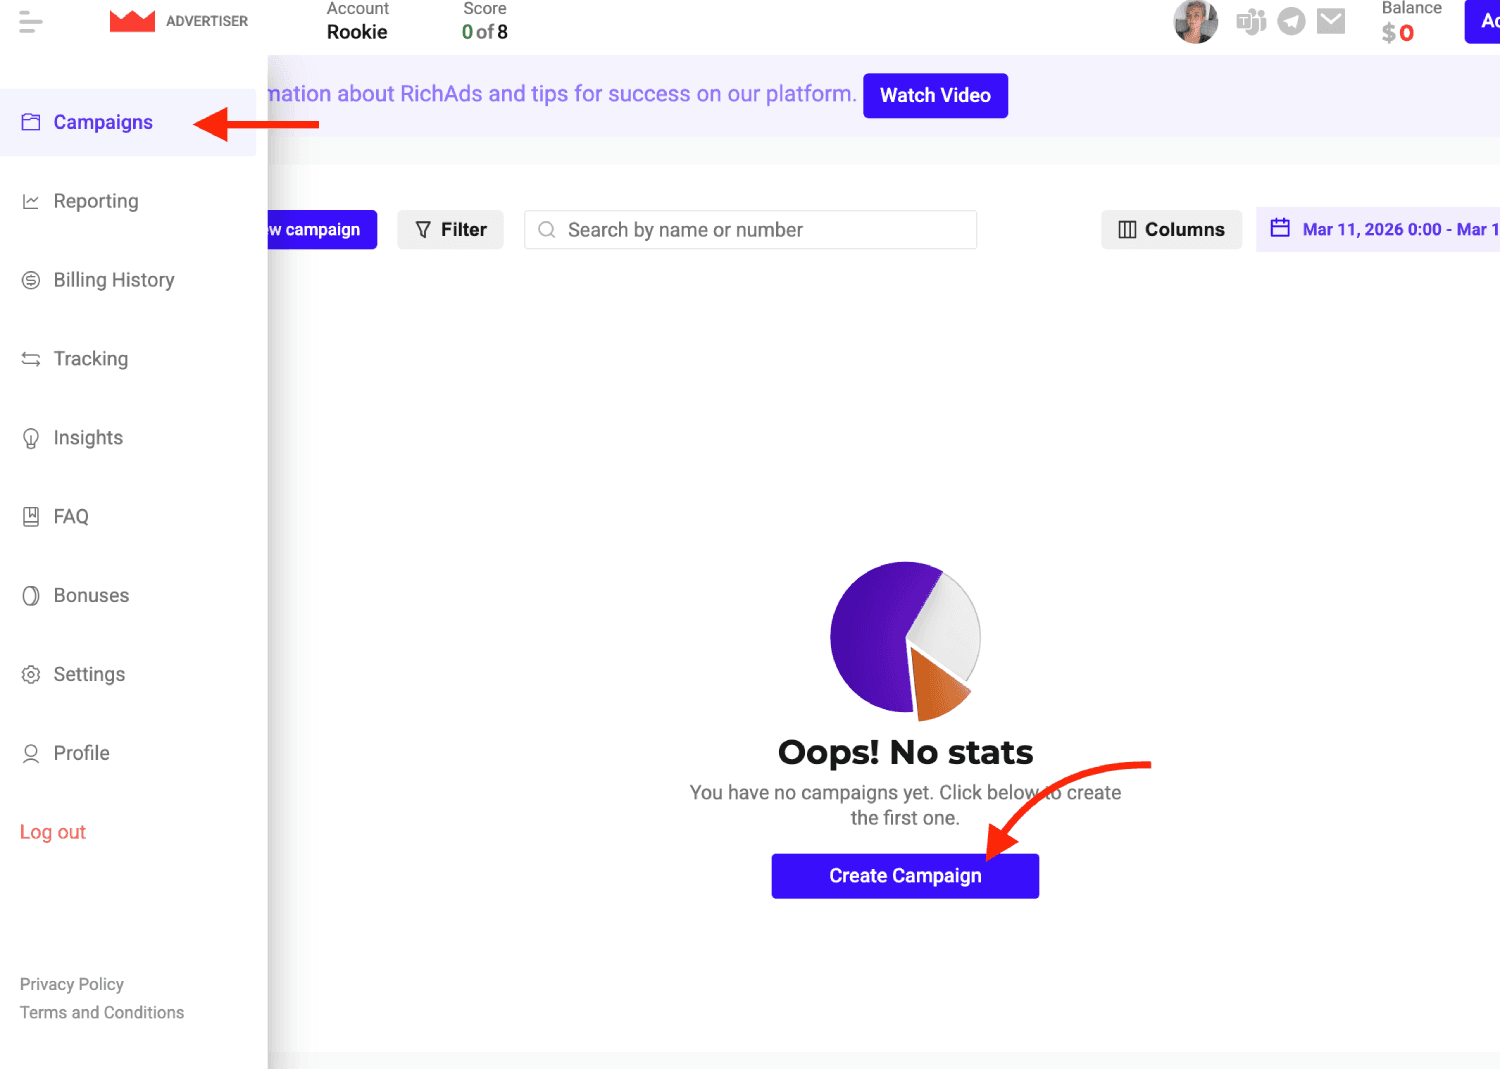
Go to the Campaigns section and click the Create Campaign.
- Select your Ad Format: Choose from Telegram, Push, Display, Pops, In-Page, Direct Click or Native.
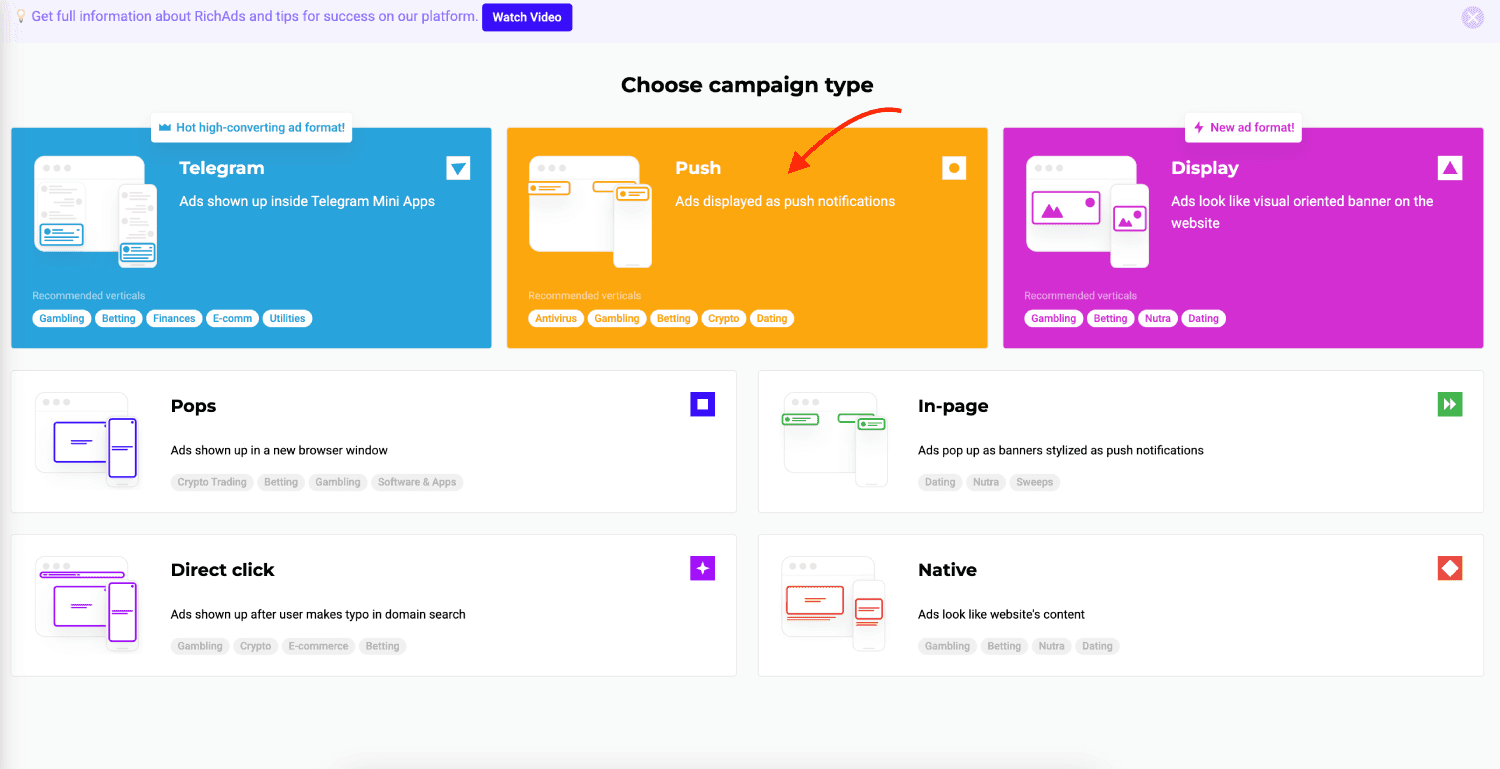
Tip: Push is generally best for beginners due to high engagement and lower costs.
Step 2: Set Destination & Creative
-
Name your campaign: Use a clear naming convention (e.g., SKRO_DE_Nutra_Push_01).
-
Target URL: Paste the Campaign Tracking URL you generated in Skro.
-
Creatives: Upload your images and write your headlines/descriptions. RichAds allows you to add up to 10 creatives per campaign to split-test performance.
Step 3: Target & Bid
-
Tracking: Ensure "Conversion Tracking" is active. If you set up the Postback in Skro earlier, RichAds will automatically track your ROI.
-
CPC/CPM Bid: Set your bid based on the Insights tool on the right-hand sidebar, which shows the current winning bids for your chosen GEO.
-
Targeting: Select your Country, Device (Mobile/Desktop), and OS.
Step 4: Budget & Schedule
-
Budget: Set a Daily Budget (minimum $25 recommended for testing) and a Total Budget.
-
Budget Mode: Choose ASAP for fast data collection or Even to spread traffic throughout the day.
-
Subscriber List: For Push campaigns, start with "Premium" sources to ensure the highest quality traffic.
Review your settings and click Create.
Verify the setup
Open the generated campaign URL and check that the visit appears in Skro. Confirm that traffic source macros resolve to actual values. If you send conversions back to the source, verify a test conversion in both systems.
Troubleshooting
If data is missing, check the selected workspace, integration, campaign, and reporting date range. Compare parameter names and macro values with the examples in this guide before repeating the test.
Related guides
Need help with this guide? Contact Skro support.