

Revcontent integration
Set up Revcontent tracking in Skro, configure traffic source parameters, and connect your advertising campaigns.
Revcontent integration gives you the ability to manage and optimize all your Revcontent ad campaigns through the Skro interface.
- Sync cost for campaigns, widgets and ads every 30 min.
- Check the status of your campaigns, widgets and ads.
- Pause or resume campaigns, widgets and ads.
- Change bidding for campaigns and widgets.
- Change budget for campaigns.
In this guide, you will learn how to set up your campaigns in Revcontent and Skro so Revcontent can pass information to Skro and back with a selected tracking method. This guide does not cover all aspects and options available when creating a campaign on these two platforms. Basic knowledge regarding setting up campaigns in Revcontent and Skro is required.
Optimize Revcontent ads through Skro
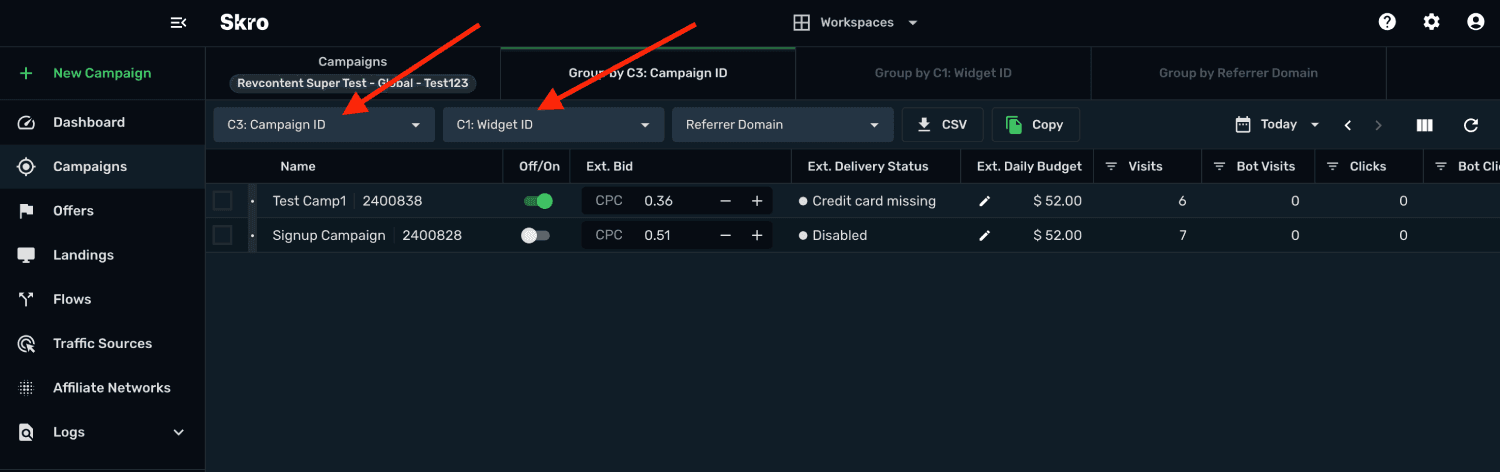
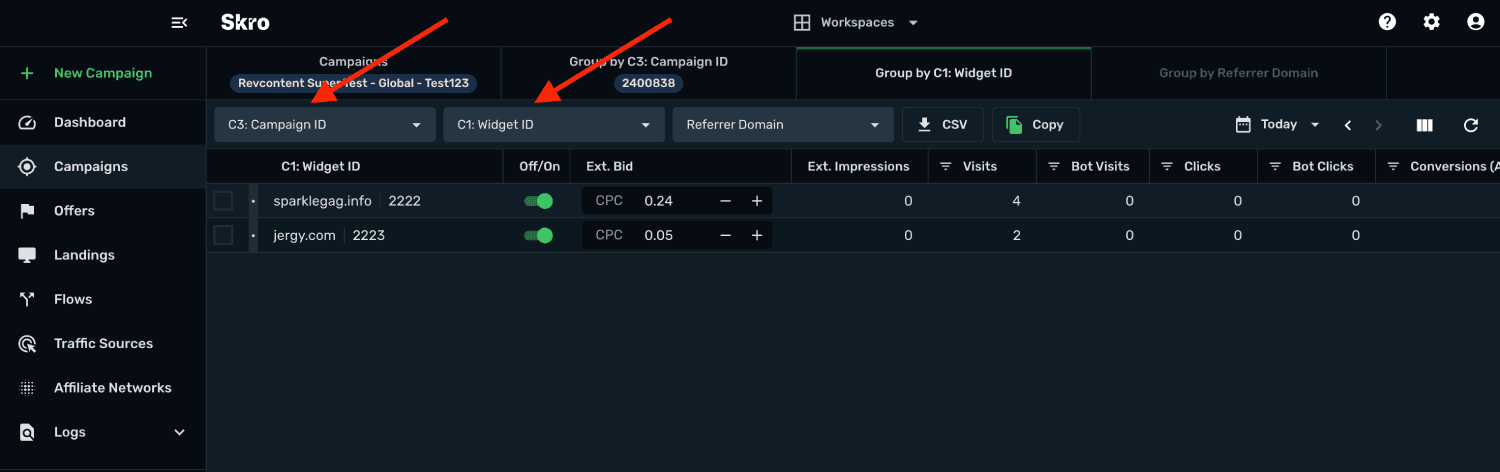
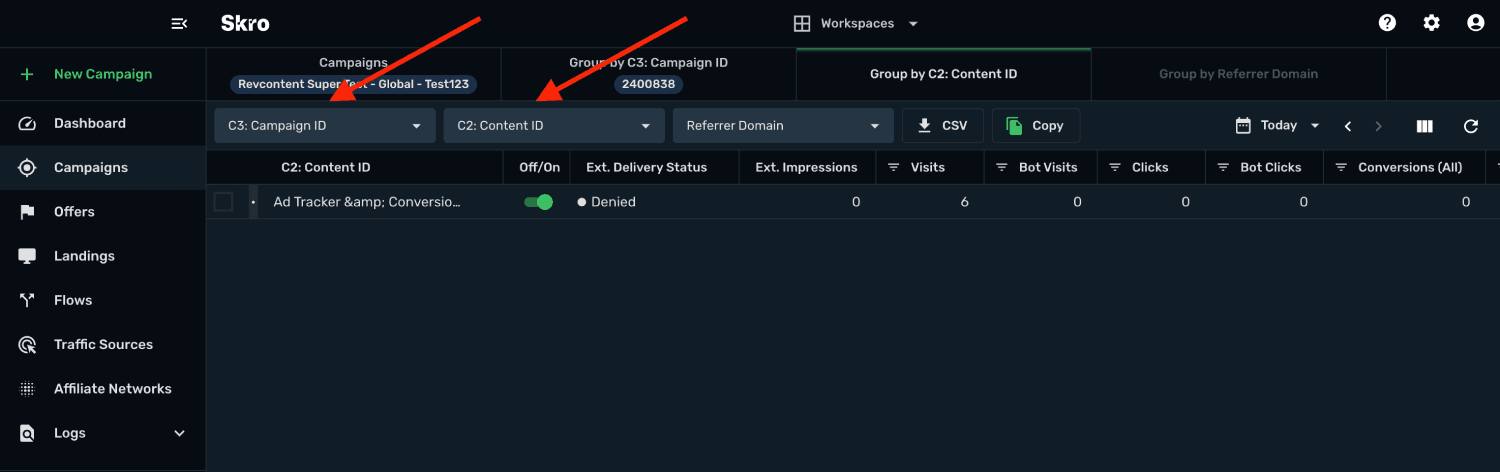
- Go to campaigns view and double-click your campaign name.
- On the campaign details view select from the first Group By dropdown menu "C3: Campaign ID"
- If you want to optimize widgets, then select on second Group By dropdown menu "C1: Widget ID"
- If you want to optimize contents, then select on second Group By dropdown menu "C2: Content ID"
Manage Revcontent campaigns
Manage Revcontent widgets
Manage Revcontent contents
Step 1. Get Revcontent API Credentials
You can get API credentials by following the steps below:
- In Revcontent, click username on the top right corner and navigate to the Account settings.
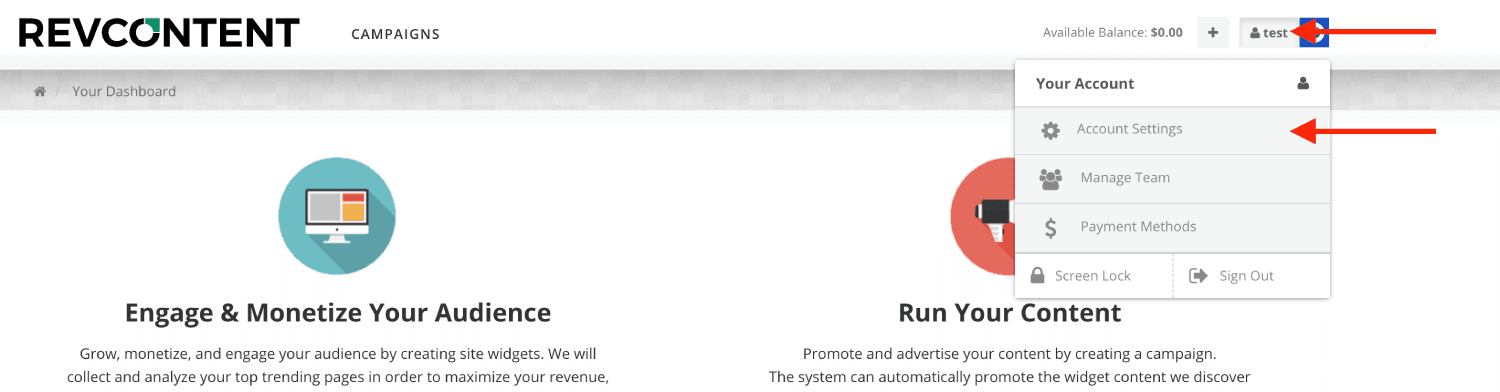
- Scroll down to the section Stats API Credentials. If you do not have API credentials there then please ask Revcontent to activate your API access.
- Copy the Client ID and Client Secret to any text editing tool.
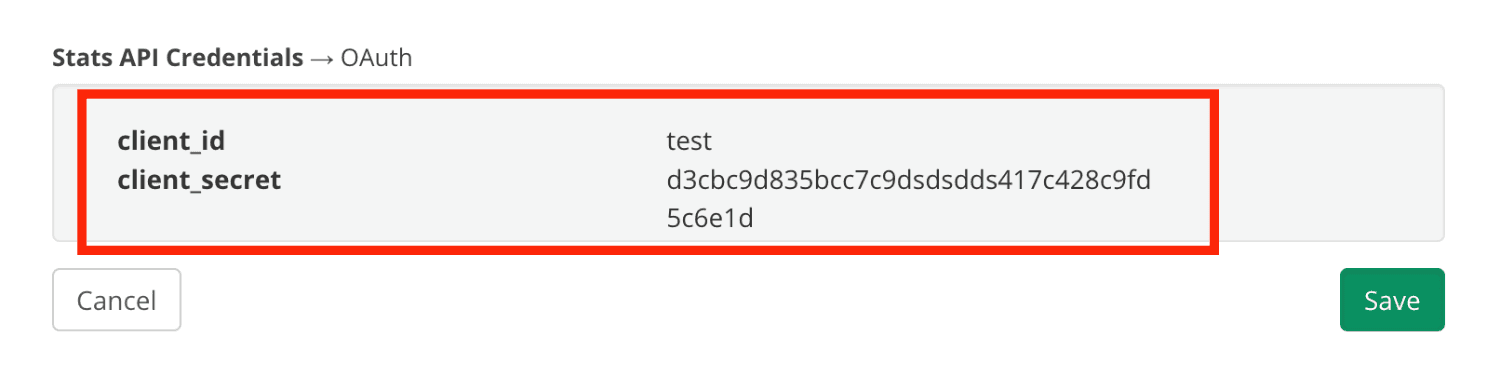
Once you have everything ready, read the further part of this guide.
Step 2. Setup integration
- Log in to your Skro account.
- Navigate to Settings → Integrations.
- In the Traffic Sources section click Add.
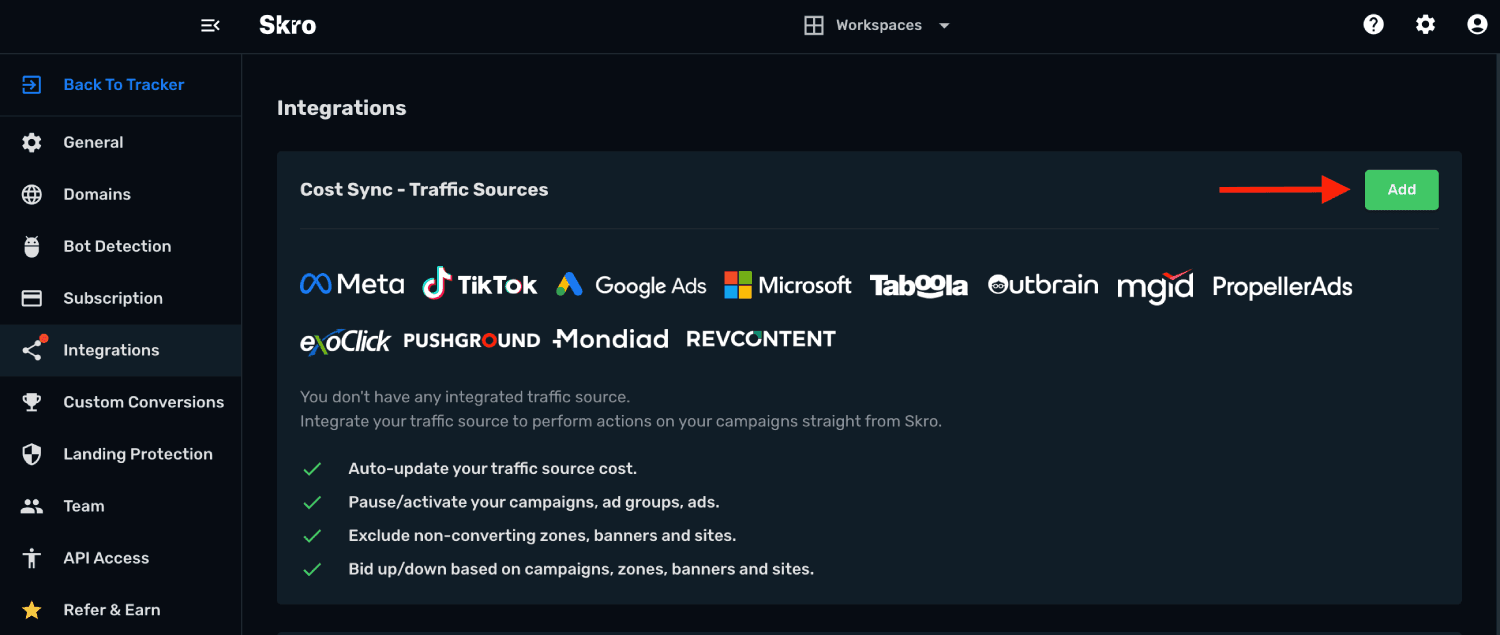
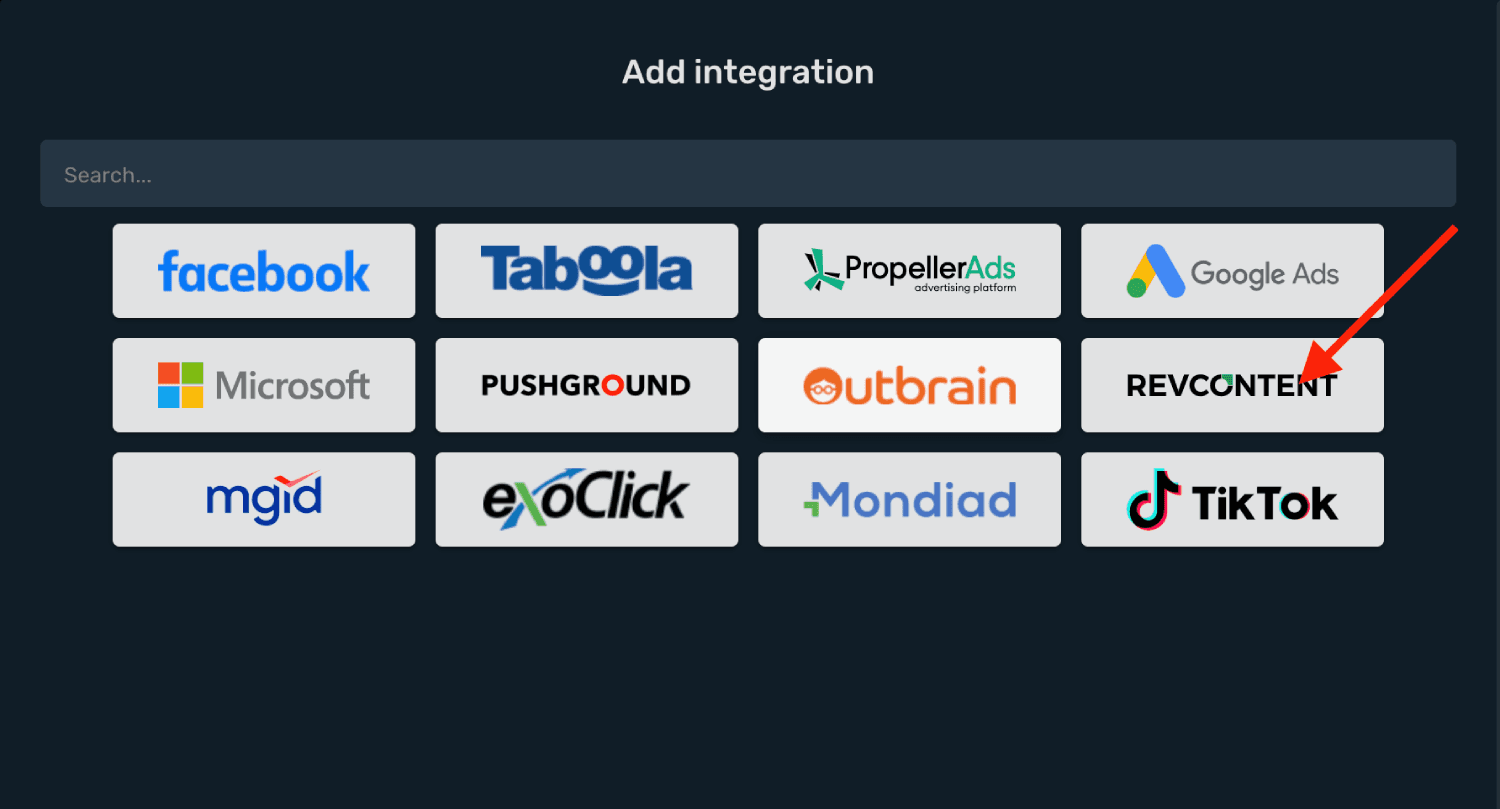
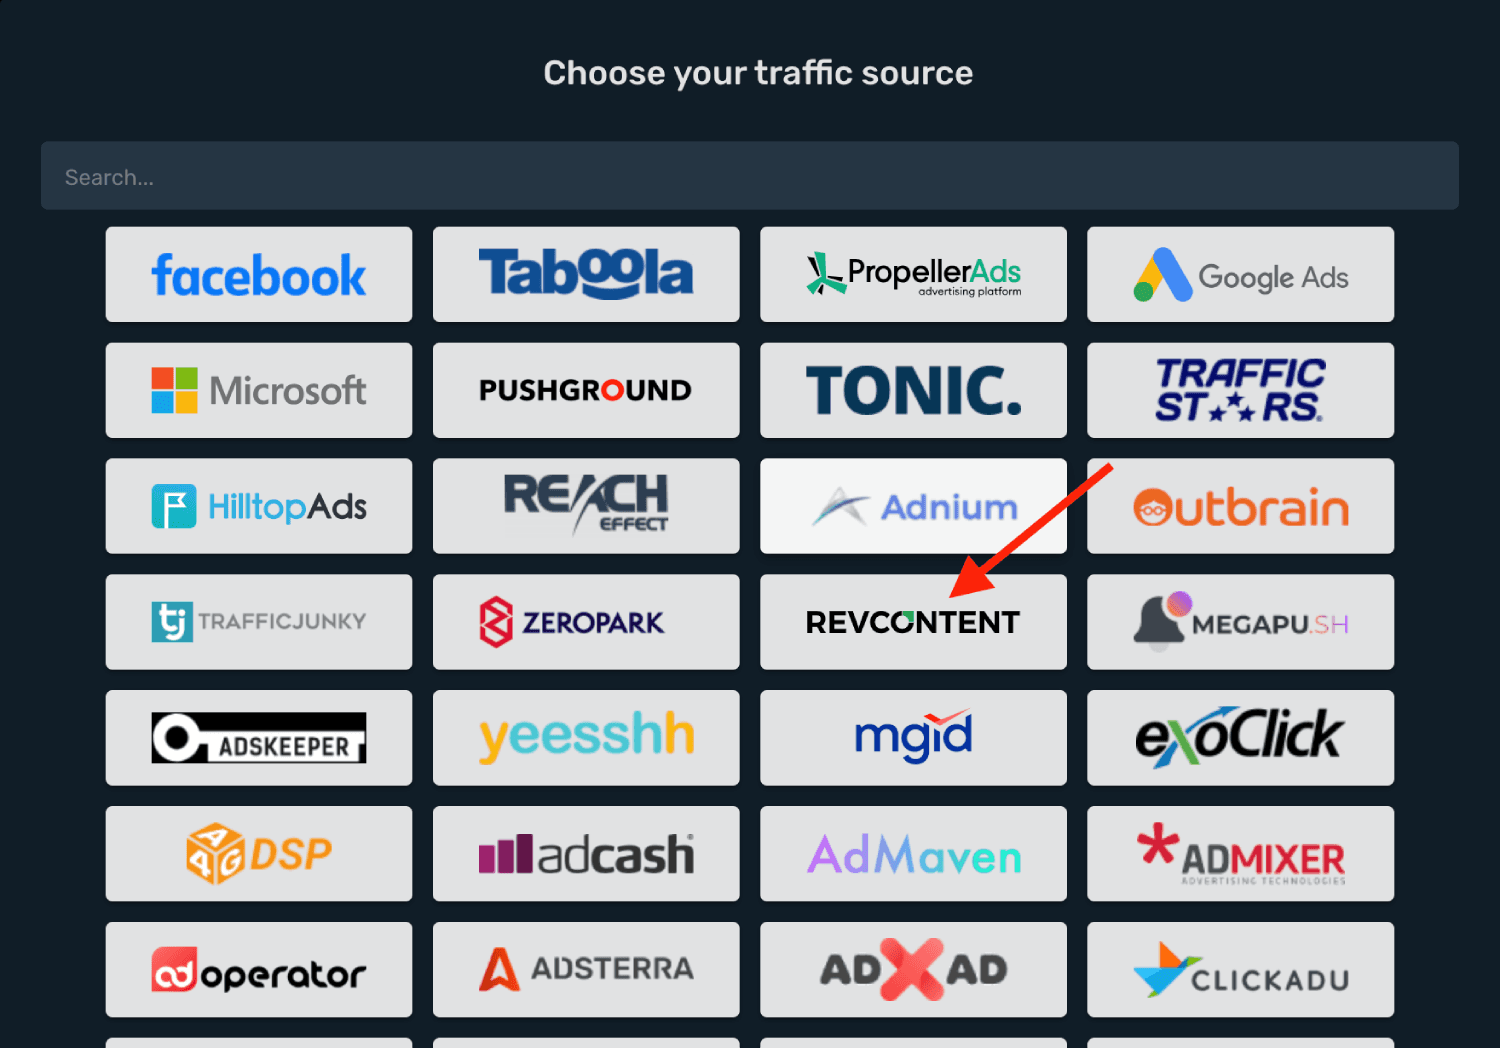
- Click Revcontent logo and integration form will pop up.
- Enter your Integration Name.
- Enter your Revcontent Client ID.
- Enter your Revcontent Client Secret.
- Click Create Integration.
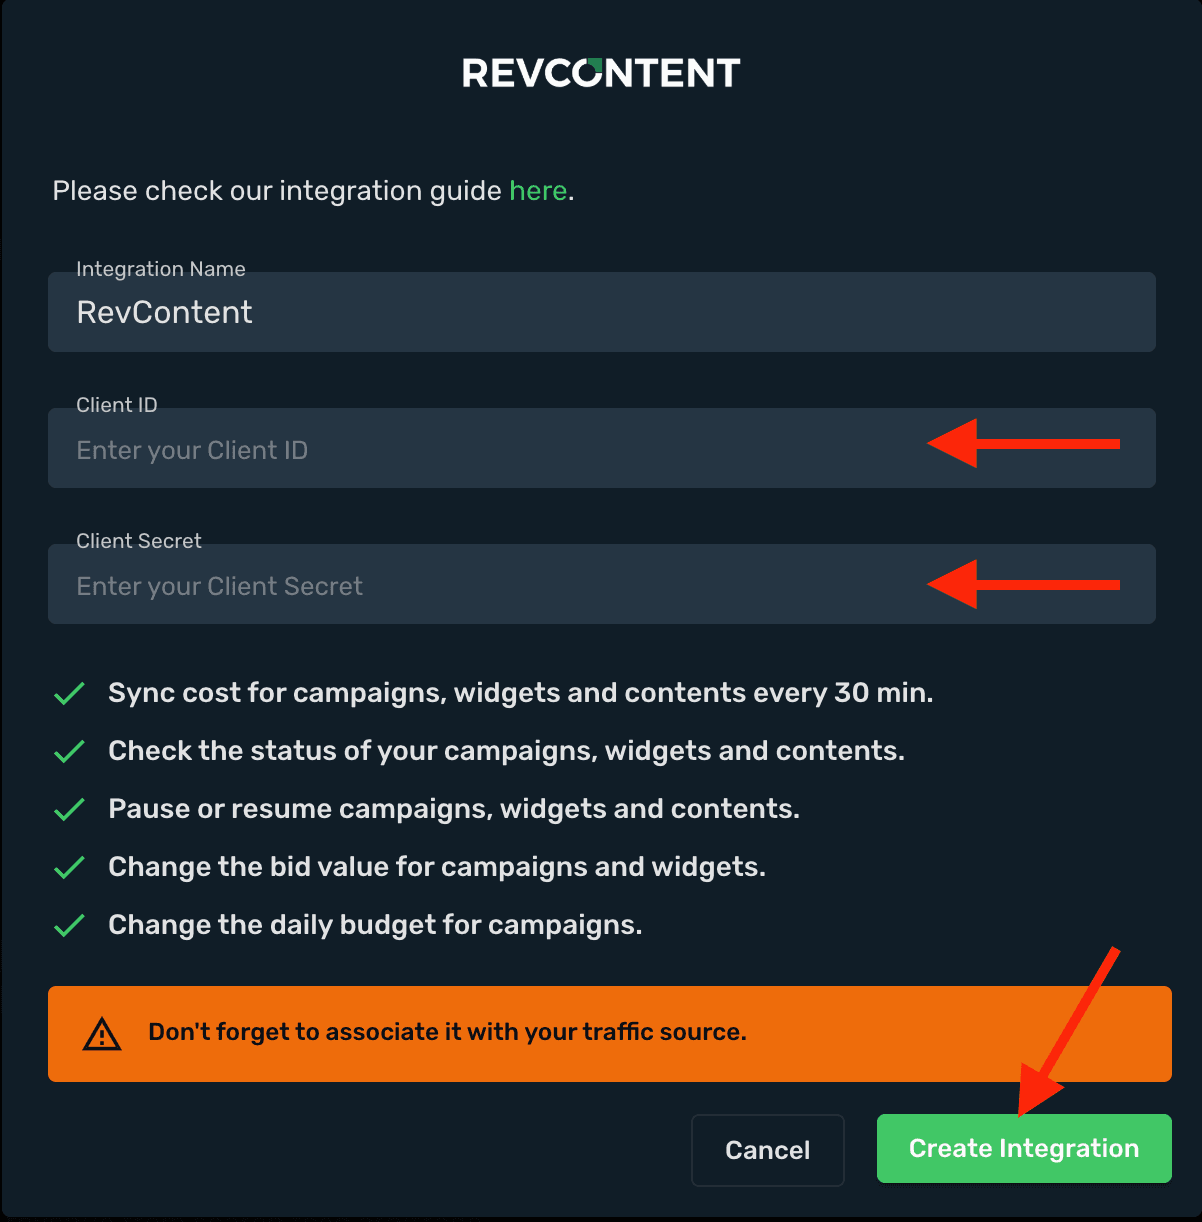
- Your Revcontent account is successfully integrated.
- You can switch on/off cost sync with given switch.
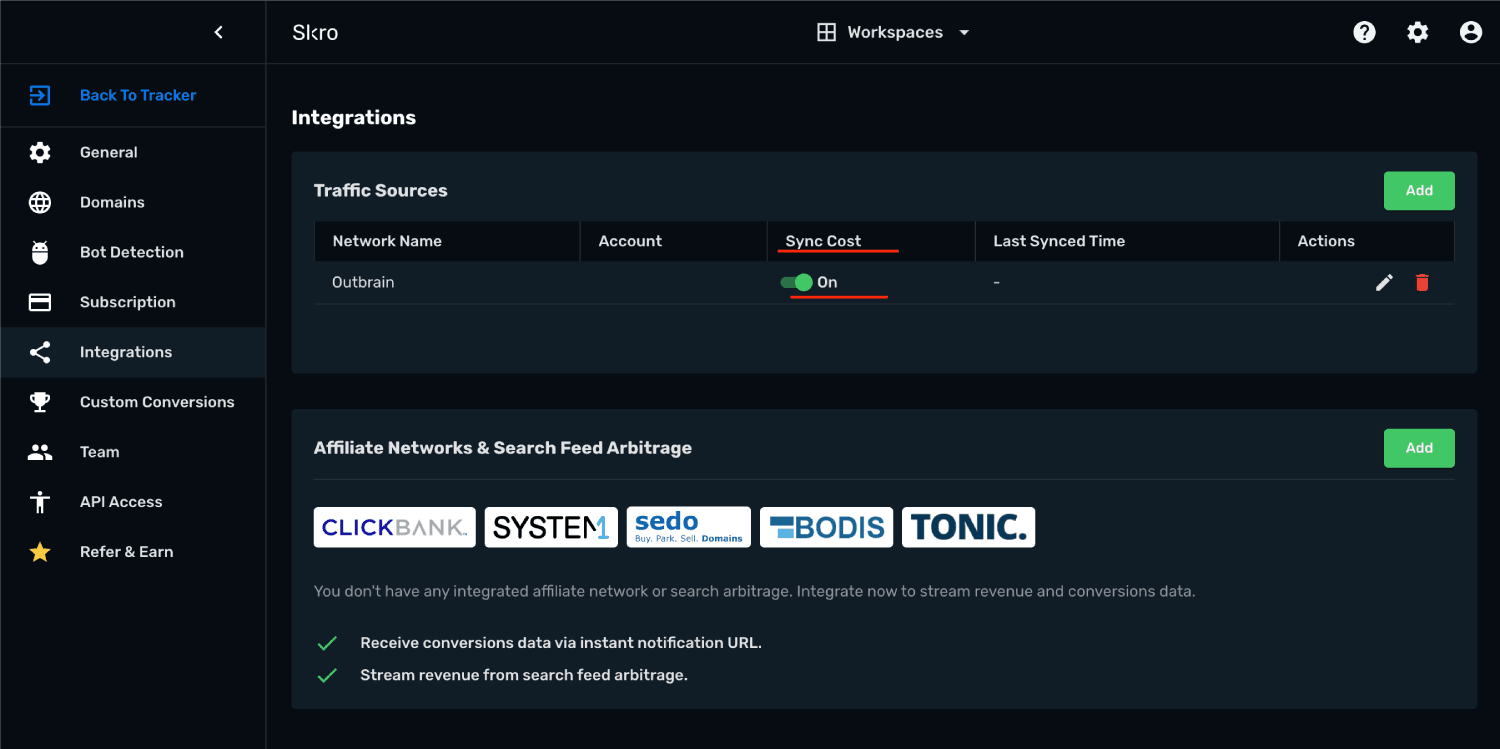
Step 3. Associate the integration with your traffic source.
- Navigate to the Traffic Sources and click Create.
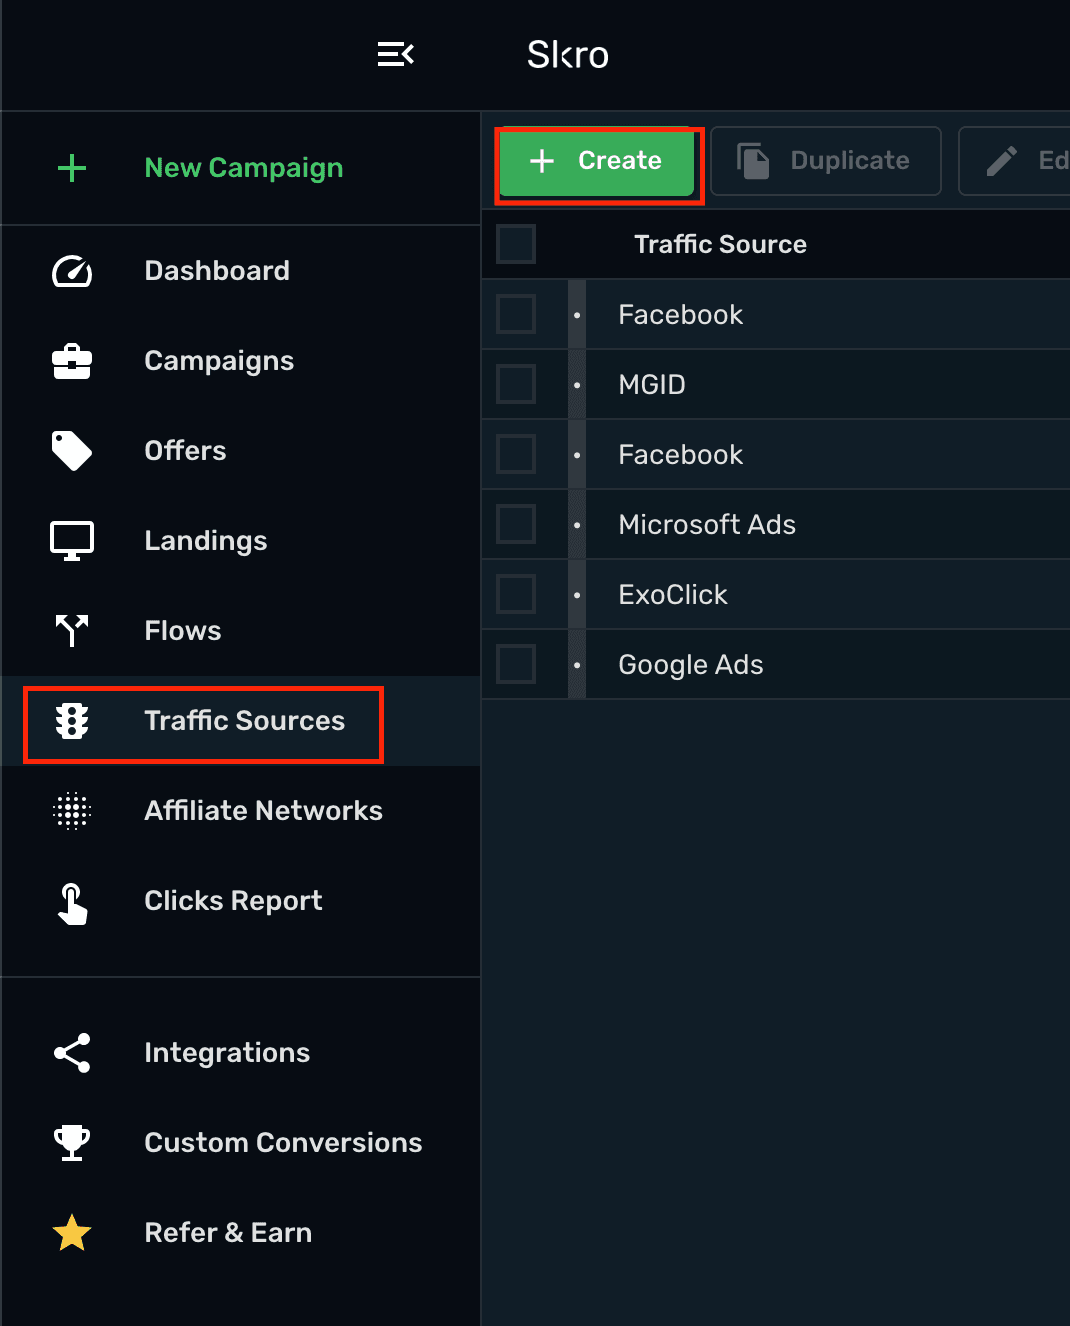
- Find Revcontent logo and click it.
- Setup your Postback URL.
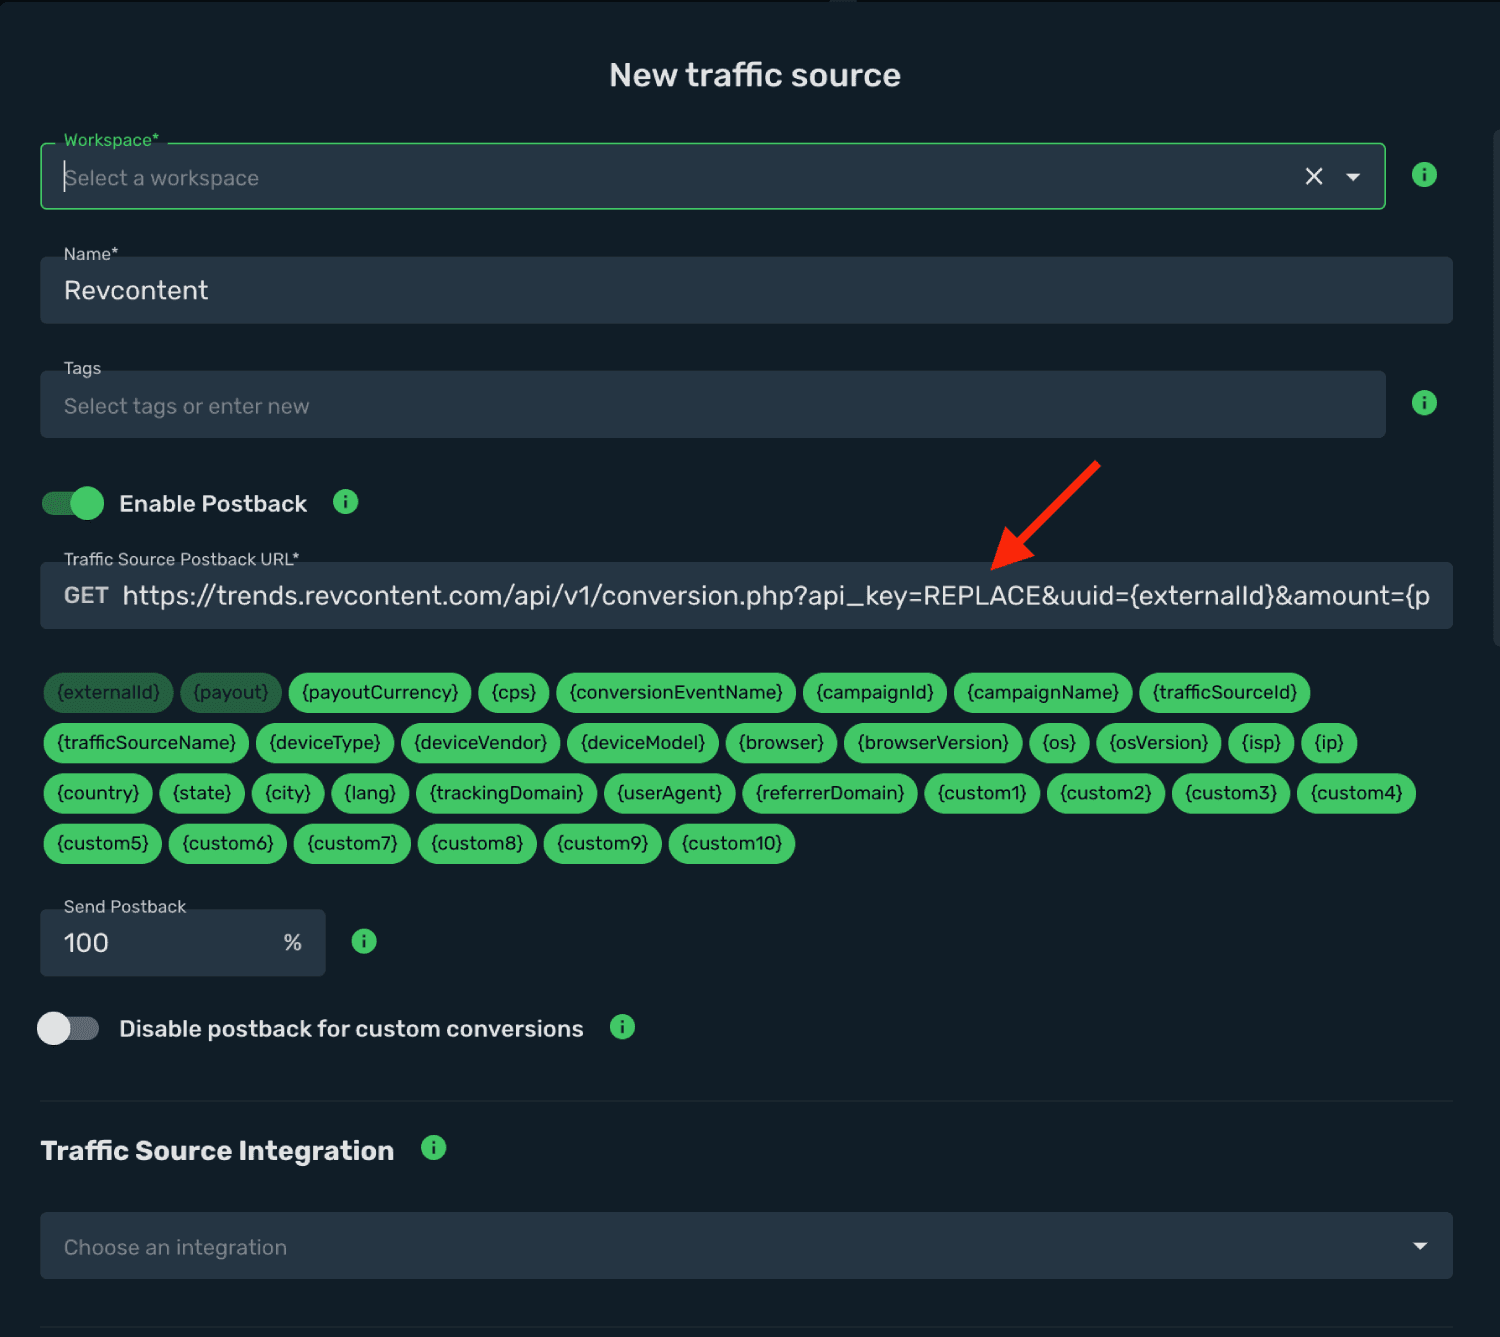
- Replace placeholder REPLACE with your Revcontent API key.
- Get API key from Revcontent. Click username on the top right corner and choose Account Settings.
- Scroll down to the API key section.
- Copy the key and replace the placeholder on Skro postback URL.

- Select your Revcontent integration from the dropdown menu.
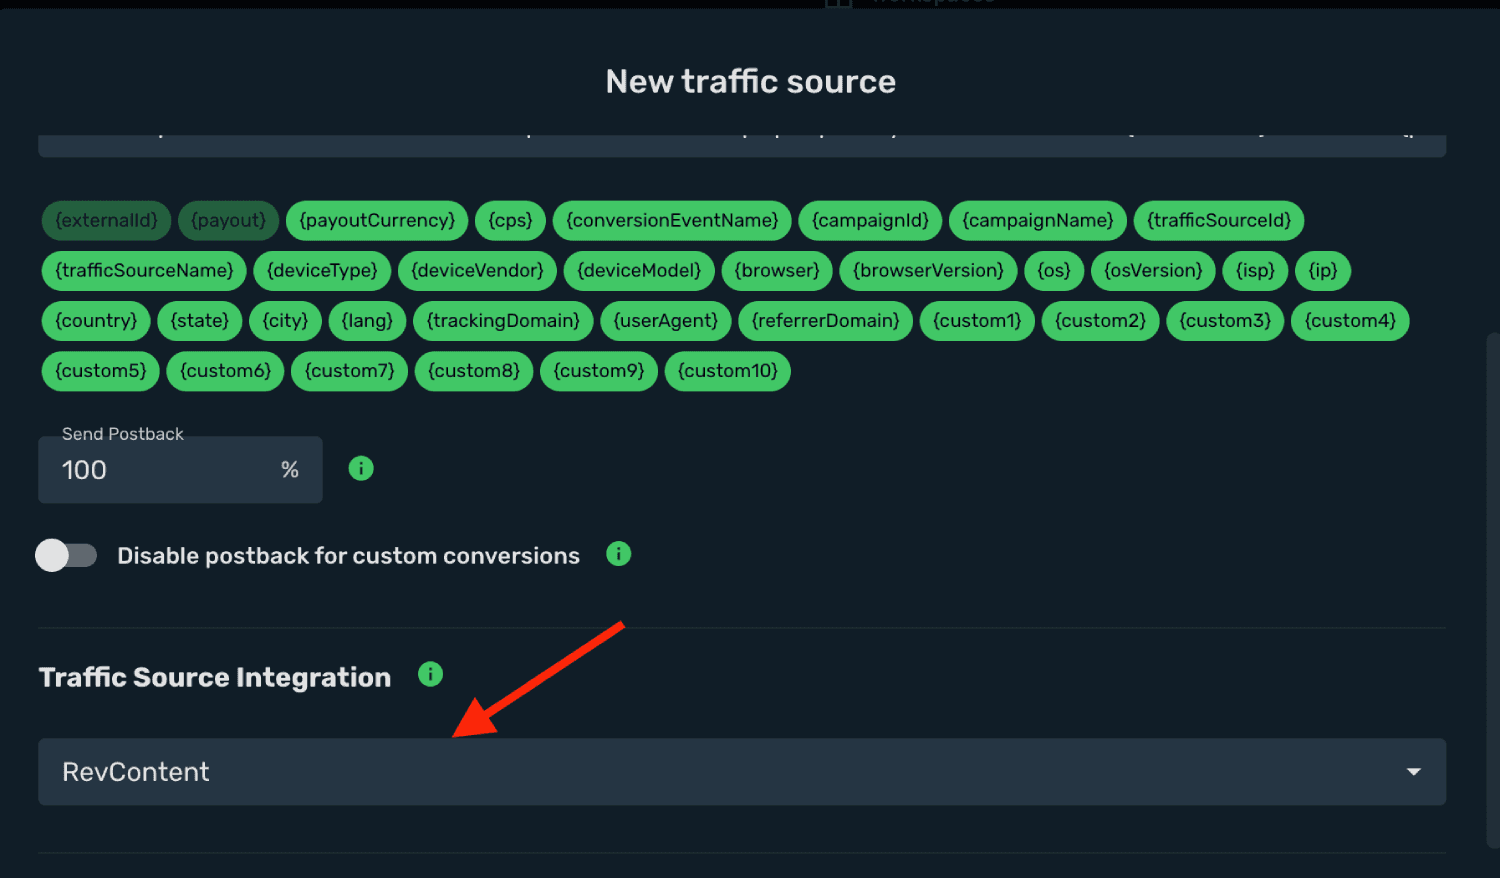
- All parameters are already prefilled for you.
- Click Save & Close.
The integration is ready. Continue by creating a campaign for Revcontent.
Step 4. Create a Campaign in Skro
If your setup requires pre-lander then add it like that.
- Navigate to the Landings view and click Create.
- Select workspace.
- Add name.
- Add your landing URL and add macros if needed.
- Copy the Click to offer URL and paste it to your pre-lander which redirects you to the offer page.
- Click Save & Close.
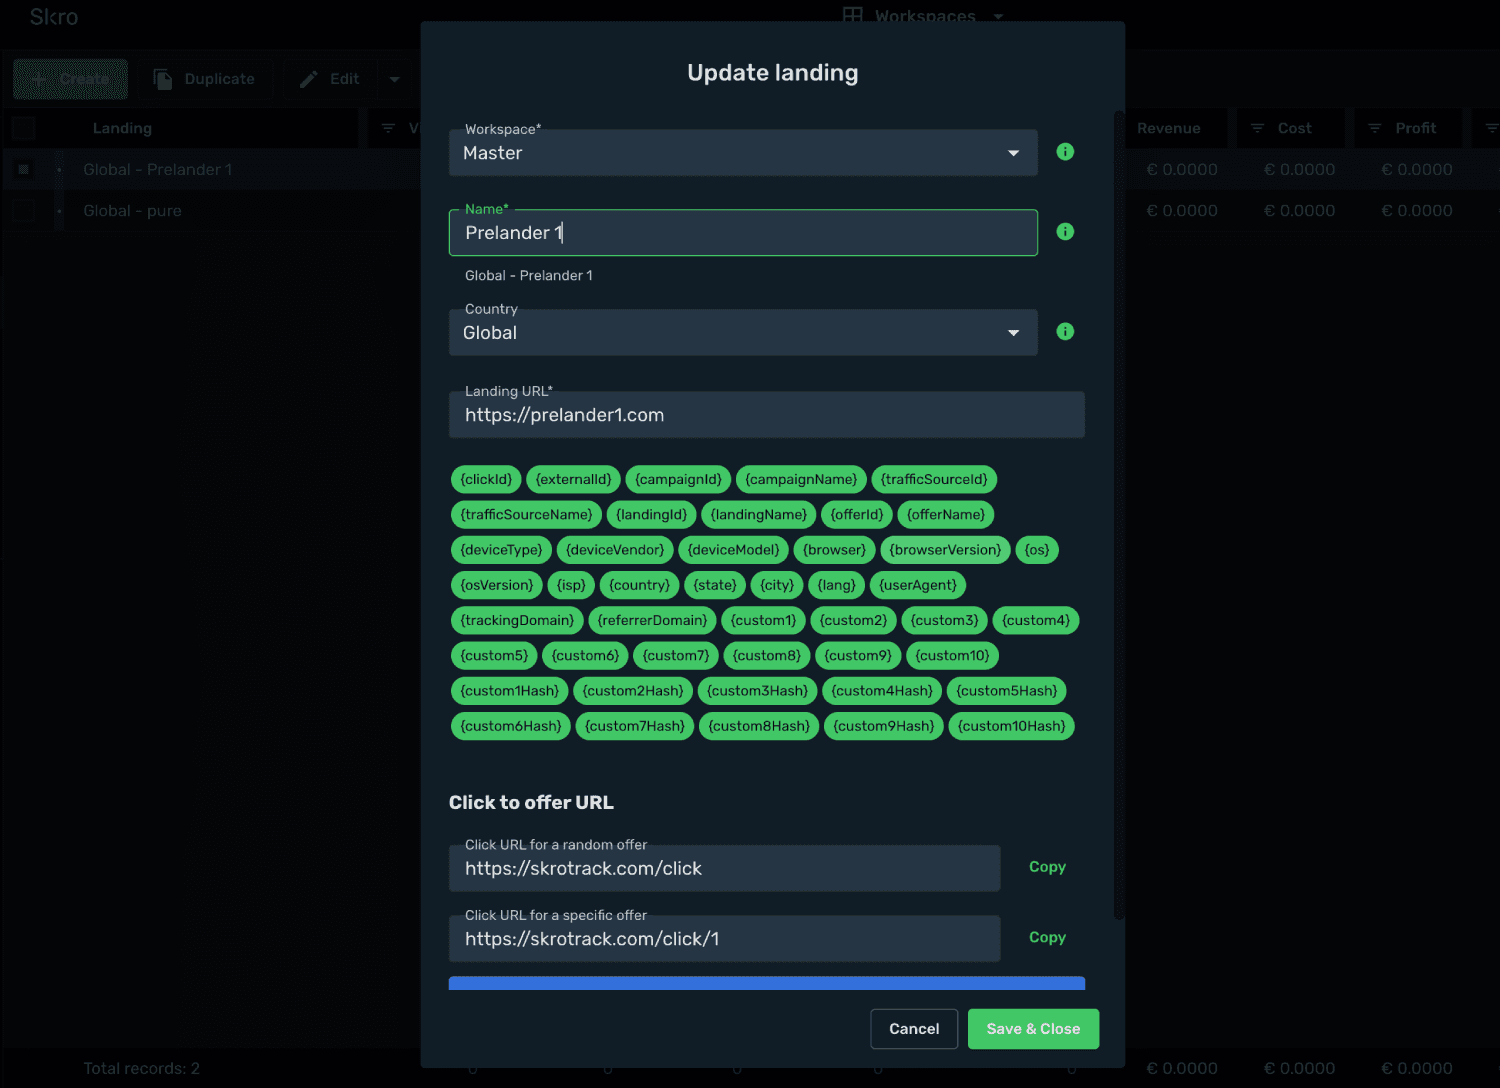
The second thing you need to do is to create an offer. Offer can be your own website/product or affiliate network offer.
- Navigate to the Offers view and click Create.
- Select workspace.
- Add name.
- Add your offer URL and add macros. Don't forget to add Skro Click ID macro to your offer URL with correct parameter name.
- Click Save & Close.
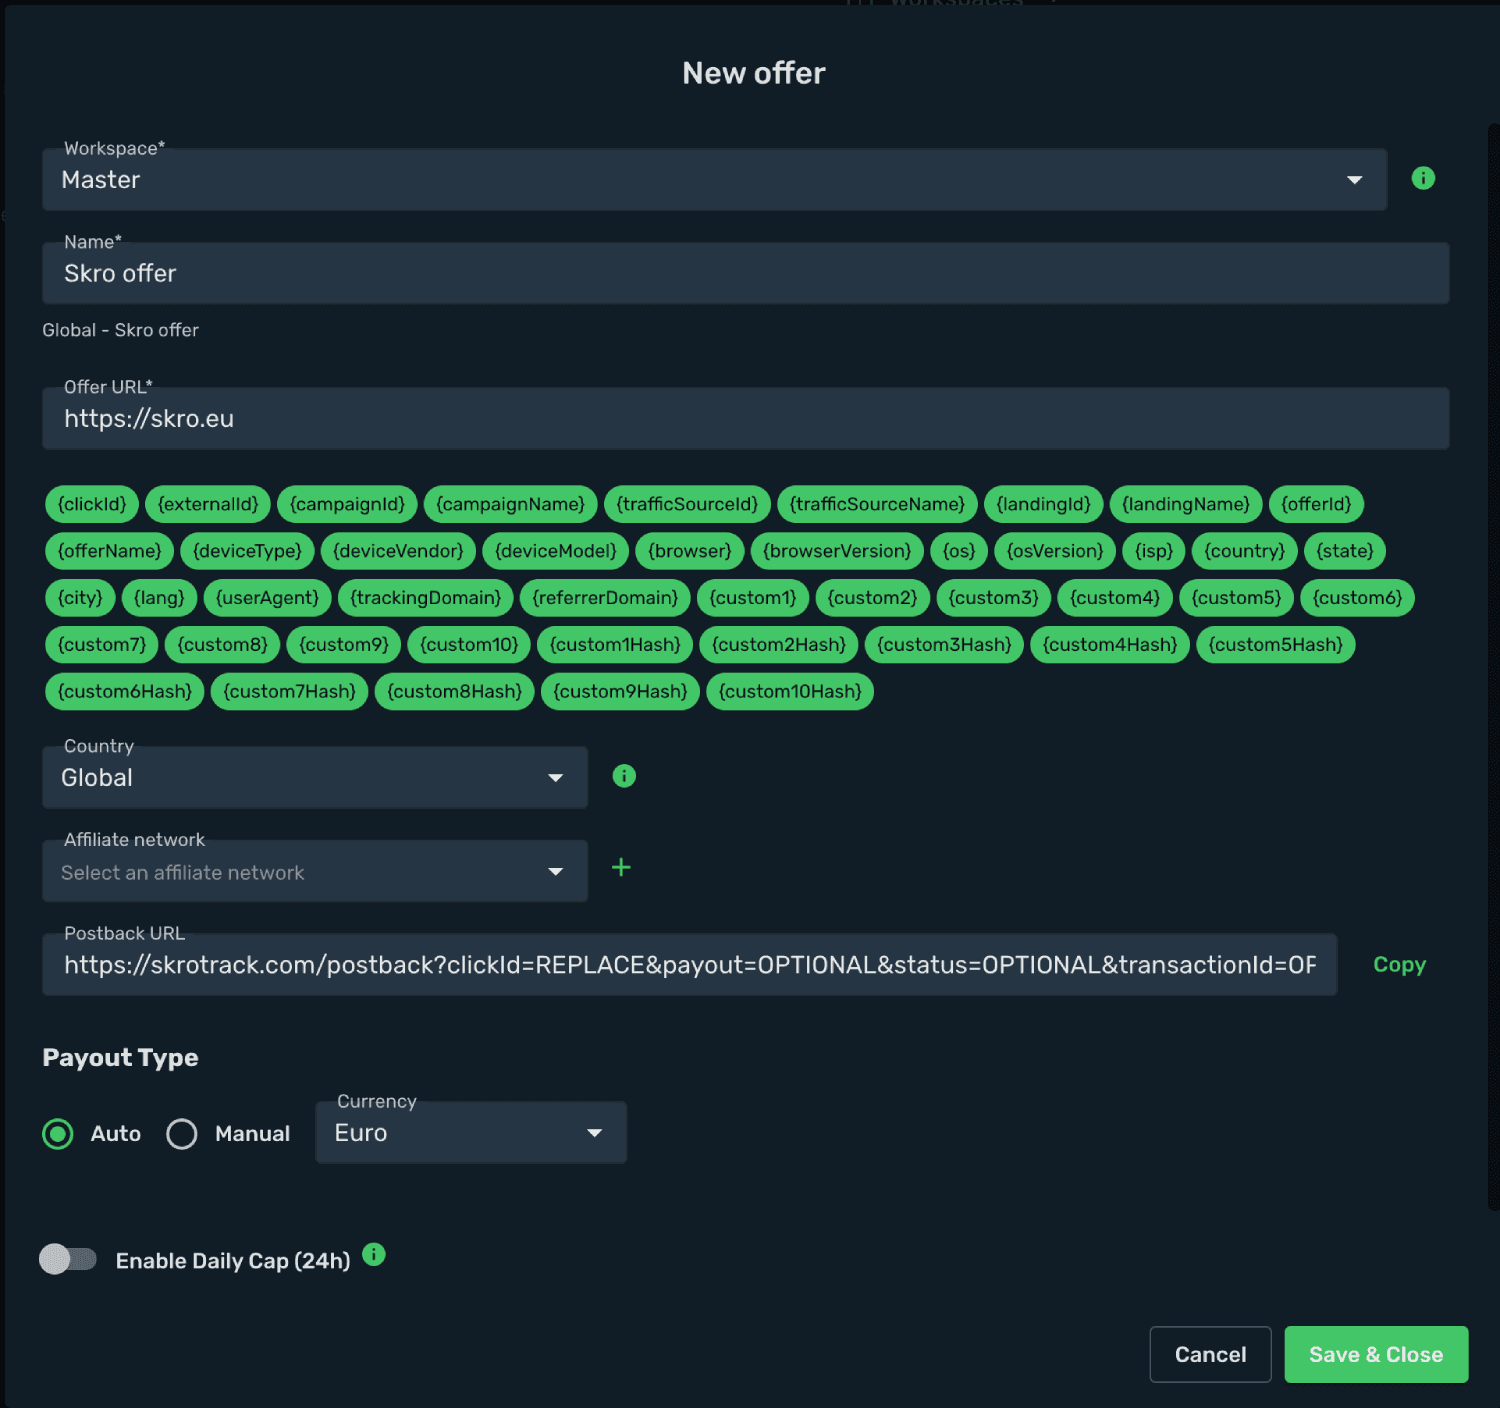
Example of offer URL with Skro click ID macro.
https://example.com/offer/?s2={clickId}
- Navigate to the Campaigns view and click Create.
- Select your integrated Traffic Source as Revcontent.
- Cost Model should be Auto.
- Currency should be USD.
- Click Next.
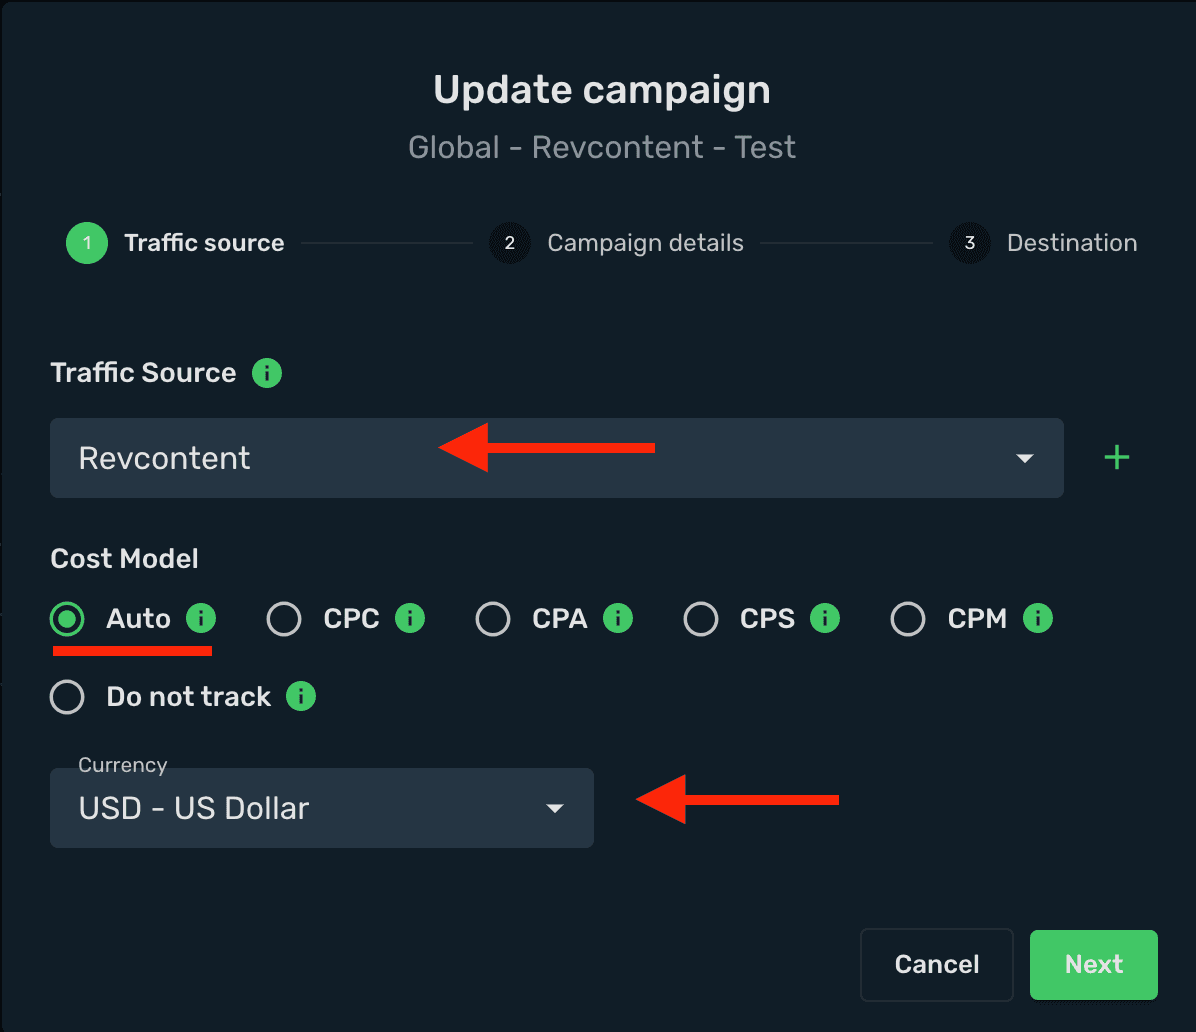
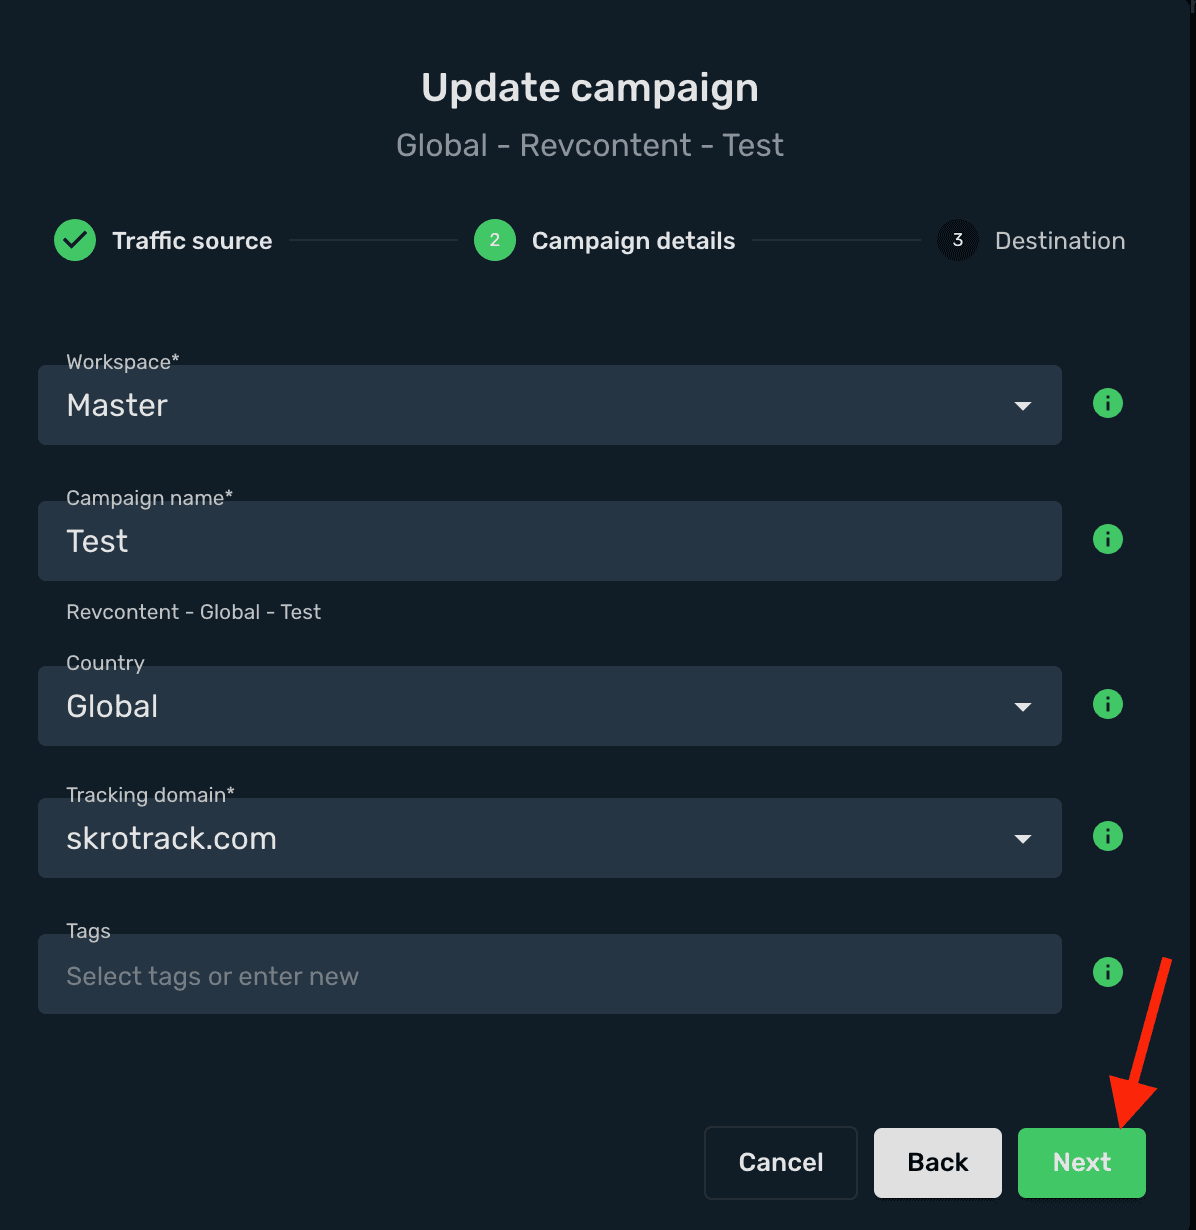
- Select workspace.
- Add descriptive name to your campaign.
- Click Next
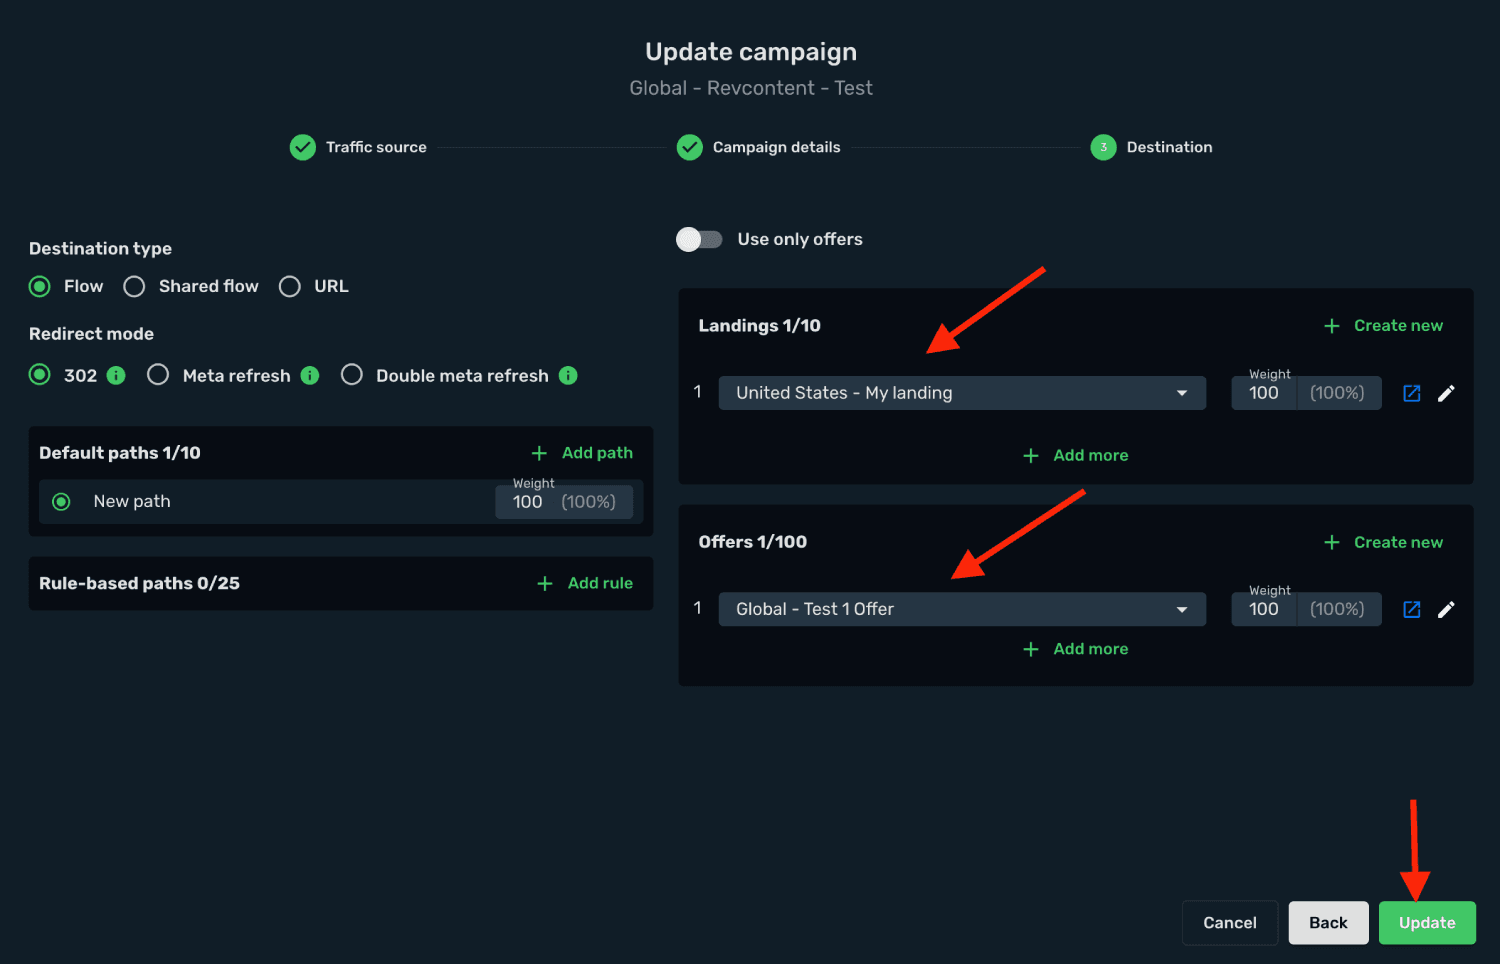
- Choose your Destination Type. In this example we use flow.
- Choose your redirect mode. In this example we use redirect 302.
- Choose your landing page.
In given example we use one landing and one offer setup.
- Click Save when you are done.
- Choose the Redirect method.
- If you didn't install the Click to Offer URL on your pre-lander, then do it now. In given example the link is https://skrotrack.com/click
In given example we have that kind of Skro Campaign Tracking Link:
https://skrotrack.com/campaign/438b7f75-d001-479b-bc15-4e9059c9fbb6?rc_uuid=&widget_id={widget_id}&content_id={content_id}&boost_id={boost_id}&adv_targets={adv_targets}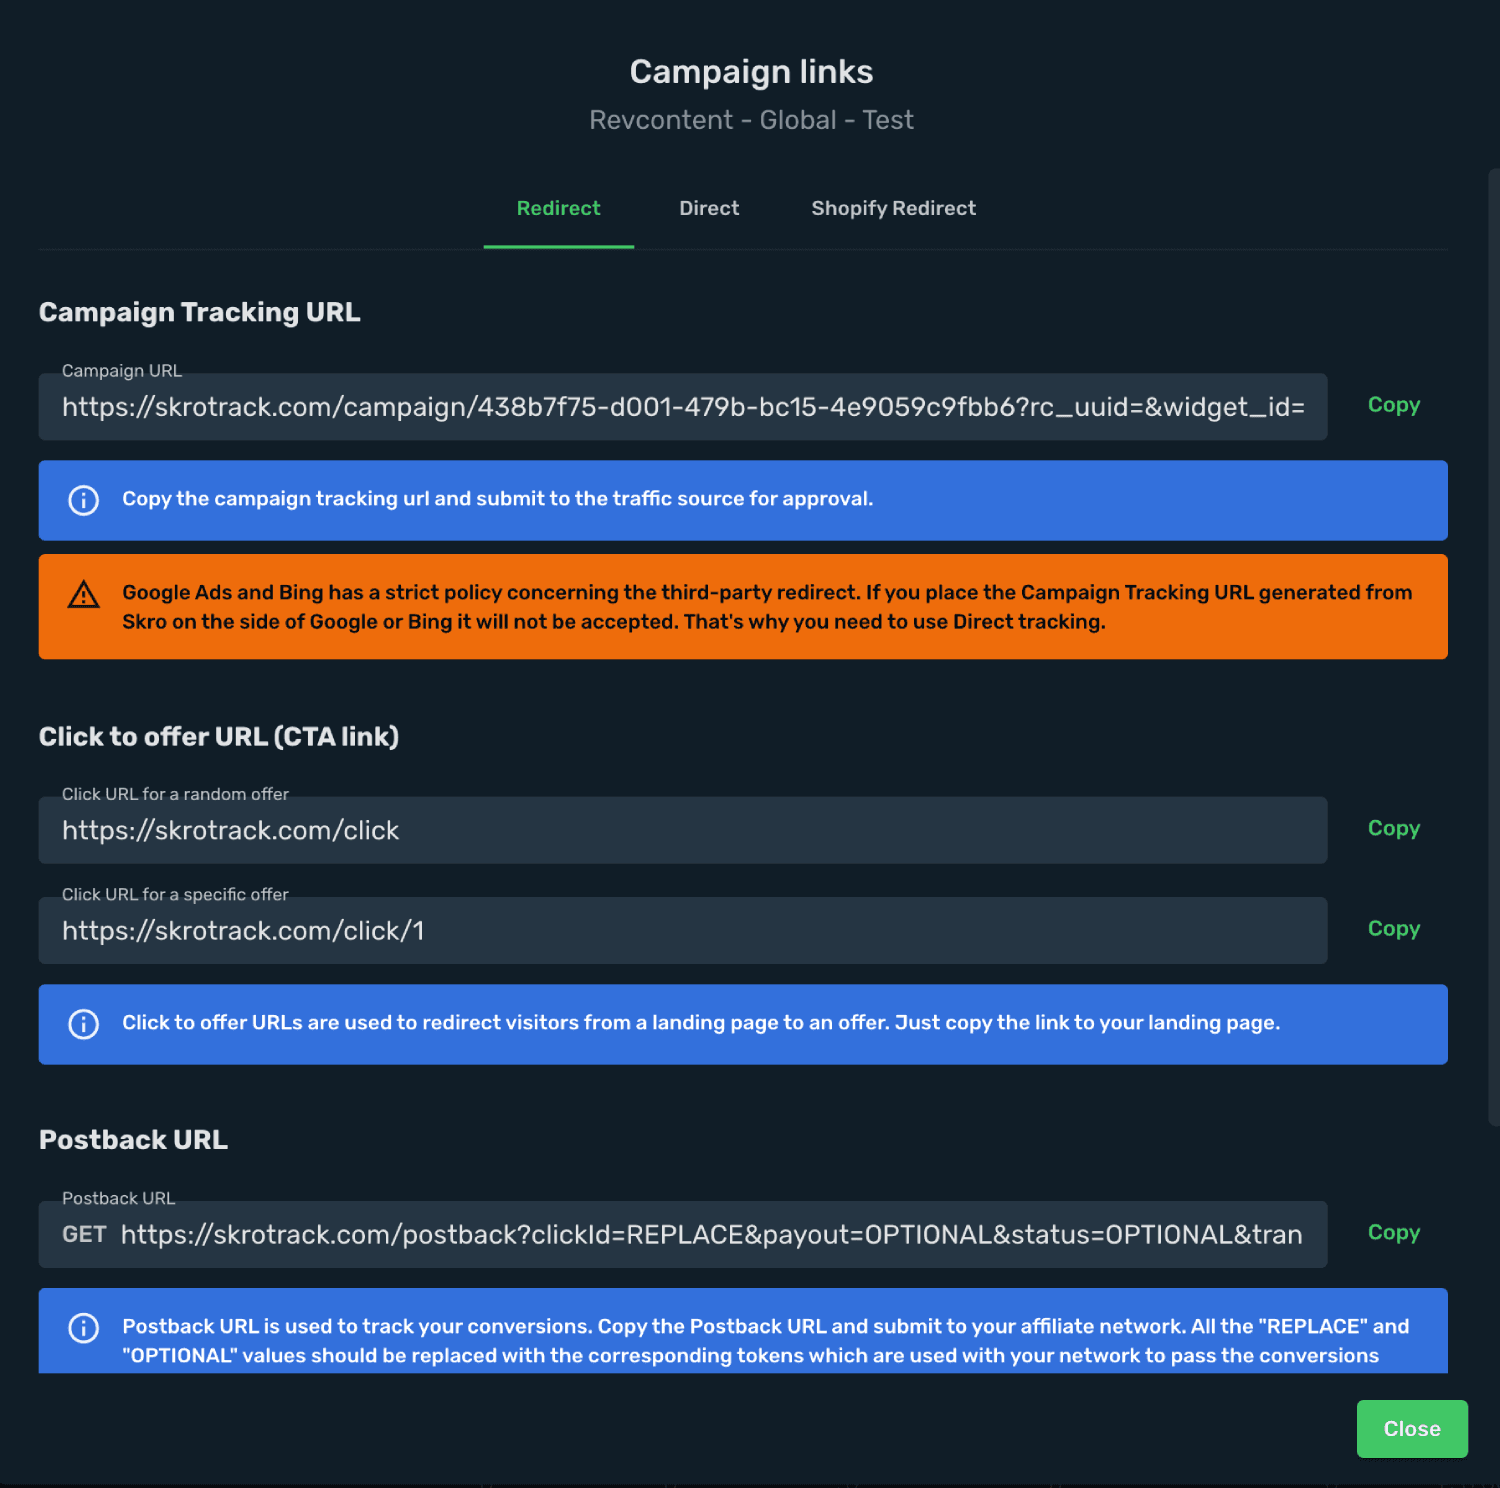
- Copy the link and paste it to Revcontent and start tracking.
Step 5. Create a Campaign in Revcontent
Now you have your campaign URL with tracking parameters added. In the next step you will submit it as your item's URL in Revcontent campaign setup. In order to do that, perform the following steps:
- Sign in to your Revcontent account.
- Go to the Campaigns view.
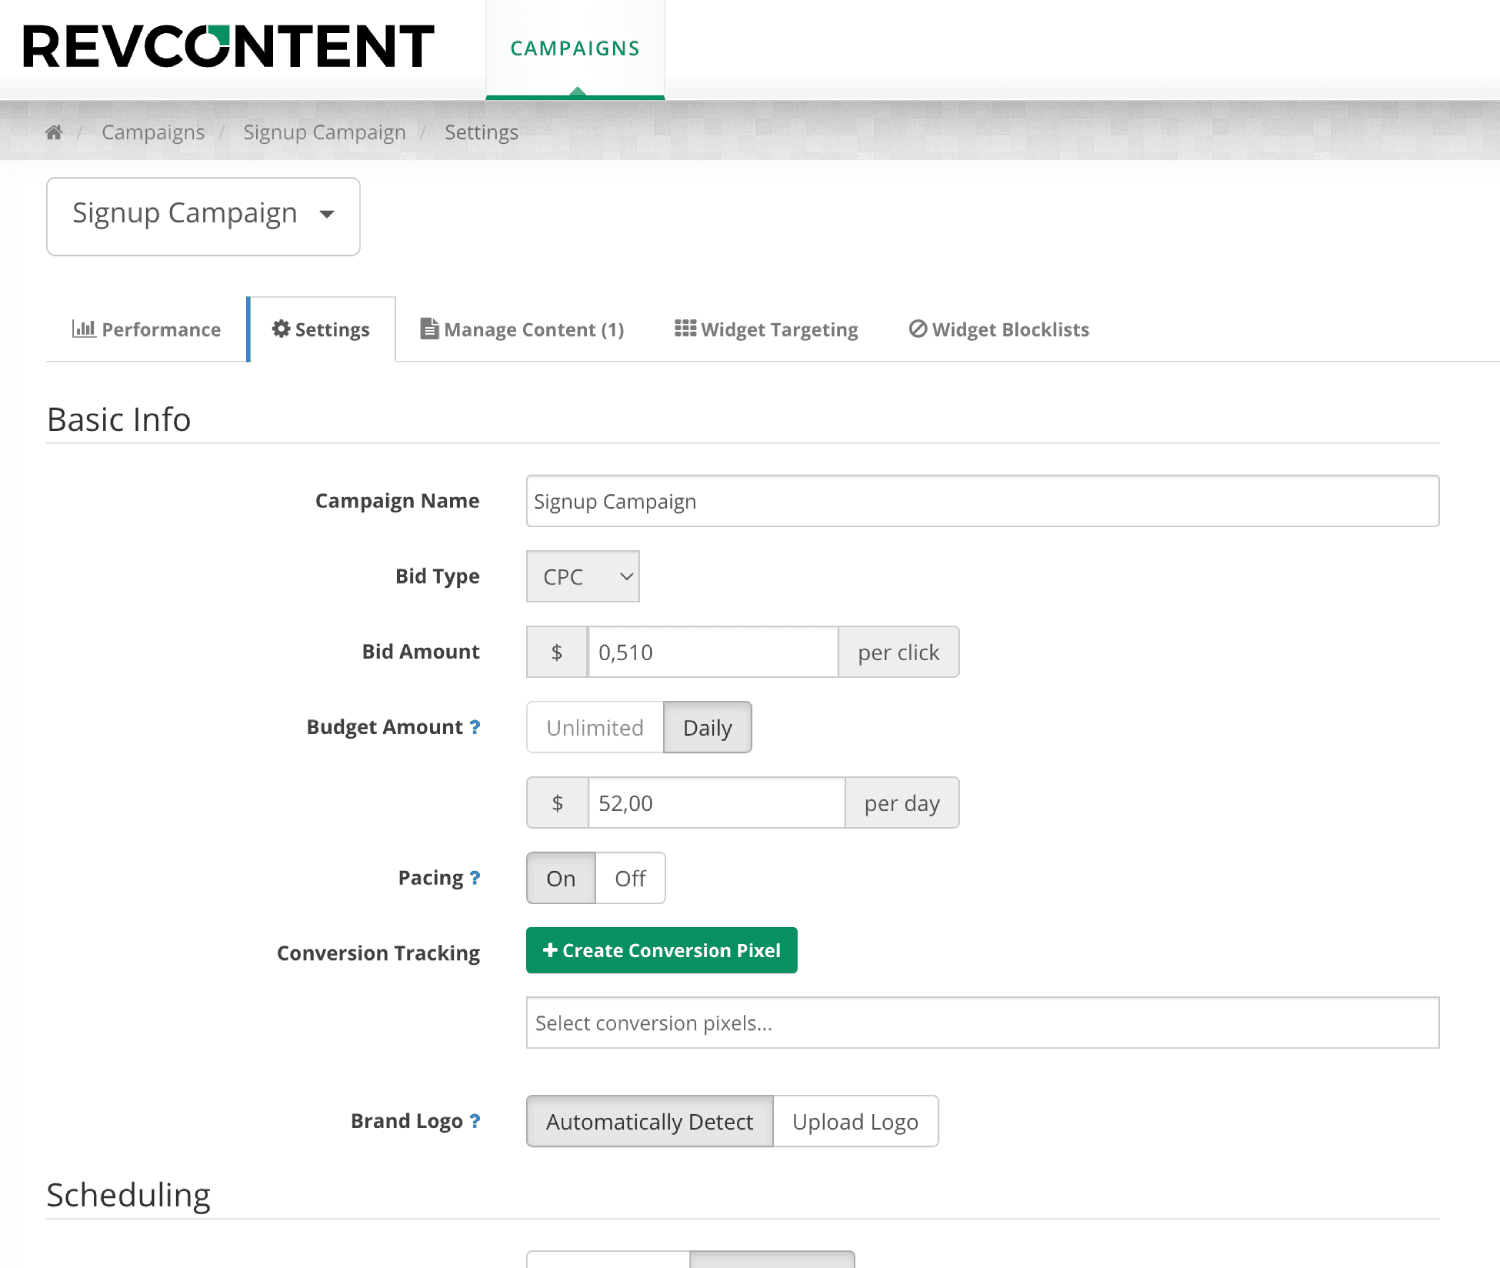
- Click the Create Campaign and setup your campaign.
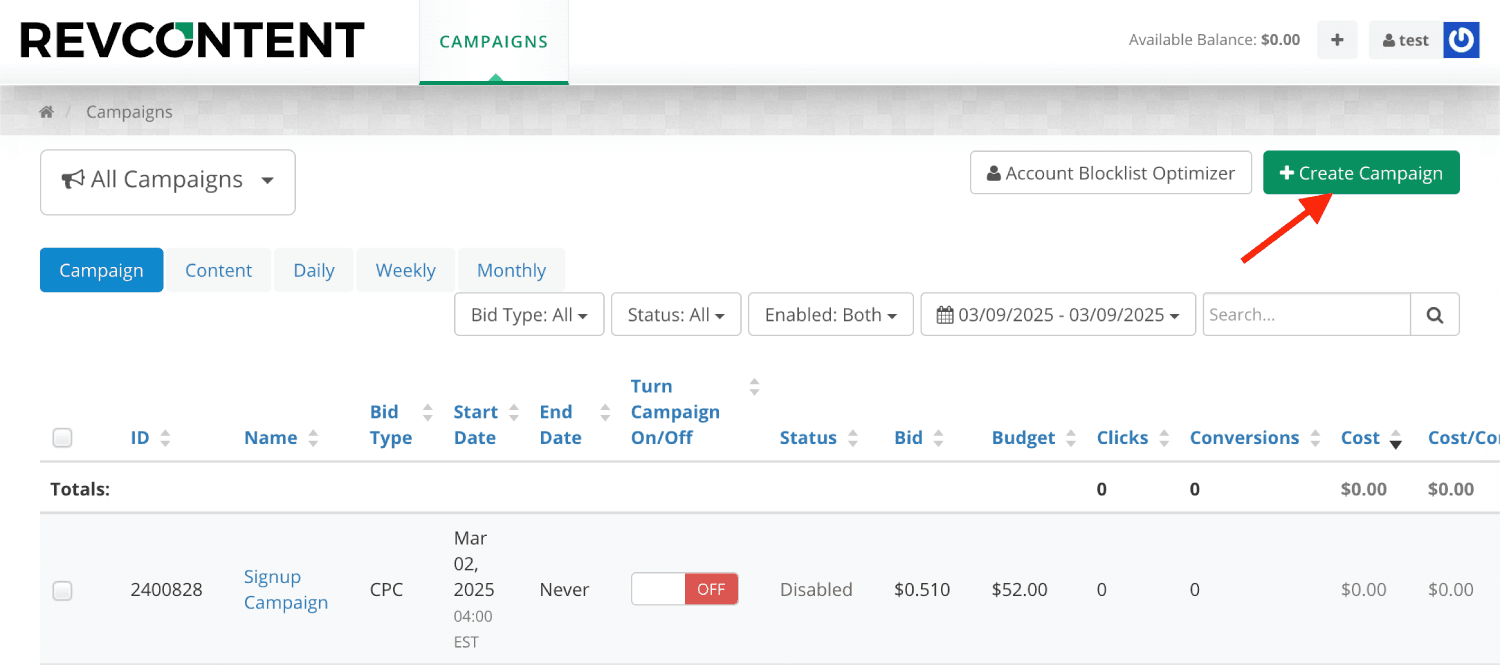
- Setup your audience and budgets.
- Click Save.
- Set up your contents.
- On the Destination URL goes your Skro Campaign Tracking link with params and macros.
- Click Submit.
This is your campaign tracking link in this example.
https://skrotrack.com/campaign/438b7f75-d001-479b-bc15-4e9059c9fbb6?rc_uuid=&widget_id={widget_id}&content_id={content_id}&boost_id={boost_id}&adv_targets={adv_targets}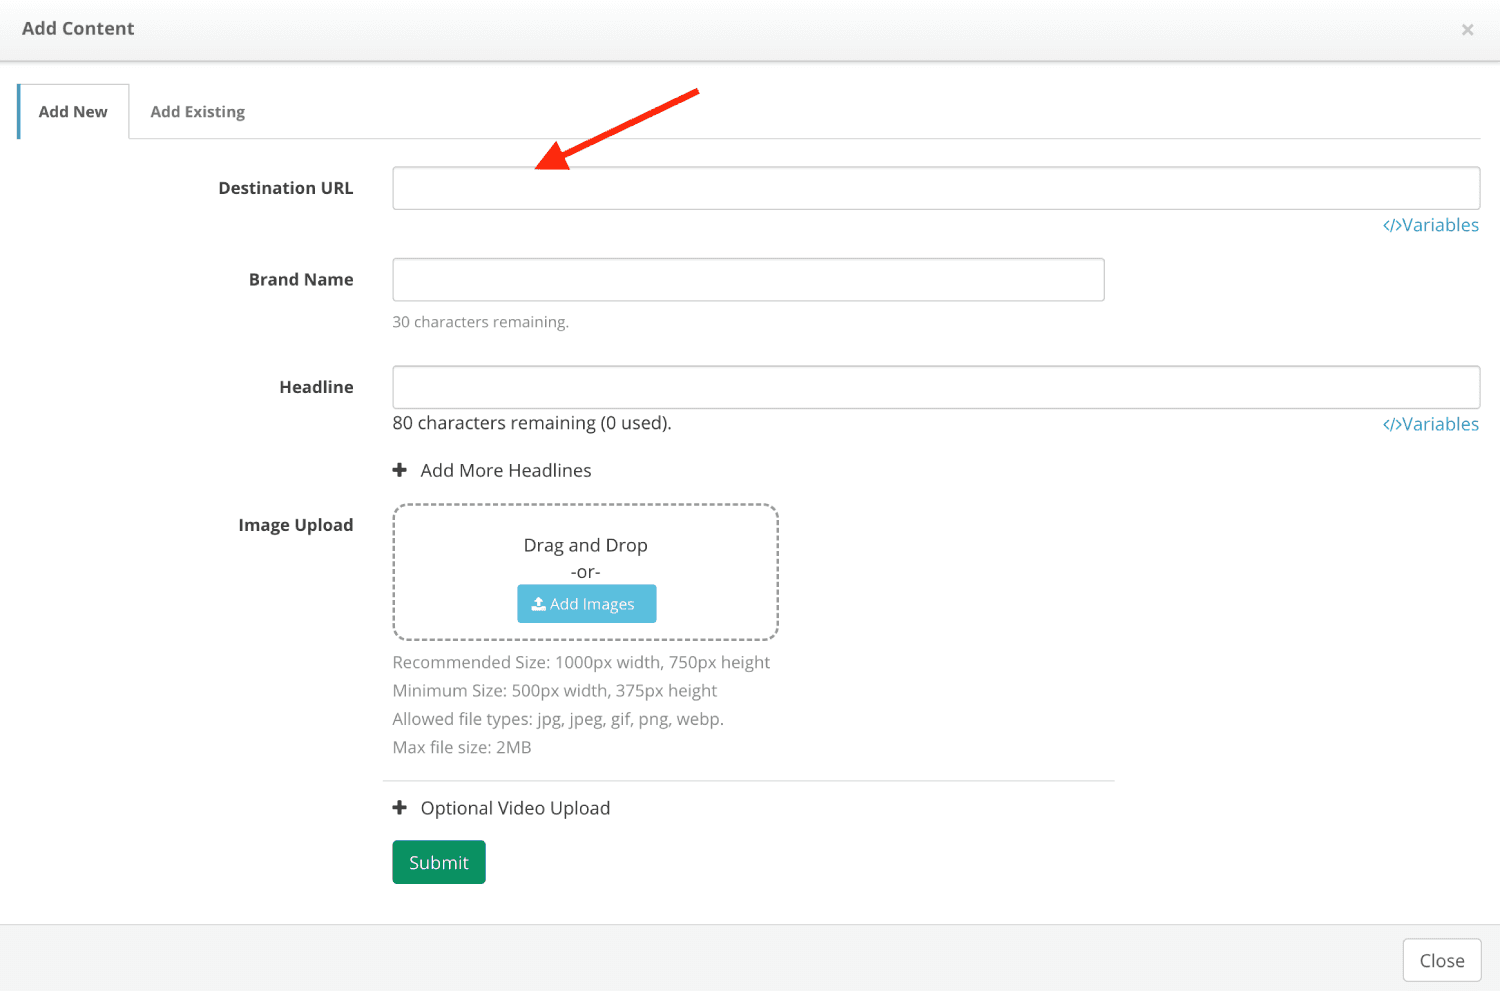
- Once your set up is done, you will need to wait when your ads are reviewed and approved.
Congratulations, you have successfully set up tracking of Revcontent traffic with Skro. Each time a visitor clicks on your ad, will be directed to your landing page with Skro's tracking parameters being passed.
Verify the setup
Open the generated campaign URL and check that the visit appears in Skro. Confirm that traffic source macros resolve to actual values. If you send conversions back to the source, verify a test conversion in both systems.
Troubleshooting
If data is missing, check the selected workspace, integration, campaign, and reporting date range. Compare parameter names and macro values with the examples in this guide before repeating the test.
Related guides
Need help with this guide? Contact Skro support.